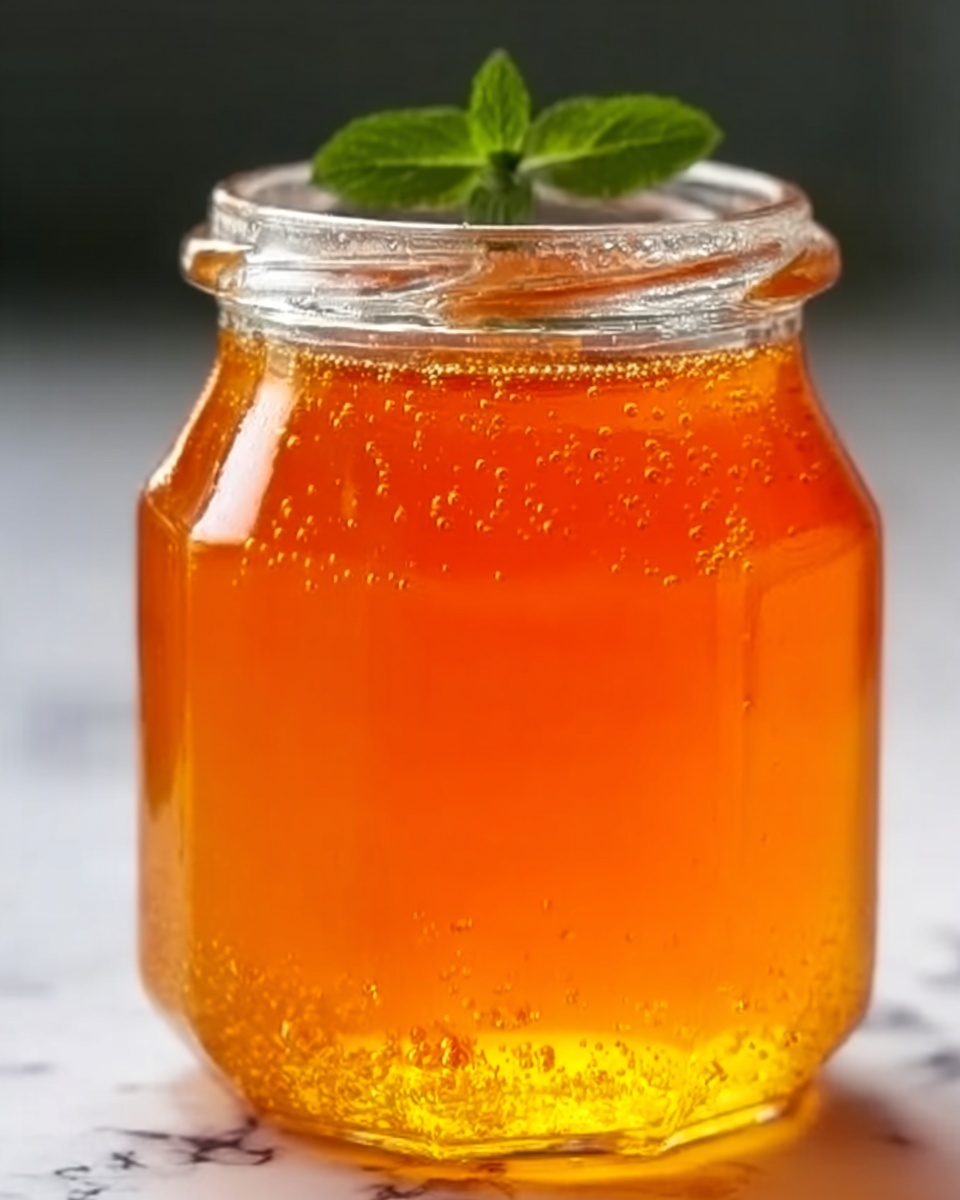
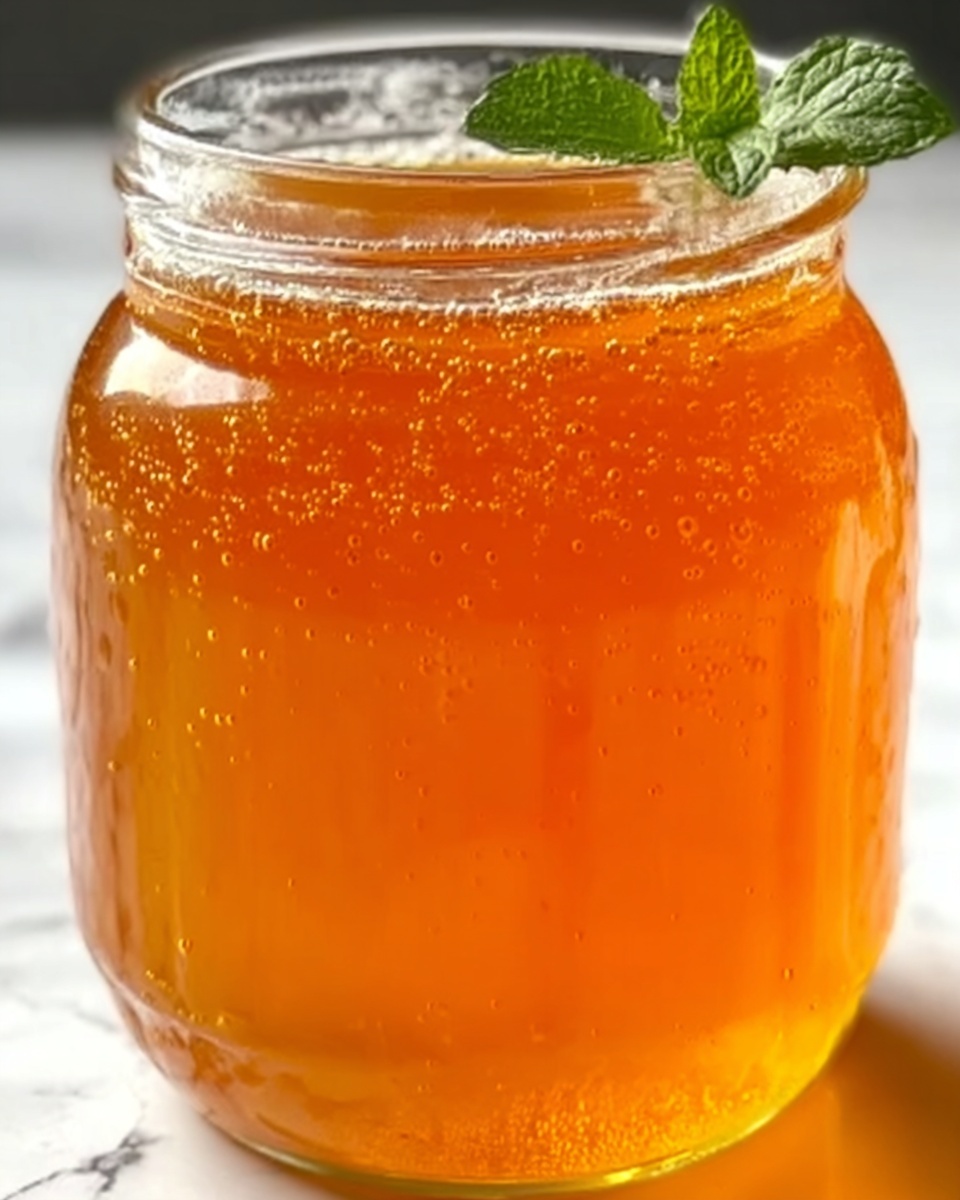
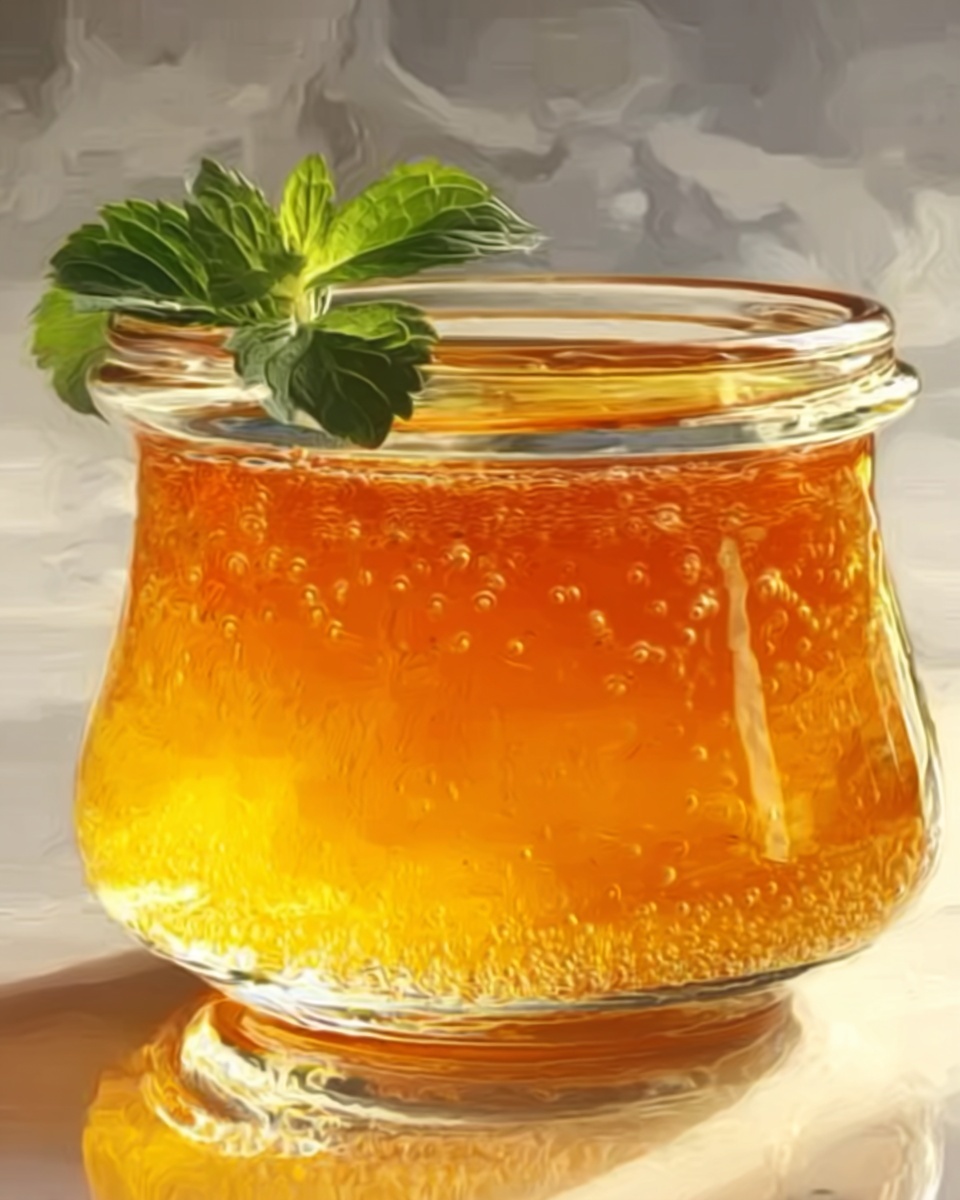
If you have a soft spot for nostalgic flavors that instantly brighten your breakfast or snack time, then this Dreamsicle Orange Jelly Recipe is about to become your new favorite. Imagine the creamy, dreamy blend of bright orange citrus with a hint of smooth vanilla, capturing that classic Dreamsicle ice cream bar in a perfectly spreadable jelly. It’s wonderfully vibrant, naturally sweet, and remarkably easy to whip up at home, turning any slice of toast or dollop of yogurt into a little celebration of sunshine and flavor.
Ingredients You’ll Need
Gathering these simple yet carefully chosen ingredients is the first step toward creating magic in your kitchen. Each one plays an important role in delivering that tender balance of sweetness, tang, and delicate creaminess that defines the Dreamsicle experience.
- 4 cups orange juice: Freshly squeezed or bottled, this is the vibrant citrus foundation of the jelly.
- 1 cup sugar: Adds sweetness and helps in jelly setting along with the pectin.
- 1 packet (1.75 oz) fruit pectin: Essential for thickening the jelly to that perfect spreadable consistency.
- 1/2 cup water: A little helper to dissolve the pectin evenly for a smooth texture.
- 1 tsp vanilla extract: The magical flavor bridge that transforms simple orange jelly into a Dreamsicle delight.
- 1 tbsp lemon juice (optional): Enhances the citrus brightness with a subtle tang.
- 1/4 tsp citric acid (optional): Adds extra tartness for a more complex flavor profile if you love that zing.
How to Make Dreamsicle Orange Jelly Recipe
Step 1: Combine Ingredients and Dissolve Pectin
Start by placing your orange juice, sugar, and fruit pectin into a large saucepan. Stir this mixture thoroughly to dissolve the pectin into the juice, which is crucial for a smooth, lumpy-free jelly. This step sets the stage for a beautiful jelly texture.
Step 2: Bring to a Rolling Boil
Next, turn your heat to medium-high and bring the mixture to a vigorous boil. Keep stirring constantly to prevent the sugars from sticking and burning on the bottom. A rolling boil means the jelly mixture is bubbling steadily without interruption, which is essential for proper gel formation.
Step 3: Boil for 1-2 Minutes
Once it hits that rolling boil, continue cooking for about 1 to 2 minutes. This brief but important boiling period activates the fruit pectin so the jelly sets up nicely once cooled.
Step 4: Stir in Vanilla and Optional Citrus Enhancers
Remove the pot from heat and immediately stir in the vanilla extract. The warm jelly easily absorbs this luscious aroma. If you’re using lemon juice or citric acid, add them now as well to gently punch up the citrus notes without overpowering the vanilla’s sweetness.
Step 5: Test the Jelly’s Set
To check if the jelly is ready, place a small spoonful onto a cold plate and let it rest for a minute. Then run your finger through the jelly—if it wrinkles and holds its shape, it’s perfectly set. If not, return the pot to a boil for another minute and test again.
Step 6: Jar the Jelly While Hot
Carefully pour the hot jelly into sterilized jars, leaving about a quarter-inch of space at the top to avoid overflow. Seal the jars tightly with their lids to lock in freshness while the jelly cools.
Step 7: Let Cool and Refrigerate
Allow your jars to cool completely at room temperature. Once cooled, pop them into the fridge for at least 12 hours to let the jelly fully set and flavors marry beautifully before you dive in.
How to Serve Dreamsicle Orange Jelly Recipe
Garnishes
A sprinkle of finely chopped fresh mint or a tiny zest of orange added on top just before serving gives a fresh aroma and a pop of color, elevating your jelly from simple spread to a showstopper.
Side Dishes
This jelly pairs wonderfully with warm buttermilk biscuits, toasted English muffins, or even a slice of creamy ricotta cheese on crusty bread. For a refreshing twist, try it alongside vanilla-flavored yogurt or cottage cheese.
Creative Ways to Present
For entertaining, serve the Dreamsicle Orange Jelly atop mini pancakes or waffles with a dollop of whipped cream. You can also swirl it into your morning oatmeal or drizzle it on ice cream for a quick and delightful dessert.
Make Ahead and Storage
Storing Leftovers
Once sealed and refrigerated, your Dreamsicle Orange Jelly should keep beautifully for up to three weeks. Always use a clean spoon when scooping to prevent contamination and preserve freshness.
Freezing
If you want to keep this delicious jelly beyond a few weeks, pour it into freezer-safe containers leaving extra headroom for expansion. Frozen jelly lasts for up to 3 months and can be thawed in the refrigerator overnight when you’re ready to spread the sunshine again.
Reheating
Jelly doesn’t generally require reheating, but if you prefer it gently warmed, simply place a jar or small bowl in a pan of warm water or microwave in short bursts until just warm to the touch. This will make it easier to spread on your favorite breads without compromising the texture.
FAQs
Can I use bottled orange juice for this recipe?
Absolutely! Fresh-squeezed orange juice gives the brightest flavor, but high-quality bottled orange juice works perfectly well too. Just make sure it’s 100% juice for the best results.
What if I don’t have fruit pectin on hand?
Fruit pectin is key to achieving the jelly’s beautiful set. Without it, your jelly may not firm up properly and could be runny. If you can’t find pectin, you might consider making a marmalade instead, which relies more on the natural pectin found in citrus peels.
Why add lemon juice or citric acid?
These ingredients brighten the overall citrus flavor and help balance the sweetness. They also enhance the gelling process by aiding pectin’s effectiveness, but they’re optional if you prefer a softer, sweeter jelly.
How long does it take for the jelly to set?
After cooking and sealing, the jelly needs at least 12 hours in the refrigerator to fully set and develop flavor. Overnight is best — patience really rewards you here.
Can I use this jelly in baking or cooking?
Definitely! This Dreamsicle Orange Jelly works beautifully as a glaze on cakes, a filling for pastries, or even stirred into sauces where you want a touch of citrusy sweetness with vanilla warmth.
Final Thoughts
Once you try this Dreamsicle Orange Jelly Recipe, it’s hard to go back to store-bought spreads. It’s incredibly satisfying to capture that beloved combination of orange and vanilla in a fresh, homemade jelly that brightens every bite. Whether you spread it on toast, swirl it into yogurt, or get creative with desserts, this jelly brings a burst of sunshine to your table. So grab those ingredients, roll up your sleeves, and treat yourself to a taste that’s pure joy in a jar!
Print
Dreamsicle Orange Jelly Recipe
- Prep Time: 5 minutes
- Cook Time: 15 minutes
- Total Time: 25 minutes
- Yield: 3 half-pint jars (approximately 3 servings)
- Category: Preserves & Jams
- Method: Stovetop
- Cuisine: American
Description
This delightful Dreamsicle Jelly captures the nostalgic flavor of the classic orange cream treat in a luscious, sweet jelly form. Made with fresh or bottled orange juice, sugar, and fruit pectin, enriched with vanilla and a hint of lemon or citric acid for a balanced tartness, this jelly is perfect for spreading on toast or adding a burst of citrusy sweetness to desserts.
Ingredients
Jelly Ingredients
- 4 cups orange juice (freshly squeezed or bottled)
- 1 cup sugar
- 1 packet (1.75 oz) fruit pectin (such as Sure-Jell)
- 1/2 cup water
- 1 tsp vanilla extract
- 1 tbsp lemon juice (optional, to enhance citrus flavor)
- 1/4 tsp citric acid (optional, for extra tartness)
Instructions
- Combine Ingredients: In a large saucepan, combine the orange juice, sugar, and fruit pectin. Stir thoroughly to help the pectin dissolve fully into the mixture.
- Bring to Boil: Place the saucepan over medium-high heat and bring the mixture to a boil, stirring constantly to prevent burning on the bottom of the pan.
- Cook the Jelly: Once the mixture reaches a rolling boil, continue to cook it for 1 to 2 minutes while maintaining constant stirring to ensure even cooking and activation of pectin for proper setting.
- Add Flavorings: Remove from heat, then stir in the vanilla extract. If using, add lemon juice and citric acid now to enhance the citrus flavor and add tartness; mix well to distribute evenly.
- Test the Set: To check readiness, place a small spoonful of jelly onto a cold plate and let it cool for about a minute. Run your finger through it – if the jelly wrinkles and holds its shape, it is ready to be jarred.
- Jar the Jelly: Pour the hot jelly carefully into sterilized jars, leaving about 1/4 inch of headspace at the top. Seal the jars promptly with lids to preserve freshness.
- Cool and Store: Allow the jars to cool completely at room temperature. Once cooled, refrigerate the jelly for at least 12 hours before serving to ensure full setting and flavor development.
Notes
- Use freshly squeezed orange juice for the best, freshest flavor, or bottled juice if convenience is preferred.
- Ensure jars and lids are properly sterilized before jarring to prevent contamination and spoilage.
- The optional lemon juice and citric acid help to balance sweetness and increase tartness, but can be omitted if a sweeter jelly is desired.
- Test the jelly set carefully to avoid jars of runny jelly; if it does not wrinkle when tested, cook for an additional minute and retest.
- Keep refrigerated after opening and consume within a few weeks for best quality.


