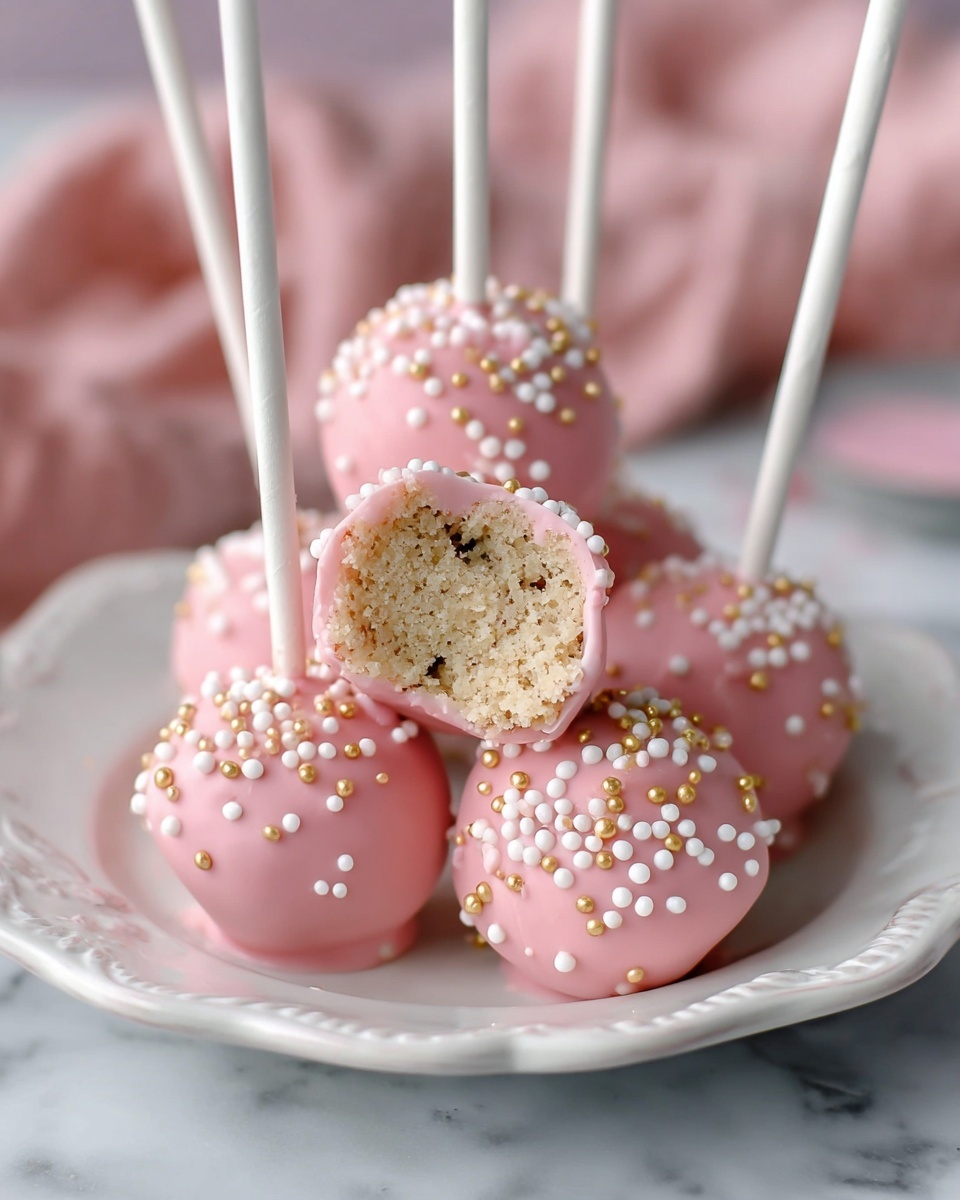
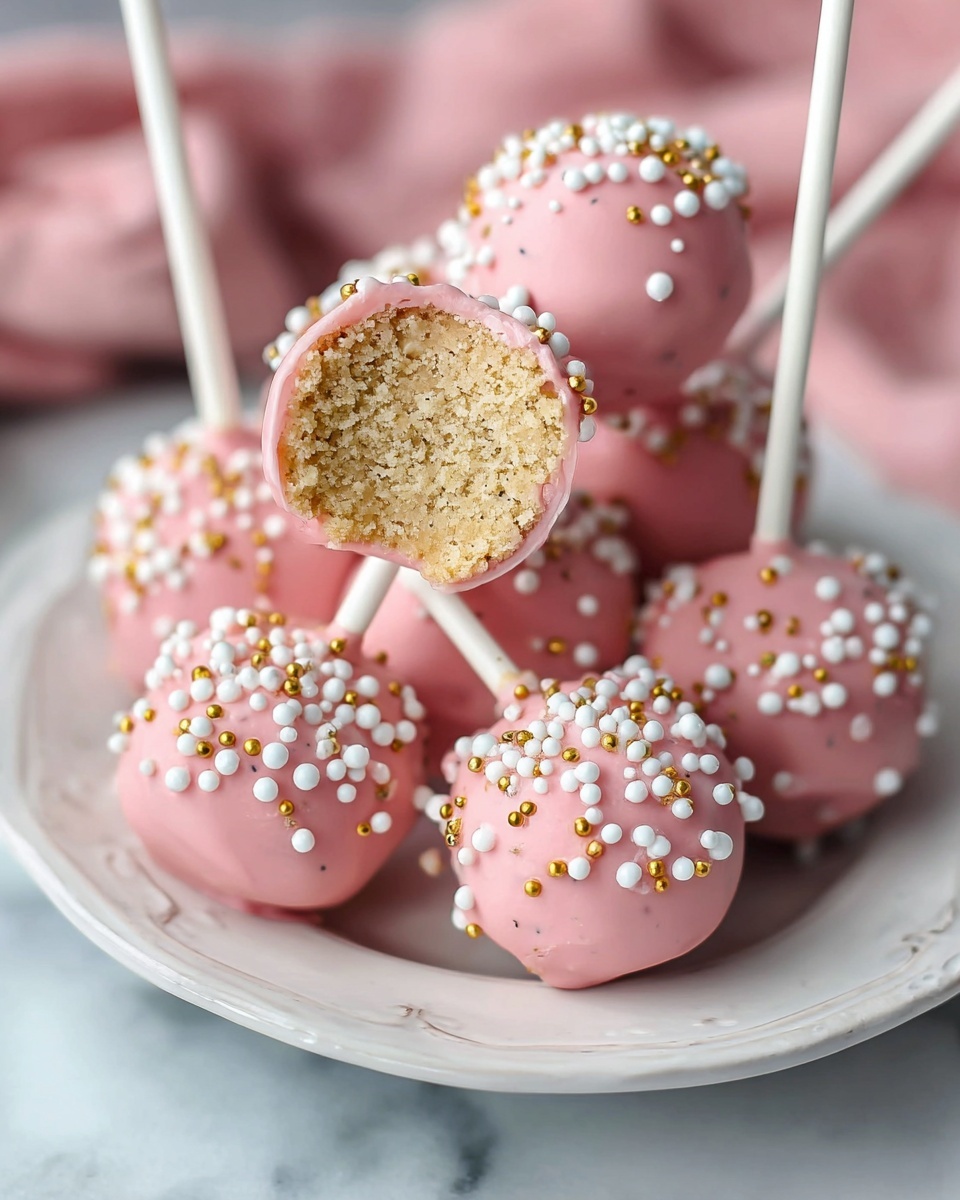
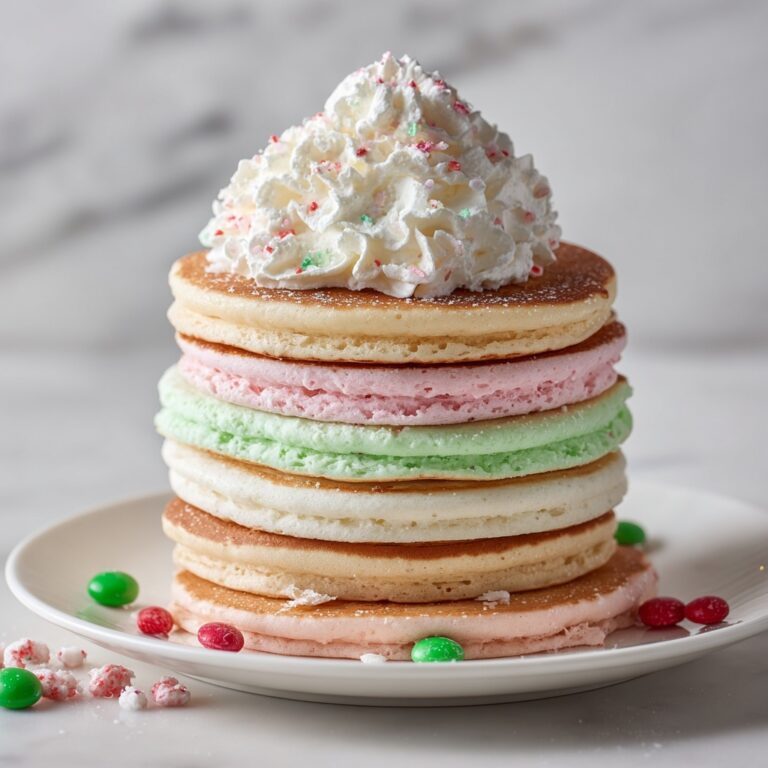
If you’re looking for a charmingly simple way to celebrate any occasion, I can’t wait to share with you my absolute favorite sweet treat: Birthday Cake Pops: A Deliciously Easy Recipe. These little bites of joy combine the fluffy goodness of moist yellow cake with creamy, dreamy frosting, all dipped in chocolate and decorated with sprinkles for that perfect festive touch. Whether you’re throwing a party or just want to brighten someone’s day, these cake pops are the ultimate crowd-pleaser that’s super fun to make and even more fun to eat!
Ingredients You’ll Need
You’ll be amazed at how straightforward and accessible the ingredients are for these cake pops. Each one plays an essential role in creating the perfect balance of flavor, texture, and colorful appeal that makes these treats simply irresistible.
- Yellow cake mix: A quick and easy base that delivers moist, tender cake every time.
- Water: Helps bind the cake ingredients and keeps the batter smooth.
- Vegetable oil: Adds richness to the cake texture without overpowering the flavor.
- Eggs: Essential for structure and moisture.
- Unsalted butter, softened: Gives our frosting a luxuriously creamy texture.
- Powdered sugar: Sweetens and thickens the frosting for smooth spreading.
- Milk: Balances the frosting’s consistency, making it just right for blending and moistening the cake crumbs.
- Vanilla extract: Brings a warm, aromatic depth to the frosting.
- Pinch of salt: Enhances all the sweet flavors to perfection.
- White chocolate candy melts: A creamy coating that sets hard to encase the cake pops beautifully.
- Milk chocolate candy melts: A rich alternative coating for variety and indulgence.
- Assorted sprinkles: Adds that joyful pop of color and texture.
- Lollipop sticks: Makes these treats easy to hold and display.
- Styrofoam block: Keeps your pops standing tall and looking fabulous for presentation.
How to Make Birthday Cake Pops: A Deliciously Easy Recipe
Step 1: Bake the Cake
The very first step to creating your cake pops is baking a homemade yellow cake from a box mix — this keeps things super simple but scrumptiously fresh. Preheat your oven to 350°F (175°C), then prepare a 9×13 inch pan by greasing and flouring it. Mix the cake ingredients—cake mix, water, vegetable oil, and eggs—in a large bowl, beating until smooth for about two minutes. Pour the batter into your pan and bake for 25 to 30 minutes until a skewer comes out clean.
Step 2: Prepare the Frosting
Once the cake has completely cooled, it’s time to whip up the frosting that will transform your crumbs into perfect pops. Beat softened butter until it’s fluffy and light, then gradually add powdered sugar, beating well after each cup. Mix in the milk and vanilla extract for a creamy finish, and don’t forget a pinch of salt to balance all that sweetness.
Step 3: Combine Cake and Frosting
The magic really happens here! Crumble the cooled cake into a large bowl, then mix in the frosting until the mixture holds together but isn’t too wet. If it feels dry, add a spoonful of milk to reach the ideal consistency for rolling. Chill this mix in the fridge for at least 30 minutes to make it easier to handle.
Step 4: Form and Freeze Cake Balls
Use a cookie scoop or your hands to roll the chilled mixture into 1-inch balls. Place each on a parchment-lined tray and pop them into the freezer for about 30 minutes. This step firms them up so the coating process goes smoothly without crumbling.
Step 5: Dip and Decorate
Melt your choice of white or milk chocolate candy melts following package directions. Insert lollipop sticks halfway into each chilled cake ball, then dip them into the melted chocolate, tapping off any excess. Immediately sprinkle with colorful decorations before placing them on parchment to set. Once dry, stand them up in a Styrofoam block to show off your handiwork!
How to Serve Birthday Cake Pops: A Deliciously Easy Recipe

Garnishes
Sprinkles are the classic choice, lending a festive crunch and cheerfulness, but feel free to get creative with edible glitter, crushed candy, or even finely chopped nuts for some texture. The garnishes turn each pop into a little piece of celebration art.
Side Dishes
While cake pops are a party in themselves, pairing them with fresh fruit platters, vanilla ice cream, or a light milkshake can complement their sweetness and keep guests smiling. These sides balance indulgence with a refreshing note.
Creative Ways to Present
Display your pops standing upright in a decorated Styrofoam block, wrapped individually in clear cellophane tied with a colorful ribbon, or arranged in festive jars or cups filled with candy or popcorn. The whimsical presentation adds to the excitement and makes your Birthday Cake Pops: A Deliciously Easy Recipe the star of any gathering.
Make Ahead and Storage
Storing Leftovers
If you have leftovers, keep the cake pops in an airtight container in the refrigerator. This will keep them fresh for up to five days without compromising the moist texture or the hard chocolate coating.
Freezing
You can freeze cake pops for up to three months. Place them on a parchment-lined tray to freeze individually before transferring to a freezer-safe container. Avoid letting them touch to keep decorations intact.
Reheating
Since cake pops are best enjoyed cool with their crisp chocolate shells, reheating isn’t usually recommended. If needed, let them thaw at room temperature for about 30 minutes. This keeps the texture and flavor spot-on without melting the decorative coating.
FAQs
Can I use homemade cake instead of box mix for this recipe?
Absolutely! Homemade cake works wonderfully for Birthday Cake Pops: A Deliciously Easy Recipe and adds a personal touch. Just make sure it’s fully cooled and crumbly enough to mix well with frosting.
What if I don’t have candy melts? Can I use regular chocolate?
Yes, regular chocolate can be used, but candy melts are designed to melt smoothly and dry firmly without seizing. If using regular chocolate, adding a little vegetable oil helps achieve a similar consistency.
How do I keep cake pops from falling off the sticks?
Freezing the cake balls before dipping and inserting the stick about halfway into the cake, then dipping immediately helps secure the pop. Also, dipping the tip of the stick into melted chocolate before inserting it into the cake ball acts like glue!
Can I make these gluten-free?
Yes! Use a gluten-free yellow cake mix and ensure all other ingredients like sprinkles and chocolate melts are gluten-free certified. This way, everyone can enjoy Birthday Cake Pops: A Deliciously Easy Recipe.
How long does it take to make these cake pops from start to finish?
You’re looking at just under two hours including baking, chilling, and decorating time. Planning ahead with make-ahead steps can make the process even smoother and more enjoyable.
Final Thoughts
There’s nothing quite like the joy of making and sharing Birthday Cake Pops: A Deliciously Easy Recipe with loved ones. Their delightful combination of cake, frosting, and chocolate in a bite-sized form makes celebrations feel extra special. Give this recipe a try and watch these pops become your new go-to for sweet moments and smiles!
Print
Birthday Cake Pops: A Deliciously Easy Recipe
- Prep Time: 40 minutes
- Cook Time: 30 minutes
- Total Time: 1 hour 45 minutes
- Yield: 24 cake pops
- Category: Dessert
- Method: Baking
- Cuisine: American
Description
These Birthday Cake Pops are a fun and easy treat perfect for parties and celebrations. Made with moist yellow cake mixed with creamy homemade frosting, dipped in white or milk chocolate, and decorated with colorful sprinkles, they offer a delightful bite-sized dessert that’s both visually appealing and delicious.
Ingredients
Cake
- 1 box (15.25 ounces) yellow cake mix
- 1 cup water
- 1/3 cup vegetable oil
- 3 large eggs
Frosting
- 1 cup (2 sticks) unsalted butter, softened
- 3 cups powdered sugar
- 1/4 cup milk
- 1 teaspoon vanilla extract
- Pinch of salt
Decoration & Coating
- 6 ounces white chocolate candy melts
- 6 ounces milk chocolate candy melts
- Assorted sprinkles
- Lollipop sticks
- Styrofoam block for display
Instructions
- Preheat and Prepare Pan: Preheat your oven to 350°F (175°C). Grease and flour a 9×13 inch baking pan to prevent sticking.
- Mix Cake Batter: In a large bowl, combine the yellow cake mix, water, vegetable oil, and eggs. Beat on medium speed for 2 minutes until the batter is smooth.
- Bake the Cake: Pour the batter into the prepared pan and bake for 25-30 minutes, or until a wooden skewer inserted into the center comes out clean.
- Cool the Cake: Allow the cake to cool completely within the pan before moving on to frosting.
- Make Buttercream Frosting: Beat the softened butter until light and fluffy, about 3-5 minutes.
- Add Powdered Sugar: Gradually add the powdered sugar, one cup at a time, beating well after each addition to ensure smoothness.
- Incorporate Milk and Vanilla: Add milk and vanilla extract to the butter and sugar mixture, beating until smooth and creamy. Adjust consistency with more milk or powdered sugar as needed.
- Add Salt: Stir in a pinch of salt to balance the sweetness.
- Crumble the Cake: Break the cooled cake into a large bowl, crumbling it finely.
- Combine Cake with Frosting: Add the frosting to the crumbled cake and mix thoroughly until evenly combined. If mixture feels too dry, add a tablespoon of milk at a time.
- Chill Mixture: Refrigerate the cake and frosting mixture for at least 30 minutes to make it easier to handle.
- Form Cake Balls: Roll the chilled mixture into 1-inch balls using a cookie scoop or hands, placing them on a parchment-lined baking sheet.
- Freeze Cake Balls: Freeze the cake balls for at least 30 minutes to firm up for dipping.
- Melt White Chocolate: Melt the white chocolate candy melts according to package directions until smooth.
- Insert Lollipop Sticks: Insert a lollipop stick halfway into each frozen cake ball carefully to avoid breaking.
- Dip in White Chocolate: Dip each cake pop into melted white chocolate, tapping off any excess coating.
- Add Sprinkles: Immediately sprinkle with assorted sprinkles before the chocolate sets.
- Set Coating: Place dipped cake pops on parchment paper and allow the chocolate coating to set for about 30 minutes.
- Repeat with Milk Chocolate: Optionally, repeat the dipping and decorating steps using melted milk chocolate candy melts with different sprinkles.
- Display: Insert finished cake pops into a Styrofoam block for easy display and serving. Optionally, add decorative ribbons or papers around the sticks for extra flair.
Notes
- You can customize the cake flavor by using other boxed cake mixes if desired.
- Chilling the cake mixture before rolling helps prevent sticking and makes shaping easier.
- Freezing the cake balls before dipping prevents them from falling apart in the melted chocolate.
- Use a Styrofoam block or a similar foam base to hold the cake pops upright while the coating sets.
- Experiment with different chocolate colors and sprinkles to match party themes.


