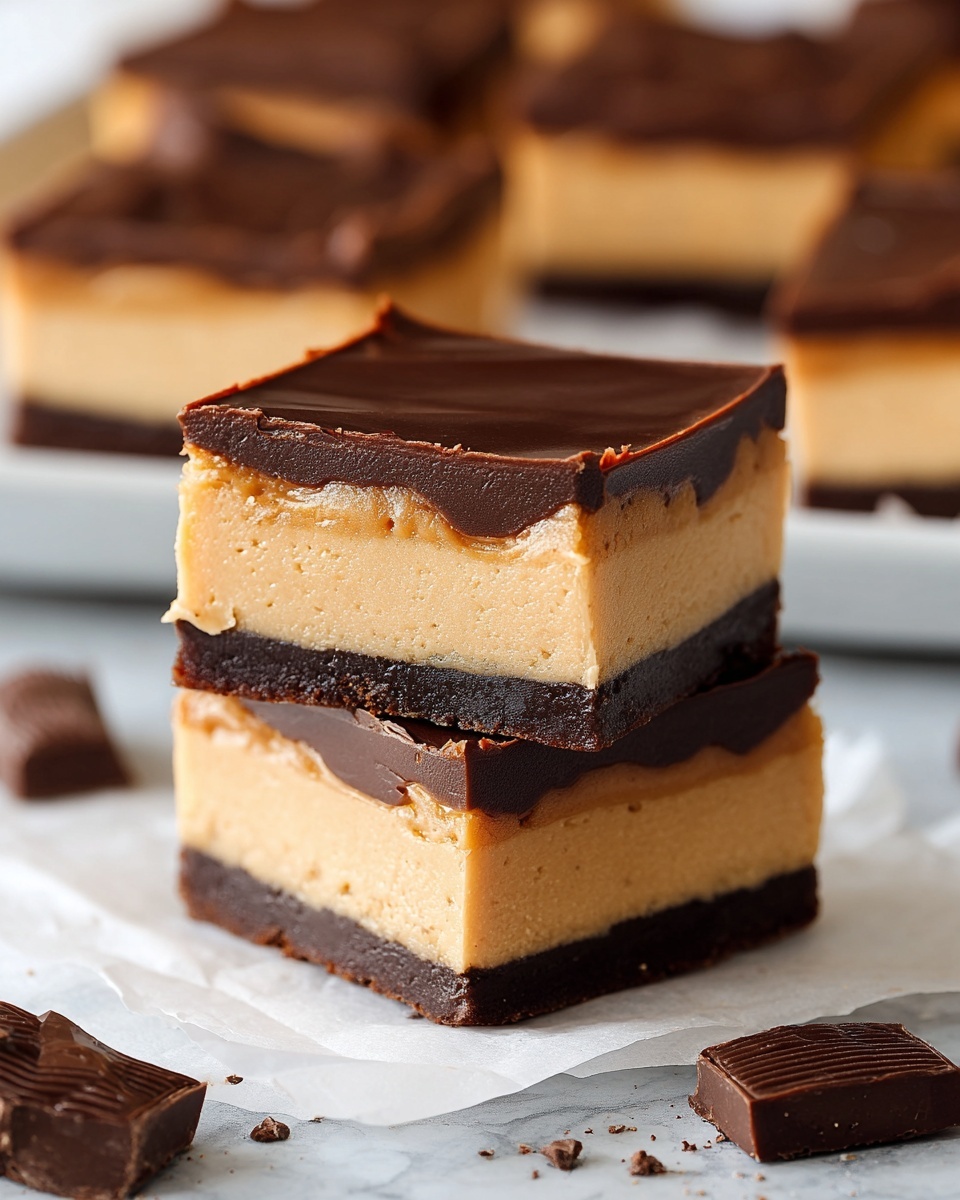
If you’re craving a luscious, melt-in-your-mouth dessert that combines the timeless flavor pairing of peanut butter and chocolate without turning on the oven, this No-Bake Peanut Butter Buckeye Bars Recipe is your new best friend. Rich, creamy, and perfectly sweet, these bars capture the classic essence of Ohio’s beloved buckeye candies but with a delightfully simple, easy-to-make twist. The texture is just right—crunchy graham cracker crumbs meet smooth peanut butter and a silky chocolate topping, resulting in a dessert that’s as indulgent as it is irresistible.
Ingredients You’ll Need
Getting started with this No-Bake Peanut Butter Buckeye Bars Recipe is a breeze because the ingredients are straightforward, yet each one plays a crucial role in crafting the perfect balance of flavor, texture, and richness. From the buttery base to the rich chocolate finish, every component enhances the bars’ iconic taste.
- 1 cup unsalted butter, melted: This adds a creamy richness and helps bind the base ingredients perfectly.
- 2 cups graham cracker crumbs: They give the bars a satisfyingly crunchy texture and a golden color.
- 2 cups powdered sugar: Sweetens the mix while contributing to a smooth consistency.
- 1 1/2 cups creamy peanut butter: The star ingredient providing that classic, creamy peanut flavor.
- 1 teaspoon vanilla extract: Adds a warm, aromatic hint to round out the flavor.
- 2 cups semi-sweet chocolate chips: For the luscious chocolate layer that tops the bars.
- 2 tablespoons peanut butter (for chocolate layer): Mixed with chocolate chips to keep the topping silky and extra flavorful.
How to Make No-Bake Peanut Butter Buckeye Bars Recipe
Step 1: Prepare the Base
Begin by lining a 9×13-inch baking dish with parchment paper for easy removal later. In a large bowl, stir together the melted butter, graham cracker crumbs, powdered sugar, creamy peanut butter, and vanilla extract until the mixture is smooth and combined. This forms the delectable peanut butter base that gives these bars their signature chew and flavor.
Step 2: Press the Base Into the Pan
Next, transfer the peanut butter mixture to your prepared dish. Using a spatula or your hands, firmly press the mixture into an even layer, smoothing the surface for a neat finish. This step is key to ensuring each bar holds together beautifully and slices cleanly later on.
Step 3: Make the Chocolate Topping
In a microwave-safe bowl, combine the chocolate chips with 2 tablespoons of peanut butter. Microwave the mixture in short 20-second bursts, stirring well after each until it becomes a smooth, glossy chocolate layer. This peanut butter-infused chocolate topping is what sets these bars apart—rich, silky, and utterly divine.
Step 4: Spread the Chocolate Layer
Pour the melted chocolate over the peanut butter base, spreading it evenly across the top with a spatula. This generous layer will harden into a firm chocolate shell that perfectly complements the soft, chewy base.
Step 5: Chill Until Firm
Place the dish into the refrigerator for at least 2 hours to allow the bars to set completely. The cooling process is essential so you can slice the bars without any mess and enjoy that perfect, satisfying bite every time.
Step 6: Slice and Enjoy
Once chilled, lift the bars straight from the pan using the parchment paper. For clean, perfect slices, warm your knife slightly before cutting the bars into squares. Now you’re ready to share and enjoy these scrumptious treats!
How to Serve No-Bake Peanut Butter Buckeye Bars Recipe

Garnishes
These bars are delicious as is, but you can elevate presentation and flavor by adding a sprinkle of sea salt or chopped peanuts on the chocolate layer before chilling. A light dusting of powdered sugar right before serving also adds a pretty and tasteful touch.
Side Dishes
Pair your No-Bake Peanut Butter Buckeye Bars Recipe with a cold glass of milk or a scoop of vanilla ice cream for a classic combination. For a slightly healthier angle, fresh berries or a bowl of mixed nuts work beautifully alongside these rich bars.
Creative Ways to Present
For an eye-catching dessert display, arrange the bars on a rustic wooden board or a pretty cake stand surrounded by small bowls of peanuts and chocolate chips. You could even wrap each bar individually in parchment paper tied with a festive ribbon for gifting or party favors.
Make Ahead and Storage
Storing Leftovers
Leftover bars keep beautifully in an airtight container in the refrigerator for up to a week. Keeping them chilled guarantees the chocolate topping stays firm and the base retains its delightful texture.
Freezing
If you want to prepare these bars well in advance, they freeze wonderfully for up to 2 months. Wrap individual squares tightly in plastic wrap and place them in a freezer-safe container to maintain freshness and flavor.
Reheating
Since these bars are best enjoyed chilled, reheating is not recommended. Simply allow frozen bars to thaw in the refrigerator for a few hours before serving to enjoy their full flavor and perfect consistency.
FAQs
Can I use crunchy peanut butter instead of creamy?
Absolutely! Crunchy peanut butter adds a delightful texture contrast, making each bite even more interesting while keeping the classic taste you love.
Is there a way to make these bars vegan?
Yes, substitute the butter with a plant-based alternative, use vegan graham cracker crumbs, and choose dairy-free chocolate chips and peanut butter to keep it completely vegan-friendly.
Do I have to use graham cracker crumbs?
Graham cracker crumbs offer a great texture and subtle flavor, but you can experiment with crushed digestive biscuits or even crushed pretzels for a salty twist if you like.
How long do these bars need to chill?
Refrigerate for at least 2 hours to ensure they are firm enough to cut and hold their shape. Overnight chilling is even better if you have the time.
Can I double the recipe?
For sure! Just double all ingredients and use a larger baking dish, or make two separate batches. Just keep the same proportions to get perfect results every time.
Final Thoughts
I promise you, once you try this No-Bake Peanut Butter Buckeye Bars Recipe, it will become a staple in your dessert repertoire. It’s quick, fuss-free, and absolutely delicious—perfect for whenever you need a sweet fix without turning on the oven. Give it a whirl, share with friends and family, and watch those smiles appear with every bite!
Print
No-Bake Peanut Butter Buckeye Bars Recipe
- Prep Time: 15 minutes
- Cook Time: 0 minutes
- Total Time: 2 hours 15 minutes
- Yield: 24 bars
- Category: Dessert
- Method: No-Cook
- Cuisine: American
- Diet: Vegetarian
Description
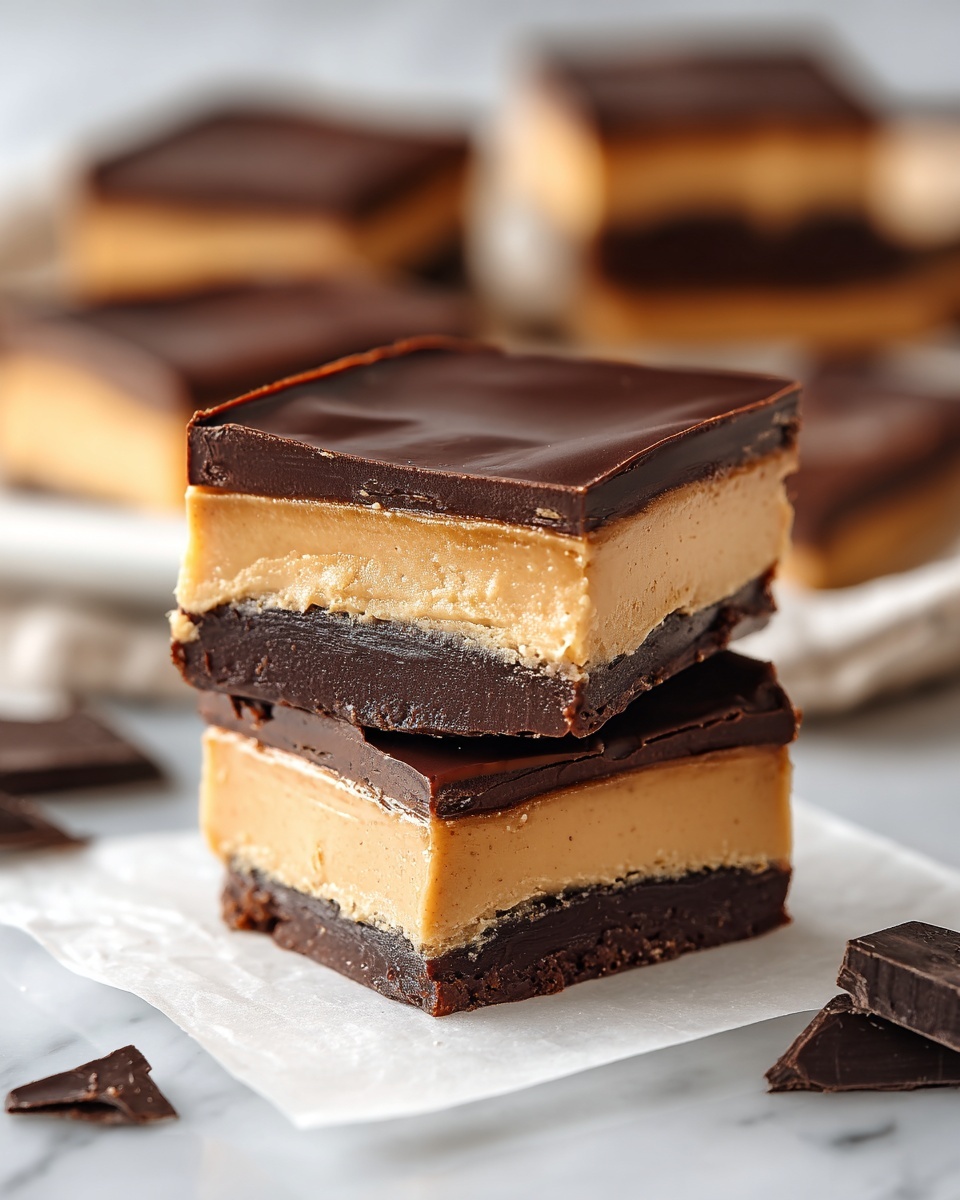
Delight in these no-bake peanut butter buckeye bars, combining a rich and creamy peanut butter base with a smooth chocolate topping. Perfectly sweet and easy to prepare, these bars require no oven time, making them an ideal quick dessert or snack with classic American flavors inspired by Ohio buckeyes.
Ingredients
Base Layer
- 1 cup unsalted butter, melted
- 2 cups graham cracker crumbs
- 2 cups powdered sugar
- 1 1/2 cups creamy peanut butter
- 1 tsp vanilla extract
Chocolate Topping
- 2 cups semi-sweet chocolate chips
- 2 tbsp peanut butter (for chocolate layer)
Instructions
- Prepare the base mixture: Line a 9×13-inch baking dish with parchment paper. In a large bowl, combine the melted butter, graham cracker crumbs, powdered sugar, peanut butter, and vanilla extract. Mix thoroughly until the mixture is smooth and fully combined.
- Press base into pan: Evenly press the peanut butter mixture into the prepared baking dish, smoothing the surface with a spatula to create an even layer.
- Make the chocolate topping: In a microwave-safe bowl, combine the semi-sweet chocolate chips and 2 tablespoons of peanut butter. Microwave in 20-second increments, stirring between each interval, until the mixture is completely melted and smooth.
- Top the bars: Pour the melted chocolate mixture over the peanut butter base, spreading it evenly to cover the entire surface.
- Chill: Place the baking dish in the refrigerator and chill for at least 2 hours or until the bars are firm and set.
- Cut and serve: Once set, lift the bars from the pan via the parchment paper and cut into 24 squares. Store the bars in the refrigerator until ready to serve.
Notes
- For clean slices, heat your knife slightly before cutting through the bars.
- Use crunchy peanut butter to add texture variation if desired.
- These bars can be frozen in an airtight container for up to 2 months without losing flavor or texture.

