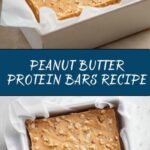
If you’re on the hunt for a homemade snack that is as satisfying as it is nourishing, look no further than this Peanut Butter Protein Bars Recipe. Bursting with creamy peanut butter and rolled oats, these bars combine just the right amount of natural sweetness and a protein punch that will fuel your day, whether it’s for a quick breakfast, post-workout boost, or a guilt-free treat. What makes this recipe truly special is how simple yet versatile it is, allowing you to customize the texture and add-ins to perfectly suit your cravings and nutritional needs.
Ingredients You’ll Need
Gathering the right ingredients is the secret to achieving the perfect balance of flavor and texture in these bars. Each component plays its role, from creaminess and sweetness to chewiness and protein power.
- Peanut butter: The star of the show, providing rich flavor and creamy texture, choose creamy or crunchy based on your preference.
- Maple syrup or honey: Adds natural sweetness and helps bind the ingredients together.
- Coconut oil: Contributes smoothness and helps solidify the bars once chilled.
- Rolled oats: Offers heartiness and a satisfying chewy bite.
- Protein powder: Boosts the protein content, making these bars a great energy source; vanilla or unflavored work best.
- Dark chocolate chips (optional): Adds a touch of indulgent sweetness and texture contrast.
- Chopped nuts or seeds (optional): Introduces an extra crunch and nutritional boost.
How to Make Peanut Butter Protein Bars Recipe
Step 1: Prepare the Pan
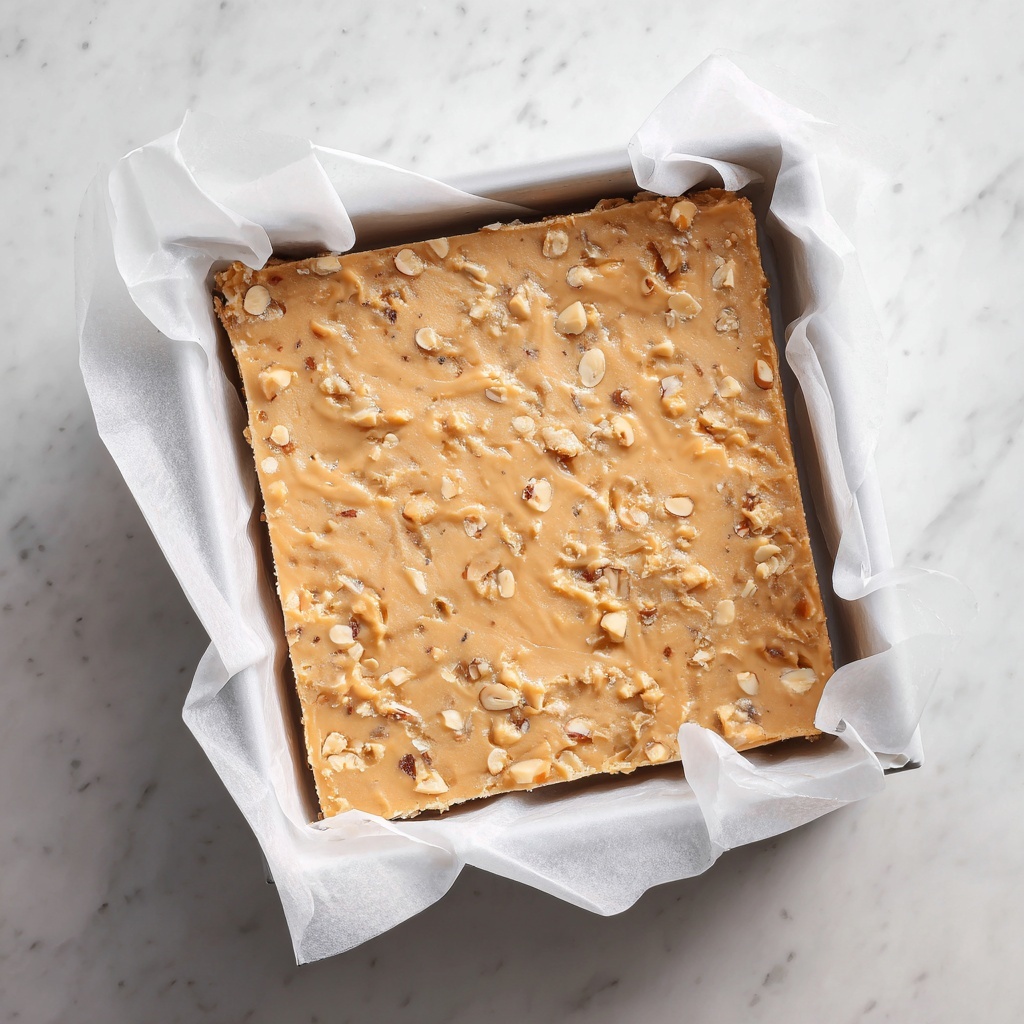
The first step sets you up for easy success later—lining an 8×8-inch pan with parchment paper allows you to lift the bars out effortlessly once they’re firm, making slicing neat and cleanup a breeze.
Step 2: Melt Wet Ingredients
Gently melt the peanut butter, maple syrup, and coconut oil together over low heat. This slow warming ensures a luxuriously smooth mixture that will blend perfectly with your dry ingredients, creating the base for your bars.
Step 3: Mix Dry Ingredients
Stir the rolled oats and protein powder into the warm peanut butter blend until everything is combined evenly. If you’re using dark chocolate chips or nuts, fold them in now to distribute those delightful bursts of texture throughout each bite.
Step 4: Press & Chill
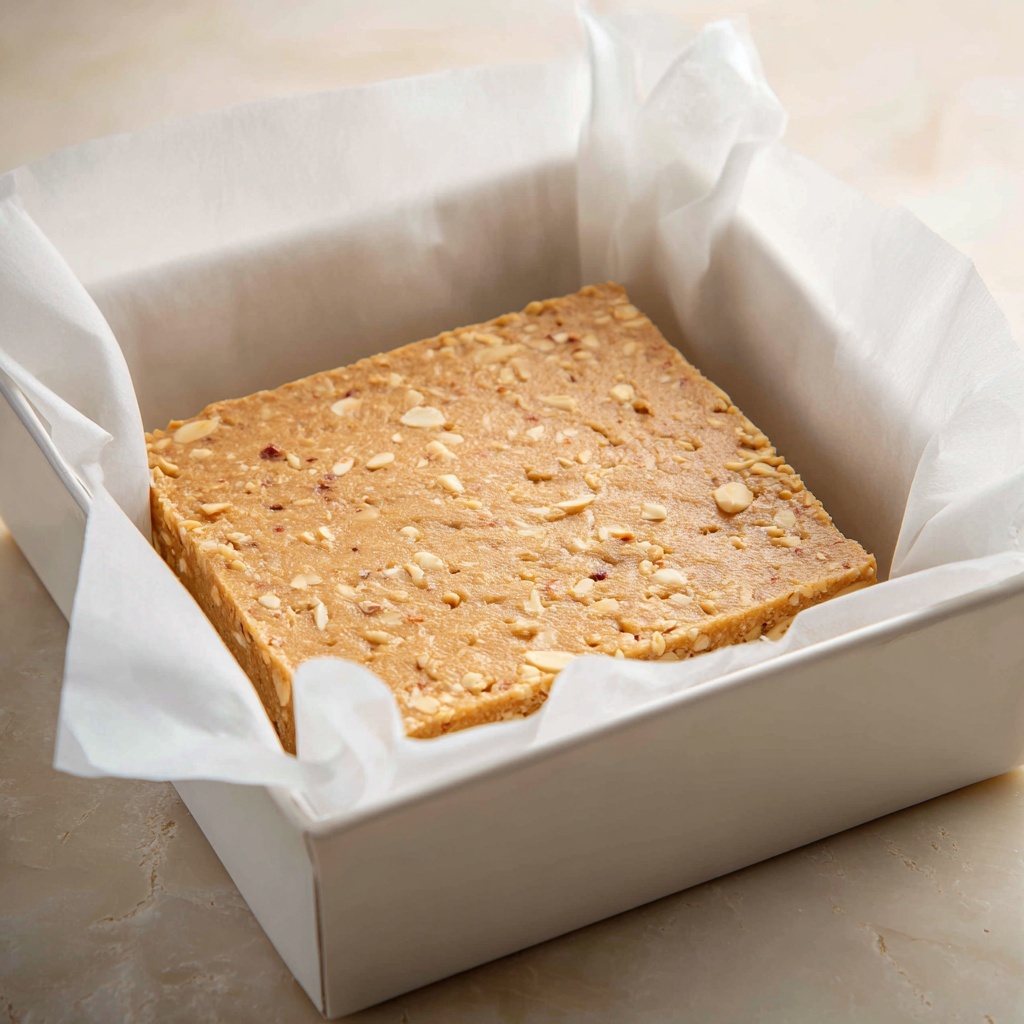
Transfer your mixture into the prepared pan and press it down firmly and evenly. This step is crucial to give the bars their structure. Pop the pan in the refrigerator for 1 to 2 hours until the mixture feels firm and perfectly set.
Step 5: Slice & Store
Once chilled, lift the mixture out using the parchment overhang and cut into 10 to 12 bars. These bars store wonderfully in the fridge for up to a week or can be frozen to enjoy over a few months.
How to Serve Peanut Butter Protein Bars Recipe

Garnishes
While these bars are perfect as they are, sprinkling a pinch of sea salt on top before chilling can bring out the peanut butter’s richness beautifully. A drizzle of melted dark chocolate or a dusting of shredded coconut can also add a gourmet touch when serving.
Side Dishes
Pair your bars with a fresh fruit salad or a simple yogurt parfait for a balanced snack or breakfast. The combination of creamy, crunchy, and fresh flavors keeps each bite exciting and satisfying without heaviness.
Creative Ways to Present
For an inviting snack display, stack the bars on a rustic wooden platter layered with parchment paper, intersperse with fresh berries or nuts, and serve with small bowls of nut butter or honey for dipping. They also travel well in individual wraps, perfect for an on-the-go boost.
Make Ahead and Storage
Storing Leftovers
Keep any leftover bars in an airtight container in the refrigerator to maintain their firmness and freshness. This keeps the flavors vibrant and the texture just right for up to one week—ideal for a quick snack during busy days.
Freezing
These protein bars freeze beautifully, allowing you to prepare a batch in advance and enjoy them over time. Wrap them individually or store in a freezer-safe container, and they will stay fresh for up to three months. Just thaw overnight in the fridge before eating.
Reheating
Since these bars are best served cold or at room temperature, reheating isn’t usually necessary. However, if you prefer a softer texture, a quick 10-second zap in the microwave can warm them slightly without losing their shape.
FAQs
Can I use other nut butters instead of peanut butter?
Absolutely! Almond butter, cashew butter, or sunflower seed butter all work wonderfully and bring their own unique flavor while still providing that creamy base and healthy fats.
What type of protein powder works best?
Vanilla or unflavored protein powders blend seamlessly into this recipe, but you can experiment with flavored varieties if you want to add a twist—just make sure the flavor complements peanut butter well.
Can I make these bars vegan?
Yes, simply use maple syrup instead of honey and ensure your protein powder is plant-based. The coconut oil keeps the bars firm without the need for animal products.
Are these bars gluten-free?
They can be! Use certified gluten-free rolled oats to avoid any gluten contamination while keeping the same delicious texture and nutritional profile.
How do I make the bars less sticky?
Pressing the mixture firmly into the pan and chilling it well helps reduce stickiness. Also, ensuring the coconut oil is properly melted and evenly mixed will create a firmer, less sticky bar.
Final Thoughts
Making your own Peanut Butter Protein Bars Recipe is a rewarding way to fuel your body with wholesome ingredients and satisfy your snack cravings at the same time. Once you master this basic recipe, you’ll love how easy it is to tweak and personalize, turning these bars into your go-to energy booster whenever you need it. Give it a try—you might just find your new favorite treat to keep in the fridge or pack on the go!
Print
Peanut Butter Protein Bars Recipe
- Prep Time: 15 minutes
- Cook Time: 5 minutes
- Total Time: 1 hour 20 minutes
- Yield: 10-12 bars
- Category: Snack
- Method: Stovetop
- Cuisine: American
- Diet: Gluten Free
Description
These Peanut Butter Protein Bars are a delicious and nutritious homemade snack perfect for a quick energy boost. Combining creamy peanut butter, wholesome oats, and protein powder, they offer a balanced mix of protein and healthy fats. With optional additions like dark chocolate chips and nuts, these bars are easy to customize and ideal for on-the-go fueling or post-workout recovery.
Ingredients
Wet Ingredients
- 1 cup peanut butter (creamy or crunchy)
- ¼ cup maple syrup or honey
- 2 tbsp coconut oil
Dry Ingredients
- 1 ½ cups rolled oats
- ½ cup protein powder (vanilla or unflavored)
- ¼ cup dark chocolate chips (optional)
- ¼ cup chopped nuts or seeds (optional)
Instructions
- Prepare the Pan: Line an 8×8-inch pan with parchment paper, making sure to leave extra paper on the sides to easily lift the bars out once set.
- Melt Wet Ingredients: In a saucepan over low heat, combine the peanut butter, maple syrup (or honey), and coconut oil. Stir consistently until the mixture is smooth and fully melted. Remove from heat once well blended.
- Mix Dry Ingredients: Add the rolled oats and protein powder to the melted peanut butter mixture. Stir thoroughly until everything is evenly incorporated. If using, fold in the dark chocolate chips and/or chopped nuts or seeds at this stage.
- Press & Chill: Transfer the mixture into the prepared pan. Press down firmly and evenly with a spatula or your hands to compact the mixture. Place the pan in the refrigerator and chill for 1 to 2 hours, allowing the bars to firm up completely.
- Slice & Store: Once set, use the parchment paper edges to lift the block out of the pan. Cut into 10 to 12 bars of your preferred size. Store the bars in an airtight container in the refrigerator for up to 1 week or freeze them for up to 3 months to maintain freshness.
Notes
- You can substitute peanut butter with almond or cashew butter for different flavors.
- For a sweeter bar, increase the maple syrup or honey slightly, but keep in mind this will affect the texture.
- Protein powder flavors work best as vanilla or unflavored to complement the peanut butter taste.
- Chilling time is crucial for the bars to set correctly; do not skip refrigeration.
- These bars can be wrapped individually for convenient grab-and-go snacks.
