
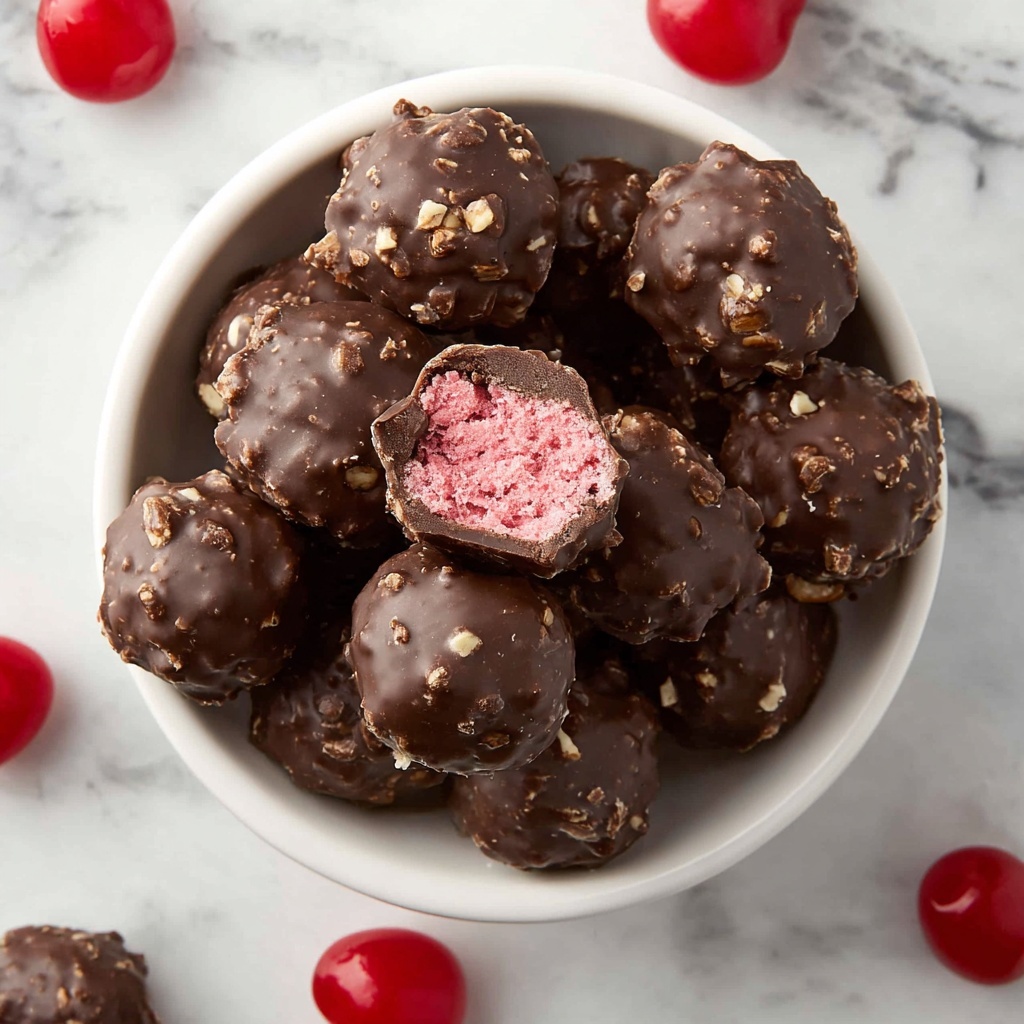
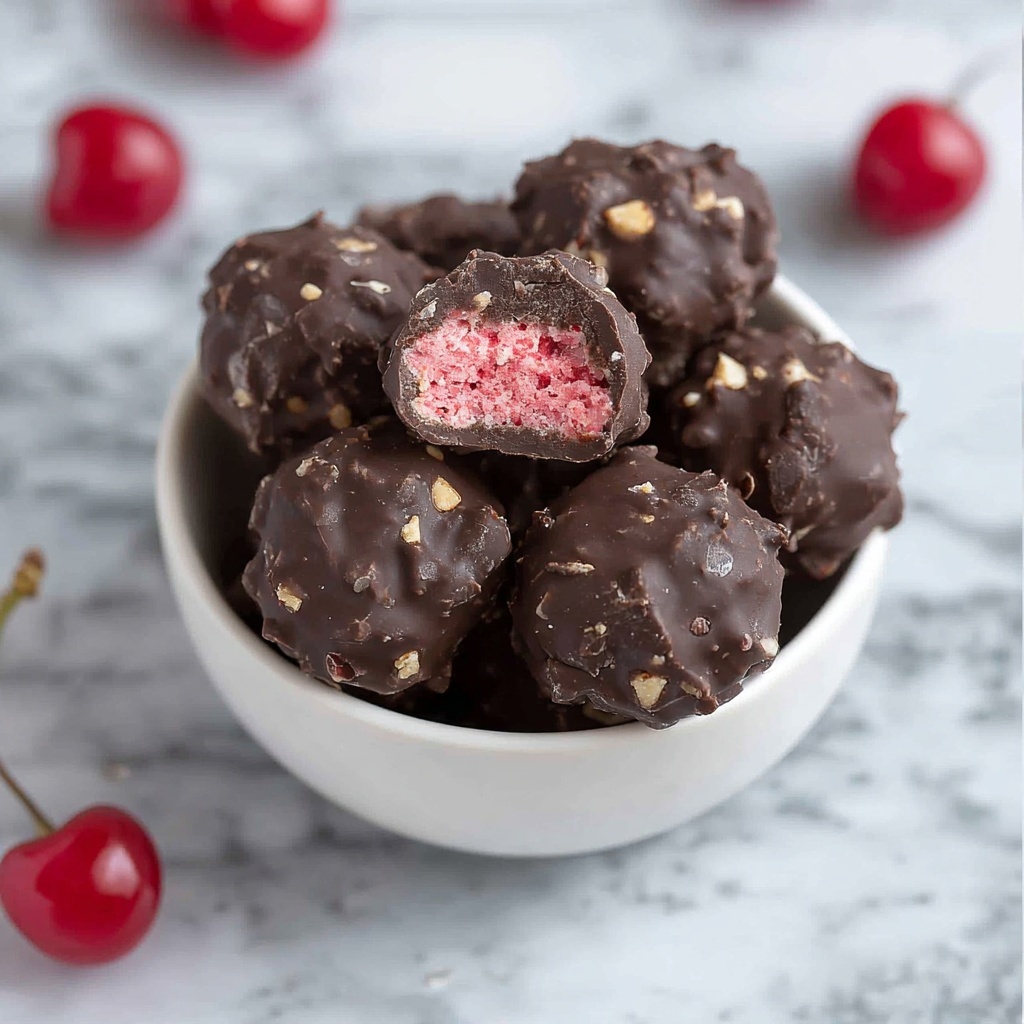
If you’re anything like me and love the perfect balance of tart and sweet wrapped in a smooth chocolate coat, then you are going to absolutely adore this Cherry Mash Truffles Recipe. These delightful little treats combine a luscious cherry-flavored center with a crunchy nutty exterior, all enrobed in rich, semi-sweet chocolate. They are irresistible, perfect for sharing with friends or keeping all to yourself as a delicious pick-me-up. The Cherry Mash Truffles Recipe captures the nostalgic flavors of cherry candy in a sophisticated, melt-in-your-mouth bite that’s surprisingly easy to make!
Ingredients You’ll Need
This Cherry Mash Truffles Recipe calls for ingredients that are both simple and essential, each playing its part to create a perfect harmony of flavor, texture, and color. From creamy butter to that vibrant cherry emulsion, every component brings something special to the table.
- Unsalted butter (1/4 cup, softened): Provides a rich, creamy base that helps bind the mixture perfectly.
- Powdered sugar (3 cups): Adds sweetness and structure with a silky texture that’s crucial for the truffle center.
- LorAnn Cherry Bakery Emulsion (3 teaspoons): The star flavor that brings authentic cherry taste without overpowering the palate.
- Milk (2 tablespoons): Helps to achieve just the right consistency for rolling the cherry mixture into balls.
- Red food coloring (1/4 teaspoon): Gives the truffles their instantly recognizable bright cherry hue.
- Semi-sweet chocolate (12 ounces): For a luscious coating that balances sweetness and richness beautifully.
- Coconut oil (2 teaspoons): Adds sheen to the chocolate and makes dipping smoother.
- Chopped peanuts (1/4 cup): Provides a delightful crunchy contrast inside the chocolate shell.
How to Make Cherry Mash Truffles Recipe
Step 1: Prepare the Cherry Mixture
Start by softening the butter in the bowl of your stand mixer. Add 1 cup of powdered sugar and mix until smooth and creamy. Gradually add another cup of powdered sugar, followed by the milk; keep mixing until well incorporated. Finish by adding the last portion of powdered sugar, the cherry emulsion, and red food coloring, mixing everything until you get a beautifully tinted, fragrant cherry dough that’s soft yet firm enough to shape.
Step 2: Shape and Chill the Cherry Balls
Using a 2 teaspoon cookie scoop or your hands, gently form the cherry mixture into small balls. Place these on a baking sheet lined with parchment paper. Pop the tray into the freezer and let the cherry balls chill for about 2 hours or until they are completely firm. This step is key to ensuring your truffles hold their shape during dipping.
Step 3: Melt the Chocolate and Mix in Peanuts
While the cherry balls are chilling, melt the semi-sweet chocolate with coconut oil in a heatproof bowl over simmering water or in short bursts in the microwave. Stir the mixture thoroughly so the coconut oil blends in for a silky, glossy finish. Then fold in the chopped peanuts, which will give your truffles that signature crunch after each bite.
Step 4: Dip Cherry Balls and Set
Working in batches, dip each cold cherry ball into the melted chocolate, coating it completely, and then set them back on a parchment-lined baking sheet. Once all are dipped, put the tray back into the freezer for the chocolate to harden. When set, transfer the Cherry Mash Truffles to the refrigerator until it’s time to enjoy or serve.
How to Serve Cherry Mash Truffles Recipe
Garnishes
Consider sprinkling a tiny pinch of finely chopped peanuts or a light dusting of powdered sugar on top of each truffle before the chocolate sets for an elevated look. A small drizzle of white chocolate can also add a pretty contrast that looks almost too pretty to eat.
Side Dishes
These truffles pair beautifully with a cup of strong coffee or a smooth, fruity red wine. For an indulgent experience, serve alongside fresh berries or a dollop of lightly whipped cream for yourself and guests to savor each bite more deeply.
Creative Ways to Present
For parties or gifts, place your Cherry Mash Truffles in colorful candy cups or mini cupcake liners inside a decorative box tied with a cherry-patterned ribbon. You could also serve them on a beautiful platter surrounded by decorative cherries or sprigs of mint for a stunning presentation.
Make Ahead and Storage
Storing Leftovers
Cherry Mash Truffles keep best when stored in an airtight container in the refrigerator. They will stay fresh and delicious for up to two weeks, making it easy to have this treat ready whenever a sweet craving strikes.
Freezing
If you want to enjoy these truffles later, freeze them in a single layer on a baking sheet, then transfer to a freezer-safe bag or container once solid. They’ll keep well for up to three months and thaw quickly when you want to indulge.
Reheating
Since these are no-bake truffles, reheating is not necessary. Just let them come to room temperature if you prefer a softer bite or enjoy them chilled for a refreshing, firm texture.
FAQs
Can I substitute the cherry emulsion with cherry extract?
You can, but cherry emulsion tends to have a richer, more bakery-like flavor that really makes this Cherry Mash Truffles Recipe special. If you use extract, start with less and adjust to taste.
What type of chocolate works best for dipping?
Semi-sweet chocolate is ideal because it balances the sweetness of the cherry filling without being too overpowering. You can experiment with dark chocolate if you prefer an even bolder flavor.
Why do I need to freeze the cherry balls before dipping?
Freezing firms up the cherry centers so the truffles keep their shape when dipped, and it prevents the filling from becoming too soft and melting into the chocolate.
Can I make these truffles nut-free?
Definitely! Simply omit the chopped peanuts or replace them with crushed pretzels or crispy rice cereal for a different kind of crunch without nuts.
How long do the truffles last once made?
Stored in an airtight container in the fridge, these truffles stay fresh for about two weeks. For longer storage, freezing is a great option.
Final Thoughts
Honestly, this Cherry Mash Truffles Recipe has become one of my absolute favorite homemade treats. It’s a wonderful combination of nostalgic flavors and textures that are sure to light up your taste buds. Whether you’re making them for a holiday gift, a party, or just to enjoy a little sweetness, these truffles will not disappoint. Give them a try, and I promise you will be reaching for seconds faster than you can say “cherry!”
Print
Cherry Mash Truffles Recipe
- Prep Time: 20 minutes
- Cook Time: 10 minutes
- Total Time: 2 hours 30 minutes
- Yield: 25 servings
- Category: Dessert
- Method: No-Cook
- Cuisine: American
Description
Delight in these Cherry Mash Truffles, a luscious no-bake treat combining a smooth cherry-flavored filling with a rich chocolate-peanut coating. Perfectly balanced sweetness with a hint of fruitiness, these truffles are a crowd-pleaser for special occasions or anytime indulgence.
Ingredients
Filling
- 1/4 cup unsalted butter, softened
- 3 cups powdered sugar
- 3 teaspoons LorAnn Cherry Bakery Emulsion
- 2 tablespoons milk
- 1/4 teaspoon red food coloring
Coating
- 12 ounces semi-sweet chocolate
- 2 teaspoons coconut oil
- 1/4 cup chopped peanuts
Instructions
- Prepare the Cherry Mixture: In the bowl of a stand mixer, combine the softened butter and 1 cup of powdered sugar. Mix until smooth. Gradually add the second cup of powdered sugar followed by the milk, mixing thoroughly. Finally, add the remaining powdered sugar, cherry bakery emulsion, and red food coloring, blending until the mixture is even in color and texture.
- Form the Truffle Centers: Using a 2 teaspoon cookie scoop, portion out the cherry mixture into evenly sized balls and place them on a sheet pan. Freeze the balls for at least 2 hours until firm and solidified to ensure easy dipping later.
- Melt Chocolate Coating: Gently melt the semi-sweet chocolate and coconut oil together until smooth and glossy. Stir in the chopped peanuts, distributing them evenly throughout the chocolate mixture for a crunchy texture.
- Dip and Set Truffles: Working in batches, dip each cherry ball into the chocolate-peanut mixture, coating it thoroughly, and place it on a parchment-lined cookie sheet. Once all truffles are coated, place the tray back into the freezer to allow the chocolate to harden and set completely.
- Storage: After setting, store the Cherry Mash Truffles in the refrigerator to keep them fresh and maintain the perfect firmness before serving.
Notes
- For best results, use a stand mixer to achieve a smooth and well-combined filling.
- If LorAnn Cherry Bakery Emulsion is unavailable, a high-quality cherry extract can be substituted, though flavor intensity may vary.
- Freezing the cherry balls solid helps prevent melting and maintains shape during the dipping process.
- The coconut oil helps the chocolate coating set with a smooth finish and adds a subtle tropical note.
- Store truffles refrigerated and consume within one week for optimal freshness.
