
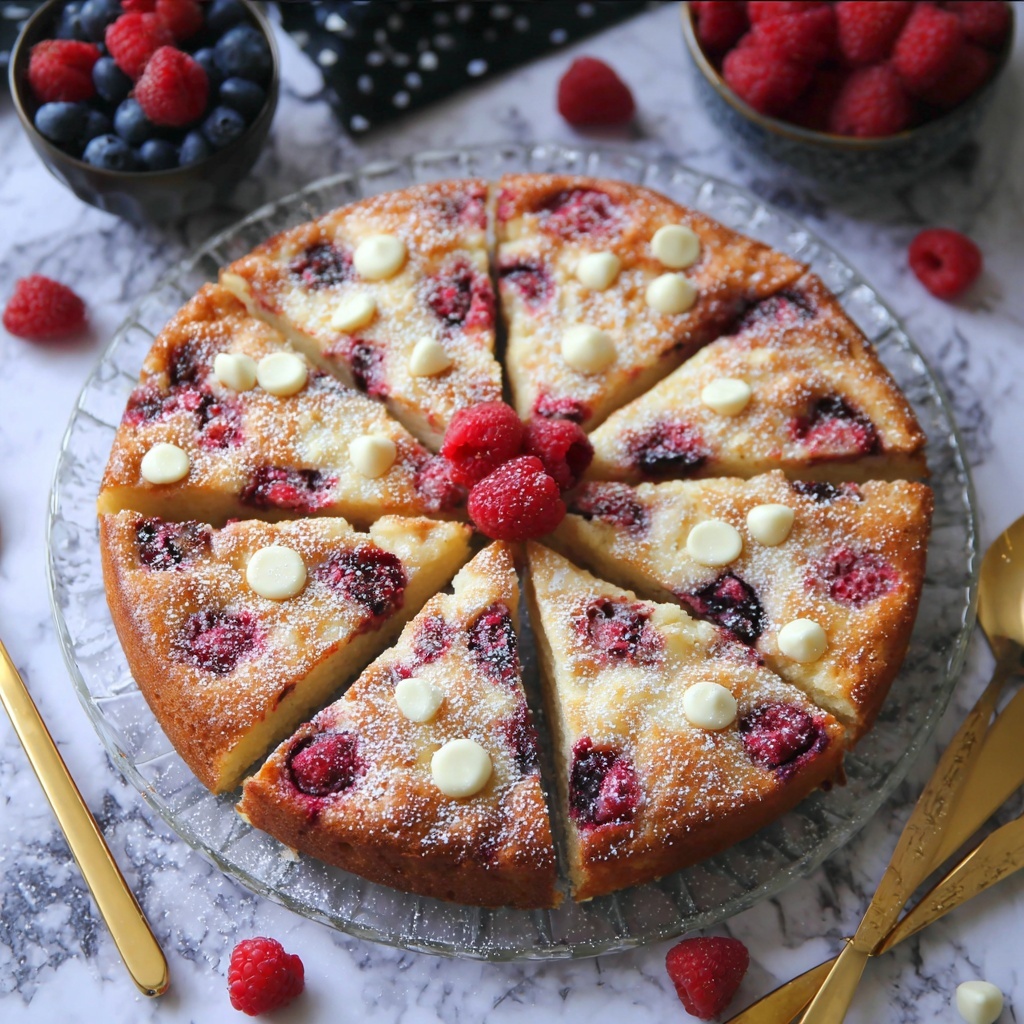
If you love the joyous pairing of sweet and tart with a touch of elegance, then this White Chocolate Chip Raspberry Cake Recipe is going to become your new favorite indulgence. Imagine a moist, fluffy cake bursting with juicy raspberries and gooey pockets of white chocolate chips, all wrapped in a delicate crumb that melts in your mouth. It’s a delightful treat that effortlessly balances creamy white chocolate sweetness with the refreshing zing of raspberries, creating a dessert that’s as beautiful as it is delicious. Whether you’re baking for a celebration or simply craving something special, this recipe is a sure crowd-pleaser that you’ll want to make again and again.
Ingredients You’ll Need
This recipe uses simple, staple ingredients that each play an essential role in building amazing flavor and texture. From the rich, melted butter that keeps the cake tender, to the fresh raspberries that add bursts of juicy color, every ingredient contributes to making this cake a sublime experience.
- All-purpose flour: Provides structure and a tender crumb, be sure to sift or aerate for a light result.
- Baking powder: A leavening agent that ensures the cake rises beautifully and stays fluffy.
- Granulated sugar: Sweetens the cake and helps achieve a golden crust.
- Salted butter (melted): Adds richness and moisture, melting it helps integrate it smoothly into the batter.
- Eggs: Bind the ingredients and contribute to the cake’s lift and structure.
- Plain Greek yogurt (low-fat): Adds creaminess and a slight tang to balance the sweetness.
- Pure vanilla extract: Enhances the overall flavor with its warm, sweet aroma.
- Raspberries (fresh or frozen): Offer fresh tartness and juicy texture that shine in every bite.
- White chocolate chips: Melt into delightful pockets of creamy, sweet bliss throughout the cake.
- Additional flour (for tossing berries): Prevents raspberries from sinking and keeps them evenly distributed in the batter.
How to Make White Chocolate Chip Raspberry Cake Recipe
Step 1: Prepare the Pan and Preheat the Oven
Start by preheating your oven to 350°F. For best results, opt for a convection bake setting if your oven has one. Then, line a 9×3-inch springform pan with a large piece of parchment paper covering both the bottom and sides. Let the parchment hang outside the pan to make removing the cake effortless later on. This clever step means you won’t need any extra greasing, keeping the cake’s edges beautifully intact.
Step 2: Mix the Dry Ingredients
In a medium bowl, combine the sifted all-purpose flour with baking powder. Mixing these together evenly ensures that the cake will bake uniformly and rise perfectly, creating a light, airy texture you’ll love.
Step 3: Whisk the Wet Ingredients
Grab a large bowl and whisk together the granulated sugar, melted butter, and eggs. Taking your time here, beat the mixture for about one or two minutes until it lightens in color and becomes fluffy rather than grainy. This aeration step is the secret to a tender crumb and vibrant cake.
Step 4: Add Yogurt and Vanilla
Next, stir in the Greek yogurt and pure vanilla extract just until everything is combined. The Greek yogurt not only adds moisture but also gives the cake a slight tang that cuts through the sweetness of the white chocolate.
Step 5: Combine Wet and Dry Ingredients
Gradually add the flour mixture to the wet ingredients, about one cup at a time, whisking gently as you go. Be careful not to overmix this batter — overworking it can result in a denser cake. The goal is to combine the ingredients just until smooth.
Step 6: Prepare the Raspberries
Take half of the raspberries and toss them with a tablespoon of flour in the bowl you used for the dry ingredients. This coating helps prevent the berries from sinking to the bottom during baking, keeping the cake beautifully studded with raspberry goodness.
Step 7: Fold in Berries and White Chocolate Chips
Carefully fold the flour-coated raspberries and about two-thirds of the white chocolate chips into the batter. Don’t worry if the berries break a little — that juicy burst will add lovely streaks of raspberry flavor and color throughout the cake.
Step 8: Transfer Batter and Arrange Toppings
Pour the thick batter into your lined springform pan. Smooth the top gently and then place the remaining raspberries on top, almost like jewels on a cake. This not only adds appeal but also a fresh raspberry burst with every bite.
Step 9: Bake to Perfection
Place the cake on the middle rack of your oven to ensure even baking. If you’re using a convection oven, bake for about 45 to 50 minutes. If using a regular oven, allow closer to an hour. The cake is ready when the center is set and a toothpick inserted away from the raspberries comes out mostly clean with just a few moist crumbs.
Step 10: Cooling and Removing from Pan
Once baked, remove the cake from the oven and let it cool in the pan on a wire rack for about 20 minutes. Then release the sides of the springform pan and use the parchment paper “handles” to carefully transfer the cake to a platter. For best results and to avoid any cake breakage, allow it to cool for a total of around 40 minutes before fully removing the parchment.
Step 11: Finishing Touches
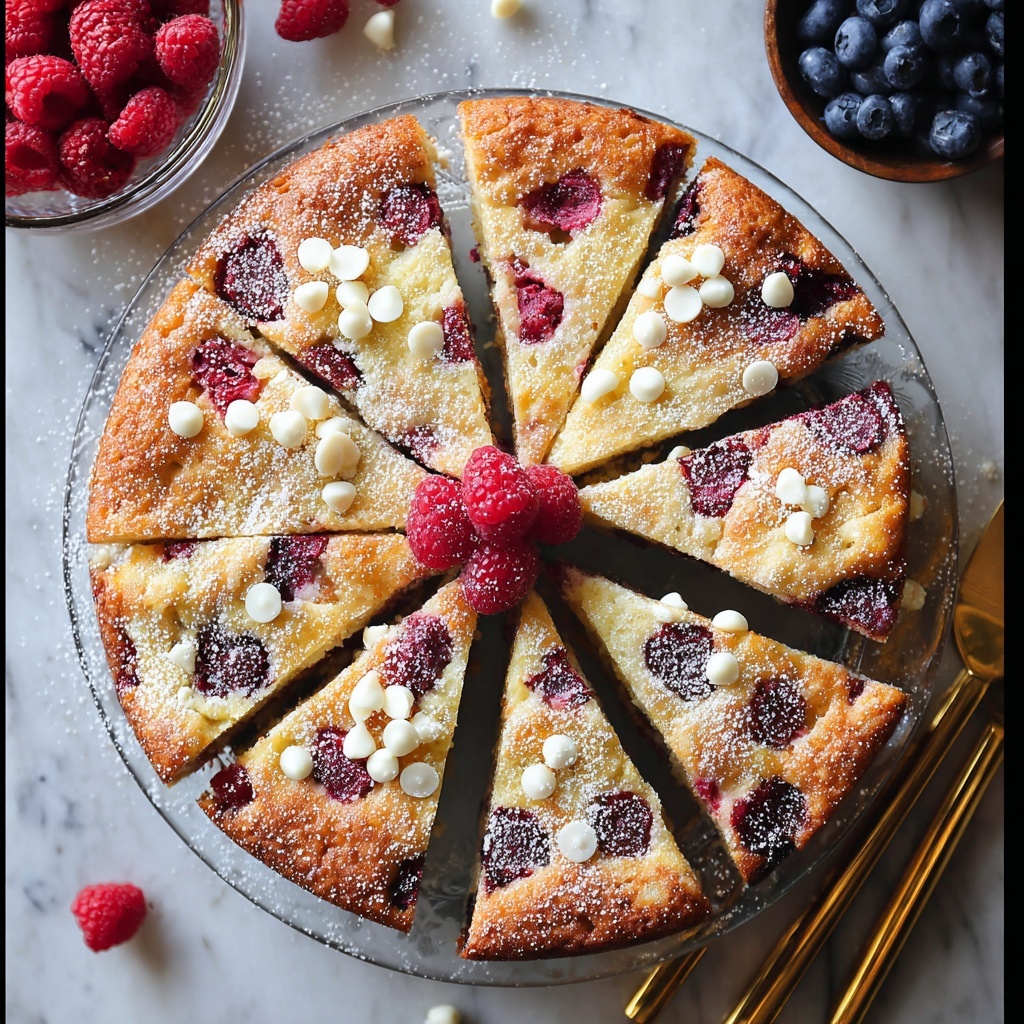
When it’s time to serve, sprinkle the remaining white chocolate chips on top and dust the cake lightly with powdered sugar. This simple garnish adds a finishing touch of sweetness and elegance that highlights the luscious layers inside.
How to Serve White Chocolate Chip Raspberry Cake Recipe
Garnishes
To highlight the beautiful contrast of this cake, try garnishing with a handful of fresh raspberries and a sprig of mint. A light dusting of powdered sugar or a drizzle of melted white chocolate can add a touch of extra flair, making the cake not only scrumptious but visually stunning.
Side Dishes
This cake pairs wonderfully with a scoop of vanilla ice cream or a dollop of lightly whipped cream to complement the soft texture and fruity notes. For a refreshing twist, serve alongside a cup of hot tea or chilled sparkling water with lemon.
Creative Ways to Present
Consider serving slices of the White Chocolate Chip Raspberry Cake Recipe on pretty dessert plates with a smear of raspberry coulis or a drizzle of white chocolate sauce. For special occasions, layering the cake with fresh whipped cream and extra raspberries can turn it into an irresistible trifle or parfait.
Make Ahead and Storage
Storing Leftovers
You can keep your White Chocolate Chip Raspberry Cake Recipe fresh by storing leftovers in an airtight container at room temperature for up to two days. For longer freshness, refrigeration is best, where it will last 4 to 5 days without losing moisture or flavor.
Freezing
This cake freezes beautifully! Wrap it tightly in plastic wrap and then foil to protect it from freezer burn. It can be frozen for up to three months. When ready to enjoy again, thaw it overnight in the fridge for the best texture and flavor.
Reheating
If you want to warm a slice, give it a gentle zap in the microwave for 15-20 seconds or warm it in a preheated oven at 300°F for 10 minutes. Reheating brings out the melting white chocolate and makes the cake even more luscious.
FAQs
Can I use frozen raspberries for this cake?
Absolutely! Frozen raspberries work well and add the same tartness as fresh ones. Just make sure to toss them in flour to reduce excess moisture and maintain the cake’s texture.
What if I don’t have Greek yogurt? Can I substitute?
You can replace Greek yogurt with sour cream or buttermilk for a similar tang and moist texture, though the cake’s flavor might be slightly different but still delicious.
Why is the flour sifted or aerated before baking?
Sifting or aerating the flour helps incorporate air, avoiding lumps and ensuring a light, fluffy cake rather than a dense one.
Can I make this cake vegan or dairy-free?
This recipe depends on butter, eggs, and yogurt for its texture and taste, so it would require significant substitutions. Using vegan butter, egg replacer, and dairy-free yogurt could work, but results may vary.
How do I know when the cake is fully baked?
The cake should be lightly golden and firm to the touch in the center. Insert a toothpick away from raspberries—if it comes out mostly clean with a few moist crumbs, the cake is done.
Final Thoughts
This White Chocolate Chip Raspberry Cake Recipe is an absolute delight to bake and even more wonderful to eat. Its vibrant flavors and inviting texture make it a standout dessert for any occasion. I can’t wait for you to try it and discover how this charming cake can quickly become a cherished favorite in your kitchen too!
Print
White Chocolate Chip Raspberry Cake Recipe
- Prep Time: 20 minutes
- Cook Time: 50 minutes
- Total Time: 1 hour 10 minutes
- Yield: 10 servings
- Category: Cake
- Method: Baking
- Cuisine: American
Description
This White Chocolate Chip Raspberry Cake is a delightful, moist dessert combining tart raspberries with sweet white chocolate chips in a tender, yogurt-infused cake. Perfect for gatherings or a special treat, this cake uses simple ingredients and a straightforward baking method to create a luscious flavor with a beautiful presentation.
Ingredients
Dry Ingredients
- 2 cups all-purpose flour (or baking flour, sifted or aerated)
- 2 teaspoons baking powder
- 1 tablespoon flour (for tossing raspberries)
Wet Ingredients
- 1 cup granulated sugar
- 4 oz salted butter (melted; 1/2 cup or 1 stick)
- 2 medium eggs
- 1 cup plain Greek yogurt (low-fat)
- 1 teaspoon pure vanilla extract
Other Ingredients
- 12 oz raspberries (fresh or frozen)
- 12 oz white chocolate chips (divided as 2/3 in batter and remaining for topping)
Instructions
- Preheat and Prepare Pan: Preheat your oven to 350°F (use convection bake if available). Line the bottom and sides of a 9×3-inch springform pan with a large parchment paper piece extending outside the pan, eliminating the need for greasing.
- Mix Dry Ingredients: In a medium bowl, whisk together the all-purpose flour and baking powder until well combined.
- Combine Sugar, Butter, and Eggs: In a large bowl, whisk granulated sugar, melted butter, and eggs for 1-2 minutes until the mixture is light-colored, smooth, and fluffy.
- Add Yogurt and Vanilla: Mix in the Greek yogurt and vanilla extract, whisking just until fully incorporated without over-mixing.
- Incorporate Dry Ingredients: Gradually whisk the flour mixture into the wet ingredients, one cup at a time, mixing until just combined to avoid overworking the batter.
- Coat Half the Raspberries: Toss half of the raspberries with 1 tablespoon of flour in the bowl used for the dry ingredients to prevent sinking.
- Fold in Raspberries and White Chocolate: Gently fold the flour-coated raspberries and two-thirds of the white chocolate chips into the batter, accepting some berry breakage.
- Assemble Cake: Pour the thick batter into the parchment-lined springform pan. Evenly arrange the remaining raspberries on top of the batter.
- Bake the Cake: Place the pan on the middle oven rack. Bake for about 45-50 minutes using convection or up to 1 hour in a regular oven. The cake is done when the center is set and a toothpick inserted away from berries comes out mostly clean.
- Cool and Release: Remove the cake from oven and cool on a wire rack for 20 minutes. Release the springform pan edges and transfer the cake using the parchment paper. For easier removal from parchment, cool an additional 20 minutes.
- Finish and Serve: Before serving, sprinkle the remaining white chocolate chips on top and dust with powdered sugar for a beautiful finishing touch.
- Optional Visual Guide: Refer to step-by-step photos for detailed visual instructions (not included here).
Notes
- Using baking flour that is sifted or aerated improves cake texture by providing lift.
- Fresh or frozen raspberries can be used; if frozen, do not thaw before adding to preserve texture.
- Coating raspberries in flour prevents them from sinking to the bottom during baking.
- Using parchment paper lining around the springform pan allows easy cake removal without greasing.
- The cake may need longer baking time if your oven does not have convection — monitor doneness carefully.
- Letting the cake cool longer before removing parchment paper helps keep it intact during transfer.


