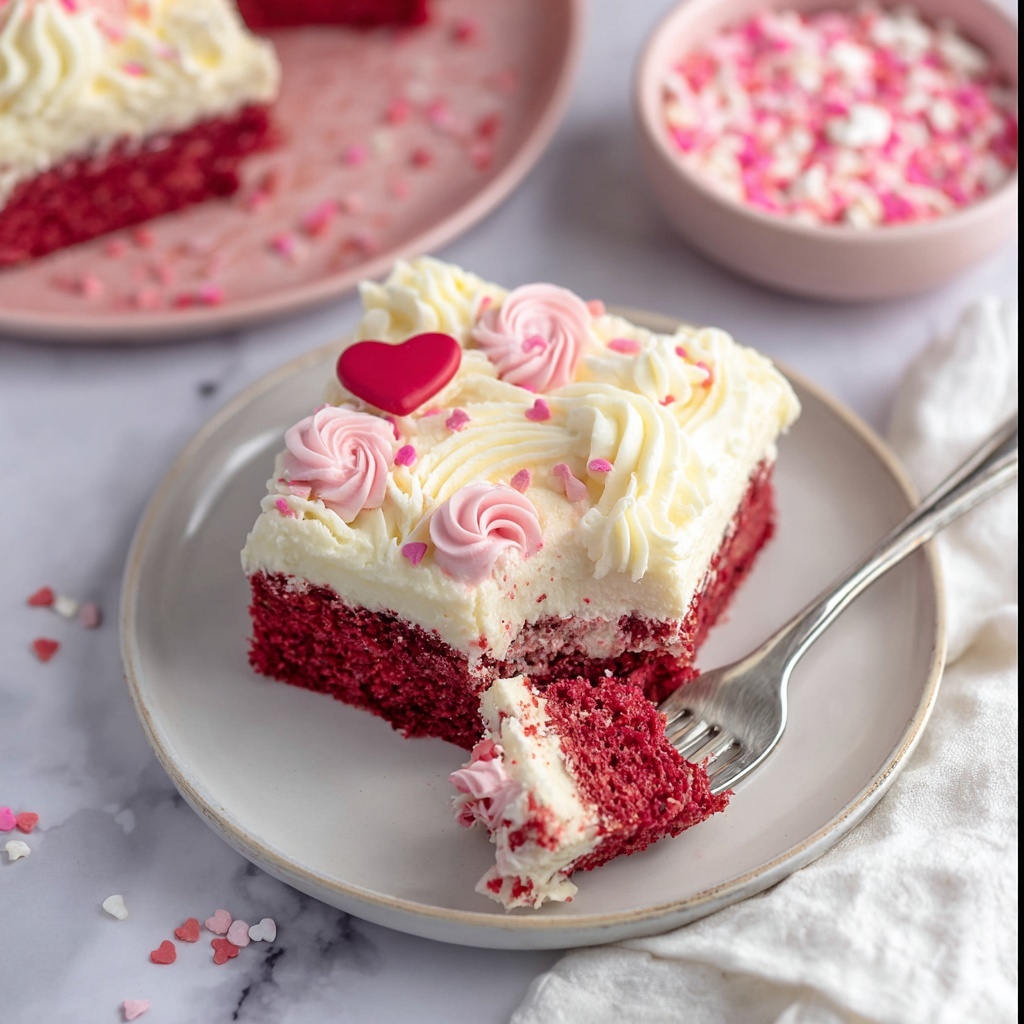
If you’re on the lookout for a treat that’s as visually stunning as it is delicious, this Easy Pink Velvet Cake Recipe is going to steal your heart! Imagine a tender, velvety crumb with that perfect pop of pink color—it’s a fabulous twist on the classic velvet cake that feels just right for birthdays, baby showers, or any day that deserves a little extra sweetness. This cake combines simplicity with charm, making it so approachable whether you’re a novice baker or a seasoned pro excited to try something new and vibrant.
Ingredients You’ll Need
Gathering your ingredients for this Easy Pink Velvet Cake Recipe is a breeze, and each one plays a crucial role in creating the perfect balance of flavor, texture, and that signature pink hue. From the richness of butter to the tang of buttermilk, these essentials come together to make magic happen in your baking pan.
- Cake flour (2 ¾ cups / 316g): The secret to a light and tender crumb, cake flour keeps the texture soft and fluffy.
- Natural unsweetened cocoa powder (1 tablespoon / 6g): Adds a subtle depth and classic velvet cake undertone without overpowering the pink color.
- Baking powder (1 teaspoon): Helps the cake rise beautifully for a light, airy result.
- Baking soda (1 teaspoon): Works with the vinegar to create that soft crumb and slight lift.
- Kosher salt (1 teaspoon): Balances sweetness and enhances all the flavors in the cake.
- Unsalted butter (½ cup / 113g plus ¾ cup / 170g for frosting): Adds richness and moisture, crucial for that velvety mouthfeel.
- Granulated sugar (1 ½ cups / 300g plus ¾ cup /150g for frosting): Sweetens the batter and ensures a delicate crumb texture.
- Pink gel food coloring (¾ – 1 teaspoon): Offers that beautiful and vibrant pink shade without thinning the batter.
- Large eggs (2 plus 3 egg whites): Provide structure while keeping the cake light and fluffy, especially the whipped egg whites for the frosting.
- Buttermilk (1 cup / 240mL): Adds a tender tang and helps create a moist, luscious crumb.
- White vinegar (1 teaspoon): Reacts with baking soda for lift and also brightens the flavor.
- Pure vanilla extract (2 teaspoons total): Enhances all the other ingredients with its warm, sweet notes.
How to Make Easy Pink Velvet Cake Recipe
Step 1: Prepare Your Oven and Pans
Start by heating your oven to 350° F, which ensures everything bakes evenly. Butter your pans thoroughly and line them with parchment if you want to easily lift the cake out after baking. The choice between a 9 x 13 pan or rounds is yours and will slightly change the look but not the deliciousness!
Step 2: Sift Dry Ingredients
Next, sift together the cake flour, cocoa powder, baking powder, baking soda, and kosher salt. This step is super important because it prevents lumps and ensures every bite of cake has the perfect texture.
Step 3: Cream Butter, Sugar, and Color
Using a stand mixer fitted with the paddle attachment, cream the room-temperature butter with sugar and pink gel food coloring until it looks creamy and thick. This helps blend air into the batter, contributing to that soft crumb we all love.
Step 4: Add Eggs One at a Time
Beat in the eggs one at a time, giving the mixture time to pull together and stay smooth. This slow addition keeps the texture light and prevents curdling.
Step 5: Mix the Wet Ingredients
Combine buttermilk, white vinegar, and vanilla extract in a measuring cup. This combo will brighten the cake’s flavor and work magic with the leavening agents in the dry mix.
Step 6: Combine Wet and Dry
Alternately add the flour mixture and the buttermilk mixture to the creamed butter, starting and ending with dry ingredients. Remember to keep the mixer on low and don’t overmix—fold in the last little bit of flour by hand to keep the batter light and airy. If you want to pump up the pink a bit more, add some extra gel coloring with the second wet addition!
Step 7: Bake the Cake
Pour the batter into your prepared pan(s). If you’re using a 9 x 13 pan, bake for about 25-35 minutes and test doneness with a toothpick. For layered cakes, divide batter evenly and bake layers the same way. Once done, cool the cakes on wire racks. For the larger pan, chilling it slightly before lifting it out helps keep it intact.
Step 8: Frost with Light and Fluffy Buttercream
Whip together egg whites, sugar, and salt for the frosting base, then whip in butter and vanilla until you get a silky, cloud-like frosting perfect for complimenting this Easy Pink Velvet Cake Recipe. Spread generously and let the cake become an irresistible centerpiece!
How to Serve Easy Pink Velvet Cake Recipe
Garnishes
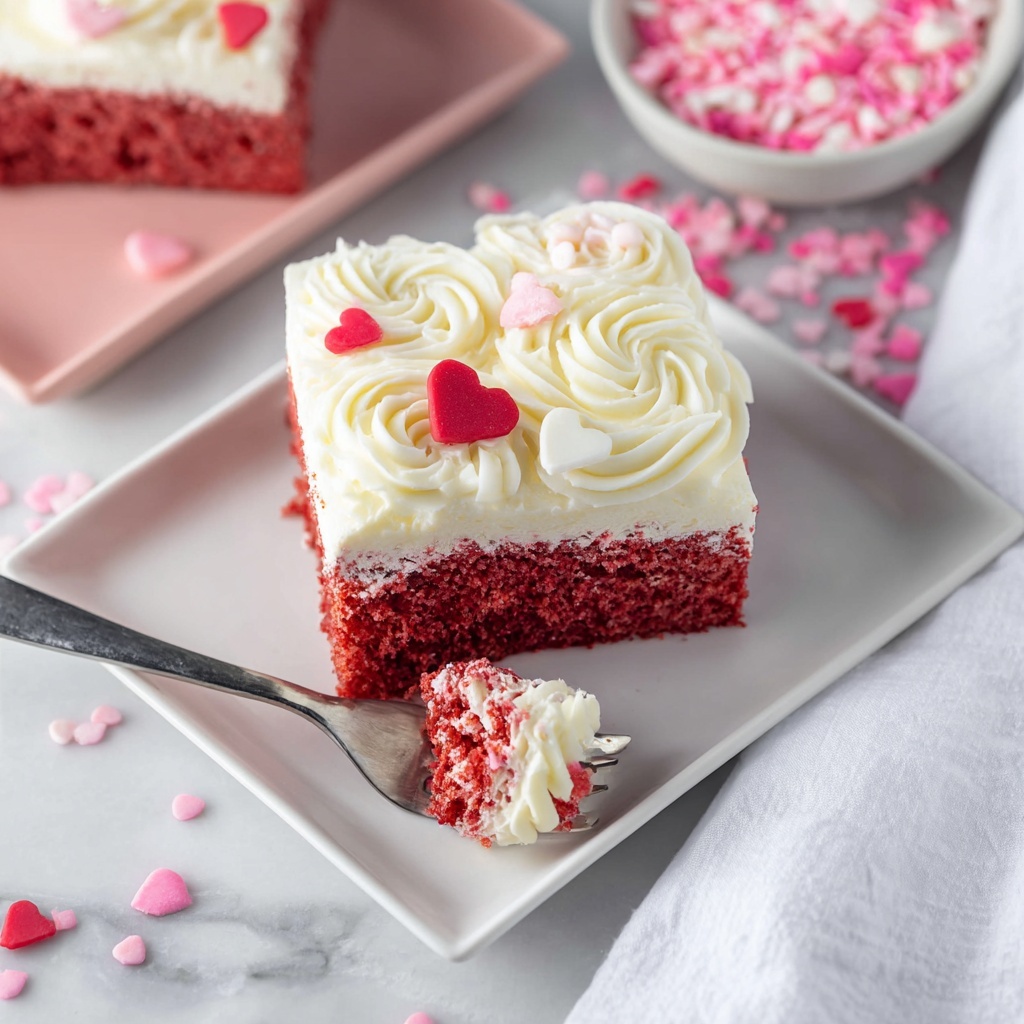
Add a touch of whimsy with some fresh raspberries, edible flowers, or sprinkles that match the pink theme. A light dusting of powdered sugar can also add a delicate finish without taking away from that show-stopping color.
Side Dishes
Pair slices with a dollop of whipped cream or a scoop of vanilla bean ice cream for an extra indulgent experience. If you’re wanting to keep it light, fresh berries or a simple fruit salad are fantastic companions that brighten the palate.
Creative Ways to Present
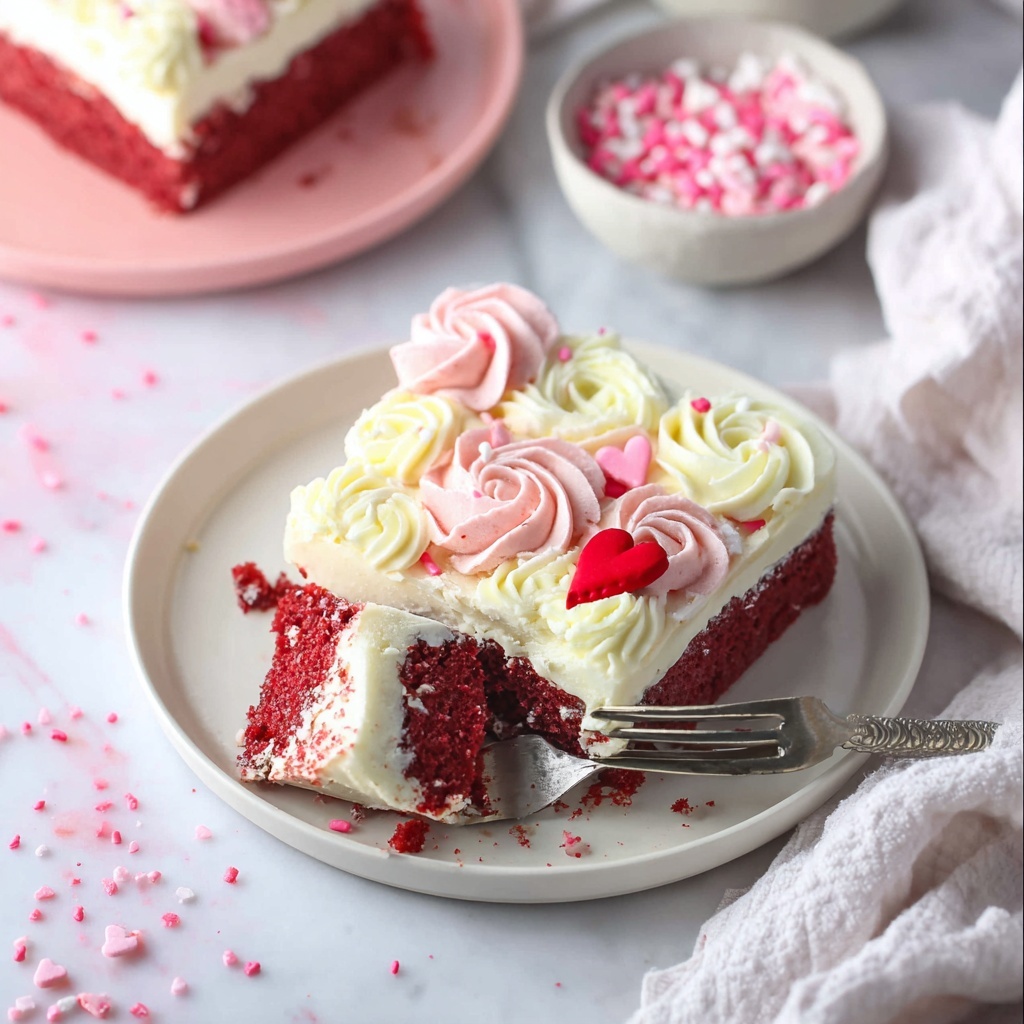
If you’re feeling adventurous, serve this cake as playful cupcakes adorned with swirls of pink frosting or even a layered cake with ombré pink shades for a stunning visual effect. Another fun twist is using themed cake toppers for celebrations or creating a layered trifle with crumbled pieces, cream, and fruit.
Make Ahead and Storage
Storing Leftovers
Keep your leftover pink velvet cake fresh by storing it in an airtight container at room temperature for up to 2 days. If your kitchen is warm, refrigerating is best, but be sure to bring the cake to room temperature before serving for the best texture and flavor.
Freezing
This Easy Pink Velvet Cake Recipe freezes beautifully! Wrap leftovers tightly in plastic wrap and then foil, or store in a freezer-safe container for up to 3 months. Thaw overnight in the fridge and let it come to room temperature before enjoying.
Reheating
For a freshly baked feel, gently warm slices in the microwave for 10-15 seconds or in a low oven (about 300° F) wrapped loosely in foil for 10 minutes. This revives the softness and makes the frosting just a touch melty and heavenly.
FAQs
Can I use regular food coloring instead of gel?
While you can use liquid food coloring, gel coloring is preferred here because it delivers a more vibrant pink without adding extra liquid to the batter, which might affect texture.
Is there a dairy-free alternative for buttermilk?
Absolutely! Mix 1 cup of your favorite non-dairy milk with 1 tablespoon of lemon juice or white vinegar, let it sit for 5 minutes, and use it as a perfect buttermilk substitute.
Can I make this cake in advance?
Yes, this recipe works wonderfully made a day ahead. Just keep it covered at room temperature or refrigerated overnight, then frost just before serving for a fresh look and taste.
What if I don’t have cake flour?
You can make a substitute by measuring out 2 ¾ cups of all-purpose flour, removing 6 tablespoons, and replacing them with an equal amount of cornstarch. Sift it well before using for similar results.
Can I use this frosting recipe for other cakes?
The fluffiest buttercream from this recipe adapts beautifully to many cakes. It’s especially fantastic for those who love a light frosting that isn’t too sweet or dense.
Final Thoughts
I can’t recommend enough giving this Easy Pink Velvet Cake Recipe a try—it’s a total showstopper that’s surprisingly simple to whip up. Whether you’re making it for a special event or just because life deserves a bit of color and sweetness, this cake brings loads of smiles and happy belly moments. So don your apron, grab your mixing bowl, and prepare for some serious deliciousness that’s as fun to make as it is to eat!
Print
Easy Pink Velvet Cake Recipe
- Prep Time: 20 minutes
- Cook Time: 35 minutes
- Total Time: 1 hour 5 minutes
- Yield: 9 servings
- Category: Dessert
- Method: Baking
- Cuisine: American
Description
This Easy Pink Velvet Cake is a delightful twist on the classic red velvet, featuring a subtle cocoa flavor and a charming pink hue achieved with gel food coloring. Moist and tender, this cake is perfect for celebrations or any occasion where a beautiful, flavorful dessert is desired. The recipe includes a fluffy cake base and a rich, creamy frosting made from egg whites and butter, ensuring a luscious finish.
Ingredients
Cake
- 2 ¾ cups cake flour (316g)
- 1 tablespoon natural unsweetened cocoa powder (6g)
- 1 teaspoon baking powder
- 1 teaspoon baking soda
- 1 teaspoon kosher salt
- ½ cup unsalted butter, room temperature (113g)
- 1 ½ cups granulated sugar (300g)
- ¾ – 1 teaspoon pink gel food coloring
- 2 large eggs, room temperature
- 1 cup buttermilk, room temperature (240mL)
- 1 teaspoon white vinegar
- 1 teaspoon pure vanilla extract
Frosting
- 3 large egg whites (about 90-100g)
- ¾ cup granulated sugar (150g)
- ½ teaspoon kosher salt
- ¾ cup unsalted butter, room temperature (170g)
- 1 teaspoon pure vanilla extract
Instructions
- Preheat Oven: Preheat your oven to 350° F (175° C) to prepare for baking the cake.
- Prepare Pans: Butter a 9 x 13 baking pan (or three 6-inch round baking pans or two 8-inch round pans). Line the bottoms with parchment paper and butter again, especially if you plan to lift the cake out after baking. If serving directly from the 9 x 13 pan, the parchment can be omitted.
- Sift Dry Ingredients: In a medium bowl, sift together cake flour, cocoa powder, baking powder, baking soda, and kosher salt. Set this dry mixture aside.
- Cream Butter, Sugar & Color: Using a stand mixer with the paddle attachment, cream together butter, granulated sugar, and pink gel food coloring on medium-high speed for 2-3 minutes until well combined. The mixture should be thick due to the sugar to butter ratio. Scrape down the sides as needed.
- Add Eggs: Beat in eggs one at a time, ensuring each is fully incorporated before adding the next.
- Mix Wet Ingredients: In a separate measuring cup, combine the buttermilk, white vinegar, and vanilla extract.
- Combine Dry & Wet: With the mixer on low speed, alternately add the sifted dry ingredients and the buttermilk mixture to the creamed butter and sugar, starting and ending with the dry ingredients. Begin with about a third of the dry, then half the wet, another third of the dry, the remaining wet, and then finish with the last dry portion. Stop mixing while a few streaks of flour remain and fold them in gently using a spatula to avoid overmixing. Assess the color and add additional pink gel food coloring during the second wet addition if desired.
- Bake the Cake: For a 9 x 13 pan, spread the batter evenly and bake for 25-35 minutes. For layered cakes, divide batter equally among either three 6-inch pans or two 8-inch pans and bake 25-35 minutes. Bake until a toothpick inserted in the center comes out with just a few moist crumbs.
- Cool the Cake: Cool the cakes in the pans on a wire rack until room temperature. For the 9 x 13 cake, chill in the refrigerator for 30 minutes to help firm it before removing from the pan. For layer cakes, remove from pans after 10-15 minutes and cool completely on wire racks.
- Prepare Frosting: (Not detailed in the original instructions but required) Whip egg whites with sugar and kosher salt over a double boiler until sugar dissolves and mixture is warm, then beat in room temperature butter gradually and vanilla extract to form a smooth, fluffy buttercream.
Notes
- Use room temperature ingredients for best mixing and texture results.
- Adjust pink gel food coloring to get the desired shade; start with less and add more as needed.
- Do not overmix the batter after adding flour to keep the cake tender.
- For the 9 x 13 cake, chilling before removing from pan ensures the cake holds its shape.
- The frosting method involves making a Swiss meringue-style buttercream, which requires careful temperature control.
- Make sure to test doneness with a toothpick to avoid over or under baking.
- Using parchment makes cake removal easier and prevents sticking.


