
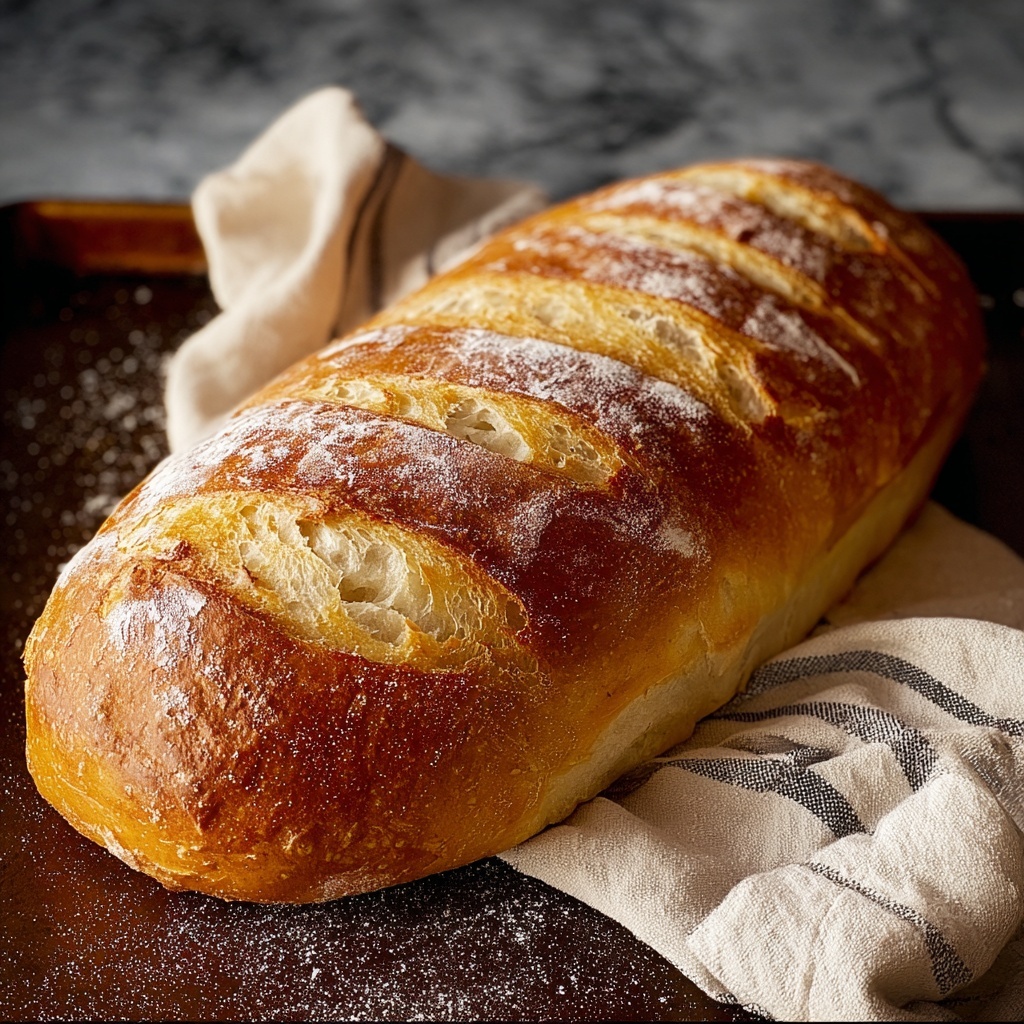
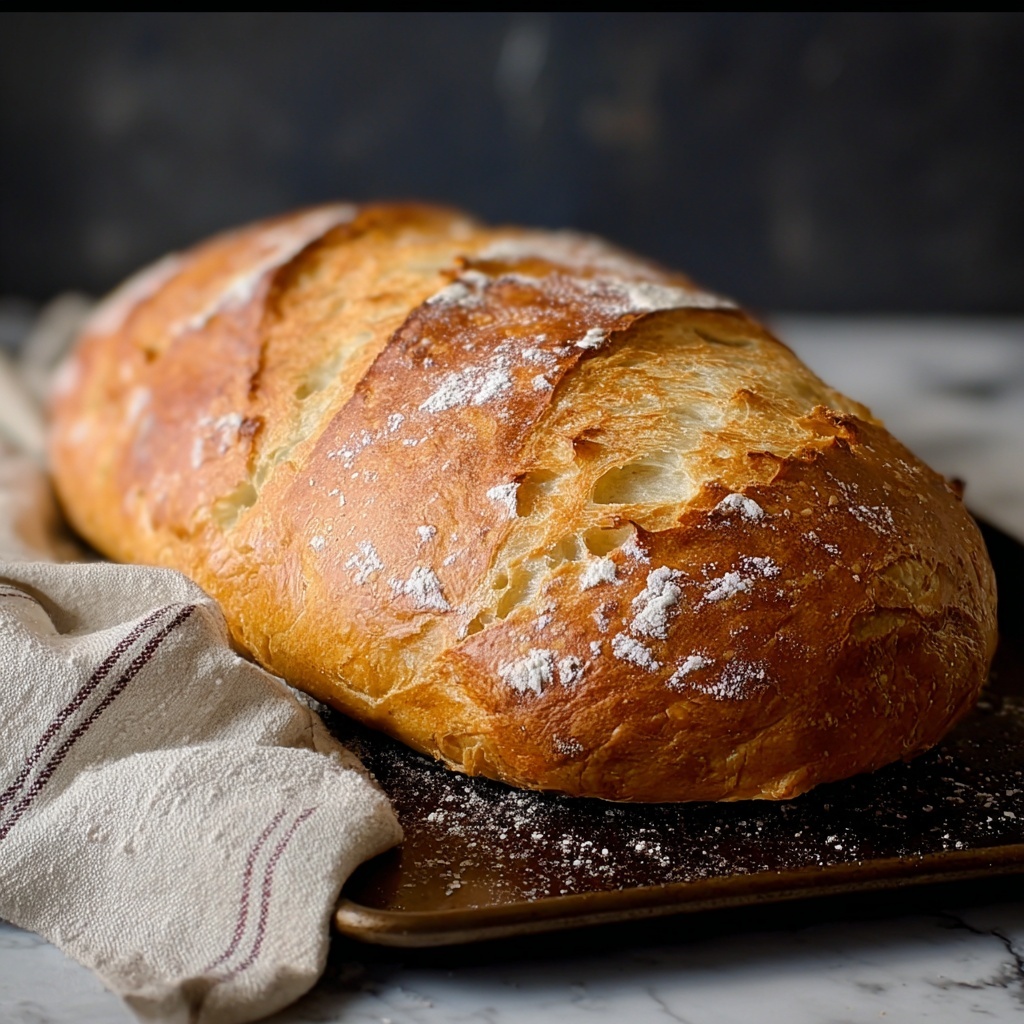
If you’ve ever wanted to bring the heart and soul of Italy straight into your kitchen, nothing beats this authentic Italian Bread Recipe. It’s a lovingly simple loaf with a gloriously crisp crust and a tender, airy interior that practically melts in your mouth. Whether you’re a beginner or a seasoned baker, this recipe will become your go-to for that warm, comforting bread that pairs perfectly with everything from olive oil dips to hearty meals. Trust me, once you try this Italian Bread Recipe, you’ll never look at store-bought bread the same way again!
Ingredients You’ll Need
There’s something so wonderful about how just a few basic ingredients come together to create this spectacular Italian Bread Recipe. Each element plays a special role—flour builds structure, yeast creates magic with the rise, and a touch of olive oil adds that subtle richness and softness you crave.
- 3 1/2 cups all-purpose flour: The foundation of the dough, providing structure and chewiness.
- 1 tablespoon sugar: Feeds the yeast to help the dough rise beautifully and develop a nice color.
- 2 teaspoons salt: Balances flavor and strengthens the dough’s gluten network.
- 1 tablespoon active dry yeast: The miracle worker that makes your dough rise and become light.
- 1 1/2 cups warm water (110°F/45°C): Activates the yeast while keeping the dough soft.
- 1 tablespoon olive oil: Adds moisture and gives the bread a tender crumb with a subtle richness.
- 1 tablespoon cornmeal (for dusting): Prevents sticking and adds a lovely rustic texture to the crust.
How to Make Italian Bread Recipe
Step 1: Activate the Yeast
Begin by dissolving the sugar and active dry yeast in warm water. The temperature here is key—too hot, and you’ll kill the yeast; too cold, and it won’t activate. After a quick stir, give it 5 to 10 minutes until the surface gets foamy, signaling the yeast is alive and ready to work its magic.
Step 2: Mix the Dough
Combine the flour and salt in a large bowl to evenly distribute the salt, which also strengthens the dough. Pour in the yeast mixture along with olive oil, then stir everything together until it forms a shaggy dough. This is the exciting beginning of your Italian Bread Recipe transformation.
Step 3: Knead to Perfection
Turn the dough onto a floured surface and knead for about 8 to 10 minutes. This step can be a workout but it’s so worth it! You’re developing gluten here, which gives the bread its chew and elasticity. You’ll know it’s ready when the dough feels smooth, slightly tacky but not sticky.
Step 4: First Rise
Place your dough in a greased bowl and cover it with a damp cloth. Now, let patience take over—the dough needs 1 to 2 hours to double in size. This slow rise helps develop flavor and makes the dough airy and light.
Step 5: Shape and Prepare for Baking
After rising, gently punch down the dough to release the air. Shape it into a loaf gently, preserving as much air as possible. Place it on a baking sheet dusted with cornmeal to prevent sticking and add a little texture to the crust.
Step 6: Second Rise and Scoring
Allow the shaped loaf to rise again, this time for 30 minutes. This final proofing boosts volume and keeps the crumb open. Just before baking, slash the top with a sharp knife to help it expand without bursting unpredictably, creating that classic beautiful loaf look you want.
Step 7: Bake to Golden Perfection
Bake your loaf at 375°F (190°C) for about 25 to 30 minutes. The aroma that fills your kitchen will be irresistible! When done, the bread should be golden brown and sound hollow when tapped on the bottom—signs of a perfectly baked Italian Bread Recipe.
Step 8: Cool Before Slicing
Cooling on a wire rack is essential—it allows steam to escape so your crust stays crisp rather than soggy. Resist slicing too early; it’s tempting, but waiting enhances texture and flavor.
How to Serve Italian Bread Recipe
Garnishes
Even the freshest Italian Bread Recipe can be elevated with simple garnishes. Lightly brush warm slices with extra virgin olive oil and sprinkle some flaky sea salt or freshly cracked black pepper. For a fun twist, rub a cut garlic clove over the crust for a fragrant garlicky hint that’s nothing short of addictive.
Side Dishes
This bread is incredibly versatile. Pair it with a rich tomato basil soup or a robust minestrone to soak up all those delicious flavors. It’s also a fantastic companion for Italian classics like lasagna, or served alongside a cheese board featuring sharp pecorino and creamy mozzarella. The possibilities are endless!
Creative Ways to Present
Turn your Italian Bread Recipe into a centerpiece by slicing it thick and creating open-faced sandwiches topped with ripe tomatoes, fresh basil, and a drizzle of balsamic glaze. For a casual gathering, cut into sticks for dipping in herbaceous olive oil or marinara sauce. Your guests will be asking for your secret recipe!
Make Ahead and Storage
Storing Leftovers
Keep your Italian Bread Recipe fresh by storing it in a paper bag at room temperature for up to two days. The paper bag allows the crust to breathe, preventing it from becoming soggy while maintaining that perfect crust-to-crumb balance.
Freezing
If you want to enjoy this bread later, slice it first and wrap the slices tightly in plastic wrap, then place in a freezer bag. Frozen bread keeps excellent for up to three months. When hunger strikes, simply take out the slices you need without defrosting the whole loaf.
Reheating
Bring back that freshly baked warmth by reheating slices in a toaster or oven at 350°F (175°C) for about 10 minutes. A quick spritz of water before reheating helps refresh the crust, making it nearly as good as right out of the oven!
FAQs
Can I use bread flour instead of all-purpose flour?
Absolutely! Bread flour has a higher protein content which can provide even more chew and structure to your Italian Bread Recipe. It might make the crumb a bit denser, but it’s a delicious variation worth trying.
Do I have to use cornmeal for dusting?
While cornmeal adds a lovely rustic texture and prevents sticking, you can substitute it with flour if needed. Just be aware the crust will have a slightly different feel and appearance without it.
How long does it take to make this bread from start to finish?
The entire process typically takes about 1 hour and 45 minutes including rising and baking times. Patience pays off here, giving you that satisfyingly airy loaf.
Can I make the dough in a bread machine?
Yes! Mix and knead the dough using your bread machine’s dough setting, then shape and bake it in the oven as directed. This can save time and gives you hands-off kneading.
What’s the best way to know when the bread is done?
Look for a golden brown crust and tap the loaf’s bottom—it should sound hollow. This classic test means your Italian Bread Recipe is perfectly baked inside and out.
Final Thoughts
There’s a special joy that comes from baking your own Italian Bread Recipe, sharing that first warm slice with people you love, and knowing you made it entirely from scratch. It’s simple ingredients, a bit of patience, and a whole lot of love that come together to create something extraordinary. I can’t wait for you to try this recipe and experience the magic of fresh, homemade Italian bread in your own kitchen. Happy baking and buon appetito!
Print
Italian Bread Recipe
- Prep Time: 20 minutes
- Cook Time: 30 minutes
- Total Time: 1 hour 45 minutes
- Yield: 12 servings
- Category: Bread
- Method: Baking
- Cuisine: Italian
Description
This classic Italian bread recipe yields a beautifully golden, crusty loaf with a soft, chewy interior. Perfect for sandwiches, dipping in olive oil, or serving alongside your favorite Italian dishes, this bread is made with simple ingredients and traditional techniques to bring authentic flavors to your home kitchen.
Ingredients
Dry Ingredients
- 3 1/2 cups all-purpose flour
- 1 tablespoon sugar
- 2 teaspoons salt
- 1 tablespoon active dry yeast
- 1 tablespoon cornmeal (for dusting)
Wet Ingredients
- 1 1/2 cups warm water (110°F/45°C)
- 1 tablespoon olive oil
Instructions
- Activate yeast: In a small bowl, dissolve sugar and yeast in warm water. Let sit for 5–10 minutes until foamy to ensure the yeast is active and ready to leaven the bread.
- Mix dough: In a large bowl, combine flour and salt. Add the yeast mixture and olive oil. Stir until a sticky dough forms, ensuring all ingredients are combined.
- Knead dough: Turn the dough onto a floured surface and knead for 8–10 minutes until the dough becomes smooth, elastic, and slightly tacky but not sticky.
- First rise: Place the dough in a greased bowl, cover it with a damp cloth, and let it rise in a warm area for 1–2 hours, or until doubled in size to develop flavor and texture.
- Preheat oven: While the dough is rising, preheat your oven to 375°F (190°C) to prepare for baking.
- Shape dough: Punch down the risen dough to release air, shape it into a loaf, and place it on a baking sheet lightly dusted with cornmeal to prevent sticking and add texture to the crust.
- Second rise: Let the shaped dough rise again for 30 minutes to allow it to expand, then slash the top with a sharp knife to help steam escape and create a decorative crust.
- Bake: Bake the loaf for 25–30 minutes until it turns golden brown and sounds hollow when tapped, indicating it is fully baked with a crisp crust and tender crumb.
- Cool: Remove from oven and cool on a wire rack before slicing to finish setting the crumb and prevent sogginess.
Notes
- Use warm water around 110°F (45°C) to properly activate the yeast without killing it.
- Kneading is essential for gluten development, which gives the bread its structure and chewiness.
- Allowing the dough to rise adequately results in better flavor and texture.
- Slashing the dough before baking helps control the expansion and creates a beautiful crust pattern.
- Cooling the bread completely on a wire rack prevents the bottom from becoming soggy.


