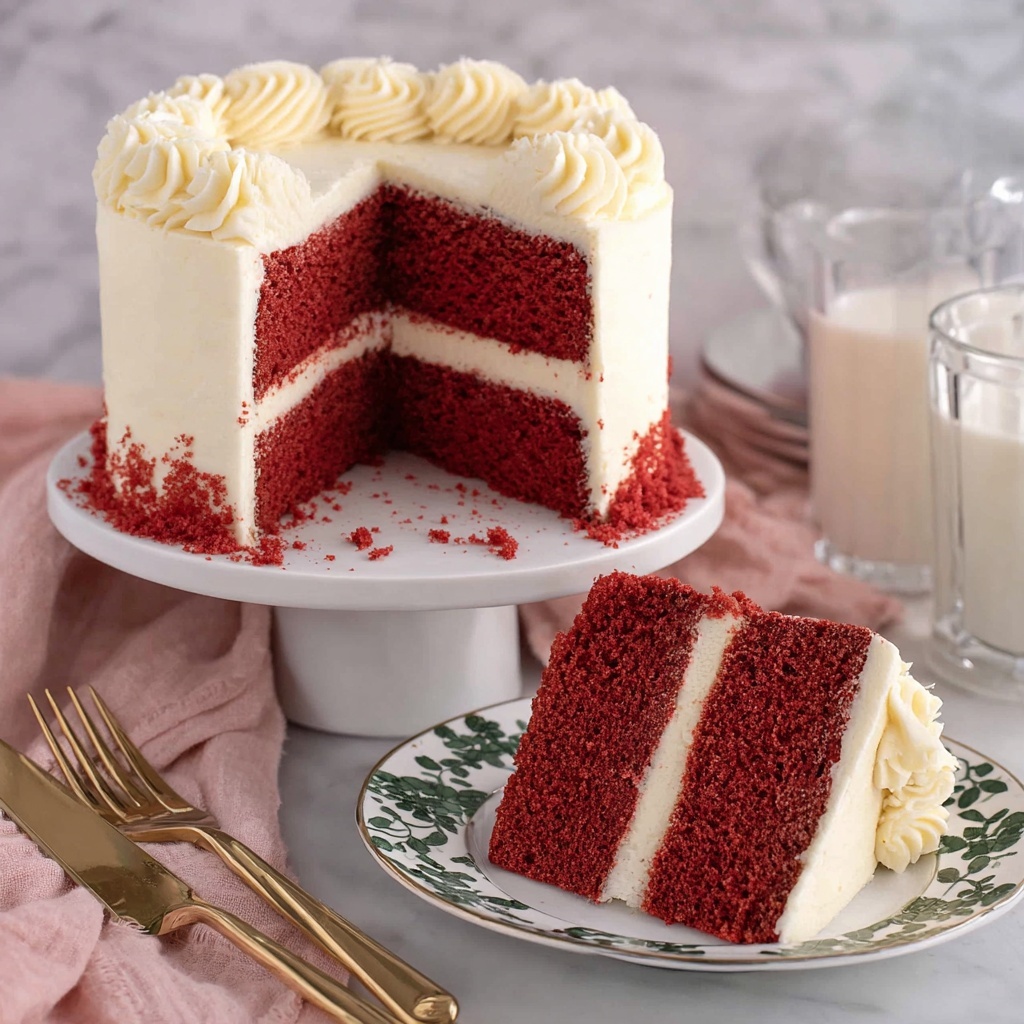
If you have a soft spot for rich, velvety desserts that feel like a warm hug in cake form, then this Red Velvet Cake Recipe is going to become your new best friend. This cake strikes the perfect balance between a tender crumb and a luscious, creamy frosting while flaunting that iconic deep red hue that always steals the show. Every bite melts in your mouth with a subtle cocoa hint, accented by the tang of buttermilk and cream cheese frosting, making it an unforgettable treat for any occasion. Trust me, once you try this Red Velvet Cake Recipe, you’ll be reaching for it time and time again to wow your friends and family.
Ingredients You’ll Need
Getting started on this Red Velvet Cake Recipe is easier than you might think because it relies on simple, everyday ingredients that each play a crucial role in creating the perfect texture, flavor, and color. Every item here ensures your cake turns out moist, tender, and beautifully red with just the right hint of cocoa.
- 2 ½ cups all-purpose flour: Provides the structure and body for the cake layers.
- 1 teaspoon salt: Enhances all the sweet and cocoa flavors perfectly.
- 1 teaspoon baking soda: Helps the cake rise and keeps it light and airy.
- ½ cup unsalted butter (room temperature): Adds richness and tenderness to the crumb.
- 1 ½ cups granulated sugar: Sweetens the cake and contributes to the delicate texture.
- 2 large eggs (room temperature): Bind the ingredients while adding moisture and richness.
- 2 teaspoons vanilla extract: Brings warmth and depth to the flavor profile.
- 2 tablespoons cocoa powder: Key to the subtle chocolate undertone classic to red velvet.
- 1 cup buttermilk (room temperature): Tangy moisture that tenderizes the cake beautifully.
- 1 tablespoon white vinegar: Reacts with baking soda to create lift and subtle tang.
- 1 to 2 tablespoons liquid red food coloring: Gives the cake its signature vibrant red color.
- 2 8-ounce blocks cream cheese (room temperature): The star of the frosting that adds creaminess and slight tang.
- 1 ½ cups unsalted butter (room temperature): Makes the frosting smooth, rich, and spreadable.
- 1 teaspoon vanilla extract: Enhances the flavor in the frosting, tying everything together.
- Pinch kosher salt: Balances the sweetness in your frosting perfectly.
- 1 ½ pounds confectioners sugar (sifted): Sweetens and thickens the frosting to the ideal consistency.
How to Make Red Velvet Cake Recipe
Step 1: Prepare Your Cake Pans and Dry Ingredients
Begin by preheating your oven to 350 degrees F, then lovingly butter and flour your cake pans. This helps ensure your red velvet layers will come out clean and perfect every time. Next, sift together the flour, salt, and baking soda to create a light, airy base for your batter.
Step 2: Cream Butter and Sugar, Add Eggs and Vanilla
In a large bowl or your stand mixer, cream the butter until soft and smooth. Beat in the sugar until the mixture is fluffy and light—that 3-minute mix really makes a difference! Add the eggs one at a time, beating well after each, then stir in the vanilla extract to infuse a lovely aroma.
Step 3: Incorporate Cocoa Powder and Combine Liquids
Sift in the cocoa powder, folding it gently into your creamed mixture until fully incorporated. Meanwhile, mix the buttermilk, vinegar, and red food coloring in a separate liquid measuring cup—the vibrant color starts to show here, so feel free to adjust the amount of food coloring to get that perfect shade.
Step 4: Alternate Adding Dry and Wet Ingredients
With your mixer on low speed, add half of the flour mixture followed by half of the buttermilk mixture. Beat just until combined, then repeat with the remaining ingredients. The key is to avoid overmixing to keep the cake tender and soft. Remember to scrape down the bowl to get every bit incorporated evenly.
Step 5: Bake Your Cake Layers
Pour the batter evenly into your prepared pans and bake for 30 to 35 minutes. Your cake layers are done when the centers spring back to a gentle touch. Let the cakes cool in the pans for about 10 minutes, then transfer them to a wire rack to cool completely. This step is crucial for a smooth frosting application later.
Step 6: Make the Cream Cheese Frosting
Beat the butter and cream cheese together until silky and fluffy, which usually takes about three minutes with a mixer. Blend in vanilla and salt for a flavor boost. Gradually add the sifted confectioners sugar while mixing on low to avoid a sugar cloud explosion. Then, crank the mixer to medium speed and beat until the frosting is irresistibly creamy and luscious.
Step 7: Assemble Your Red Velvet Cake
Start by placing one cake layer on your serving dish, spreading about half a cup of frosting over it. Repeat with the second layer and more frosting. Top with the final layer and spread the remaining frosting evenly across the top and sides. Smooth it out with a bench scraper or spatula, then pipe a decorative border or design if you’re feeling fancy. Chill for about an hour so the frosting sets beautifully.
How to Serve Red Velvet Cake Recipe
Garnishes
A classic dusting of finely chopped pecans or walnuts adds extra texture and a nutty crunch that contrasts wonderfully with the creamy frosting. You can also sprinkle edible rose petals or add fresh berries to enhance the festive look and hint of freshness.
Side Dishes
Pair your Red Velvet Cake with a light cup of freshly brewed coffee or a glass of cold milk to balance the sweet richness. For an elegant touch, serve alongside a scoop of vanilla bean ice cream or a dollop of lightly whipped cream.
Creative Ways to Present
Try creating individual mini red velvet cupcakes following the same recipe for personal servings at parties. Another fun idea is to assemble a layered trifle with crumbled cake, cream cheese frosting, and fresh fruit in a glass bowl—guests will be wowed by both taste and presentation!
Make Ahead and Storage
Storing Leftovers
Once assembled, your Red Velvet Cake can be kept covered at room temperature for up to two days, but for the best freshness, refrigerate it for up to a week. Make sure to keep it wrapped or under a cake dome to prevent drying out.
Freezing
You can freeze leftover cake by wrapping individual layers tightly in plastic wrap and then in foil. Store them in an airtight container or freezer bag for up to three months. Thaw in the refrigerator overnight before frosting or serving.
Reheating
It’s best to enjoy red velvet cake chilled or at room temperature, but if you prefer warm cake, microwave one slice on a low setting for 10 to 15 seconds—just enough to soften it without melting the frosting. Avoid reheating the whole cake to protect that creamy texture.
FAQs
Can I use regular milk instead of buttermilk?
While regular milk is fine, buttermilk is key to giving red velvet its subtle tang and tender crumb. If you don’t have buttermilk, you can make a simple substitute by adding a tablespoon of vinegar or lemon juice to one cup of milk and letting it sit for five minutes.
Why does red velvet cake need vinegar and baking soda?
The vinegar reacts with baking soda to create carbon dioxide bubbles, which help the cake rise and maintain its soft, fluffy texture. Plus, the slight acidity enhances the cake’s distinctive tang.
Is the cocoa powder necessary?
Absolutely! The small amount of cocoa powder provides that signature mild chocolate flavor without overpowering the balance of flavors, helping set red velvet apart from traditional vanilla cakes.
Can I make this cake gluten-free?
Yes, you can substitute the all-purpose flour for a gluten-free flour blend designed for baking, but results might vary slightly in texture. It’s best to choose a blend that includes xanthan gum for structure.
How far in advance can I make this cake?
You can bake the cake layers up to two days ahead and keep them wrapped tightly in the fridge. The frosting keeps well for up to a week, so assembling a day before your event is absolutely doable and often improves flavor melding.
Final Thoughts
I’m thrilled you explored this Red Velvet Cake Recipe with me. Its perfect balance of vibrant color, tender crumb, and creamy frosting makes it a true showstopper on any dessert table. Whether you’re celebrating a special occasion or treating yourself on an ordinary day, this cake never disappoints. So, grab your mixing bowls, invite loved ones, and create some sweet memories with every slice. Happy baking!
Print
Red Velvet Cake Recipe
- Prep Time: 30 minutes
- Cook Time: 35 minutes
- Total Time: 2 hours
- Yield: 6 servings
- Category: Dessert
- Method: Baking
- Cuisine: American
Description
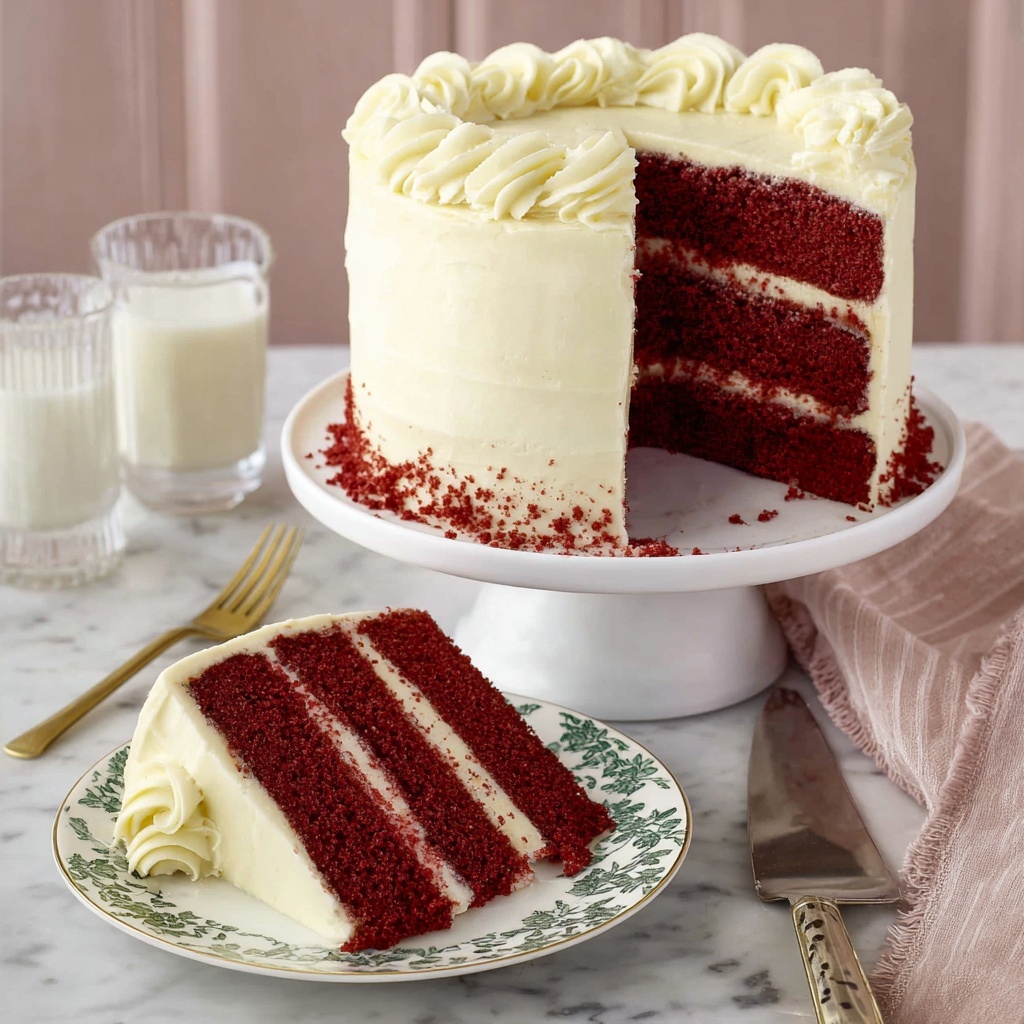
This classic Red Velvet Cake features a moist, tender crumb with a subtle cocoa flavor and vibrant red color, perfectly complemented by a smooth, creamy cream cheese frosting. Ideal for special occasions or celebrations, this recipe creates a visually stunning and delicious layered cake that is both rich and velvety.
Ingredients
Cake:
- 2 ½ cups all-purpose flour (300g)
- 1 teaspoon salt
- 1 teaspoon baking soda
- ½ cup unsalted butter, room temperature (113g)
- 1 ½ cups granulated sugar (300g)
- 2 large eggs, room temperature
- 2 teaspoons vanilla extract
- 2 tablespoons cocoa powder
- 1 cup buttermilk, room temperature (240ml)
- 1 tablespoon white vinegar
- 1 to 2 tablespoons liquid red food coloring
Cream Cheese Frosting:
- 2 8-ounce blocks cream cheese, room temperature (454g)
- 1 ½ cups unsalted butter, room temperature (340g)
- 1 teaspoon vanilla extract
- Pinch kosher salt
- 1 ½ pounds confectioners sugar, sifted (5½ cups / 675g)
Instructions
- Prepare Cake Pans: Preheat your oven to 350°F (175°C). Butter and flour three 6-inch cake pans. Alternatively, you can use two 9-inch cake pans if preferred.
- Sift Dry Ingredients: In a medium bowl, sift together the all-purpose flour, salt, and baking soda. Set aside.
- Cream Butter and Sugar: In a large mixing bowl or stand mixer fitted with a paddle attachment, cream the unsalted butter on medium speed. Gradually add the granulated sugar and beat until the mixture is light and fluffy, about 3 minutes.
- Add Eggs and Vanilla: Add the eggs one at a time, beating well after each addition. Then, beat in the vanilla extract thoroughly.
- Add Cocoa Powder: Sift the cocoa powder into the butter and sugar mixture and beat just until combined. Scrape down the mixing bowl to ensure even mixing.
- Mix Wet Ingredients: In a liquid measuring cup, combine the buttermilk, white vinegar, and red food coloring. Adjust the food coloring amount depending on the desired vibrancy.
- Combine Batter: With the mixer on low speed, alternate adding half of the dry flour mixture and half of the wet buttermilk mixture to the batter. Beat just until combined after each addition. Scrape down the bowl as needed to ensure all ingredients are well incorporated.
- Fill Pans and Bake: Divide the batter evenly among the prepared pans. Bake for 30 to 35 minutes, or until the cake centers spring back when lightly pressed. Let cakes cool in their pans for 10 minutes.
- Cool Cakes: Remove cakes from pans and place on a wire rack to cool completely before frosting.
- Make Frosting: In a large mixing bowl or stand mixer with paddle attachment, beat the room temperature unsalted butter and cream cheese together on medium speed until smooth and fluffy, about 3 minutes.
- Add Flavor and Salt: Add vanilla extract and a pinch of kosher salt to the frosting mixture and beat until evenly combined.
- Add Confectioners Sugar: Sift the confectioners sugar into a separate large bowl. Gradually add the sugar to the frosting mixture on low speed, beating until just combined. Scrape the bowl occasionally. Increase speed to medium and beat until fluffy, about 1 minute.
- Prepare for Decoration: Set aside about one cup of frosting in a piping bag fitted with a decorative tip for decorating the finished cake.
- Assemble Cake Layers: Place one cake layer on a cake stand or serving plate. Spread about ½ cup of frosting evenly on top. Repeat with the second layer. Top with the third layer.
- Frost the Cake: Spread the remaining frosting over the top and sides of the assembled cake. Use a bench scraper or offset spatula to smooth the frosting for a clean finish.
- Decorate and Chill: Pipe decorative borders or designs with the reserved frosting as desired. Chill the cake in the refrigerator for about 1 hour to set the frosting.
- Store: Leftover cake should be covered and can be stored at room temperature for up to 2 days or refrigerated for up to 1 week.
Notes
- Using three 6-inch pans produces thinner layers and more layers in the cake; if using two 9-inch pans, baking time might need adjustment.
- Ensure all ingredients, especially butter, eggs, and buttermilk, are at room temperature for better mixing and texture.
- Adjust the amount of red food coloring based on desired cake vibrancy.
- Let cakes cool completely before frosting to avoid melting the cream cheese frosting.
- Chilling the cake helps set the frosting and makes slicing cleaner.
- Store leftover cake properly to maintain freshness and prevent drying out.


