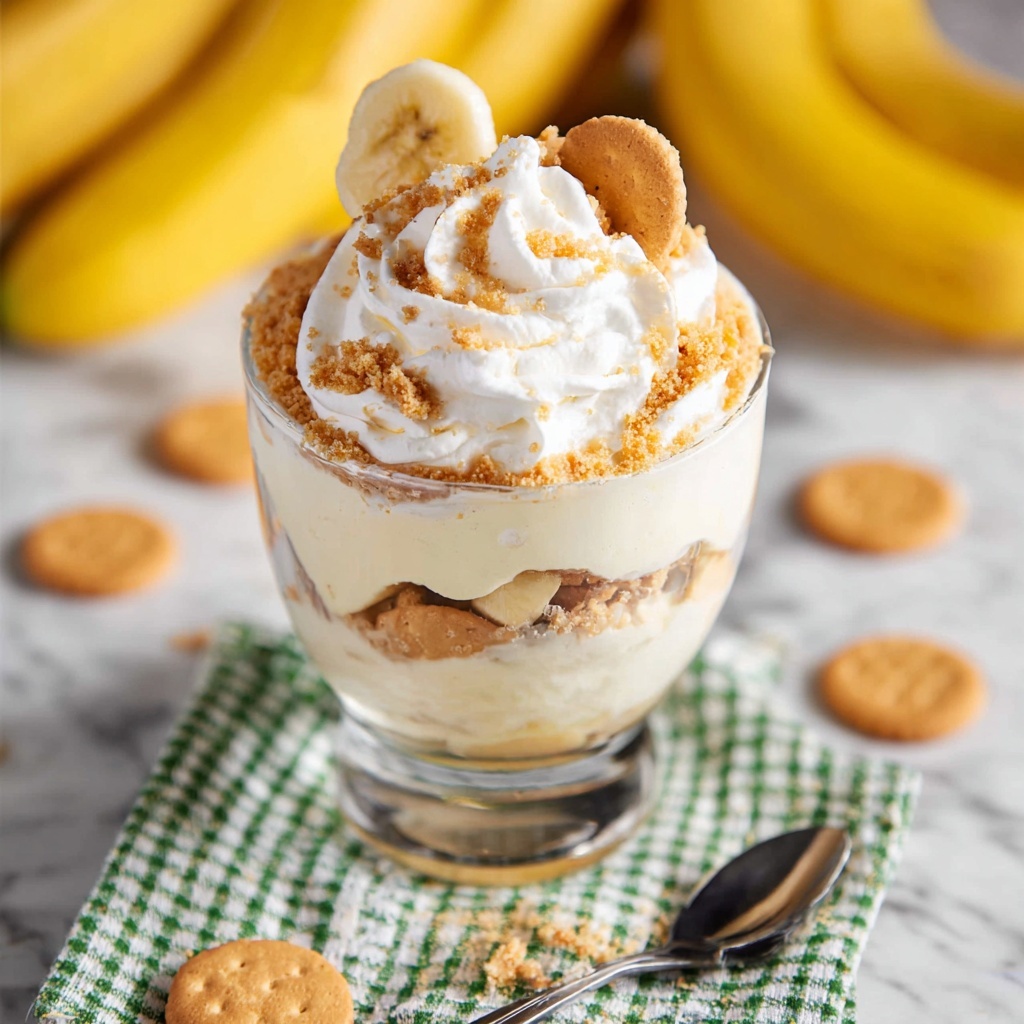
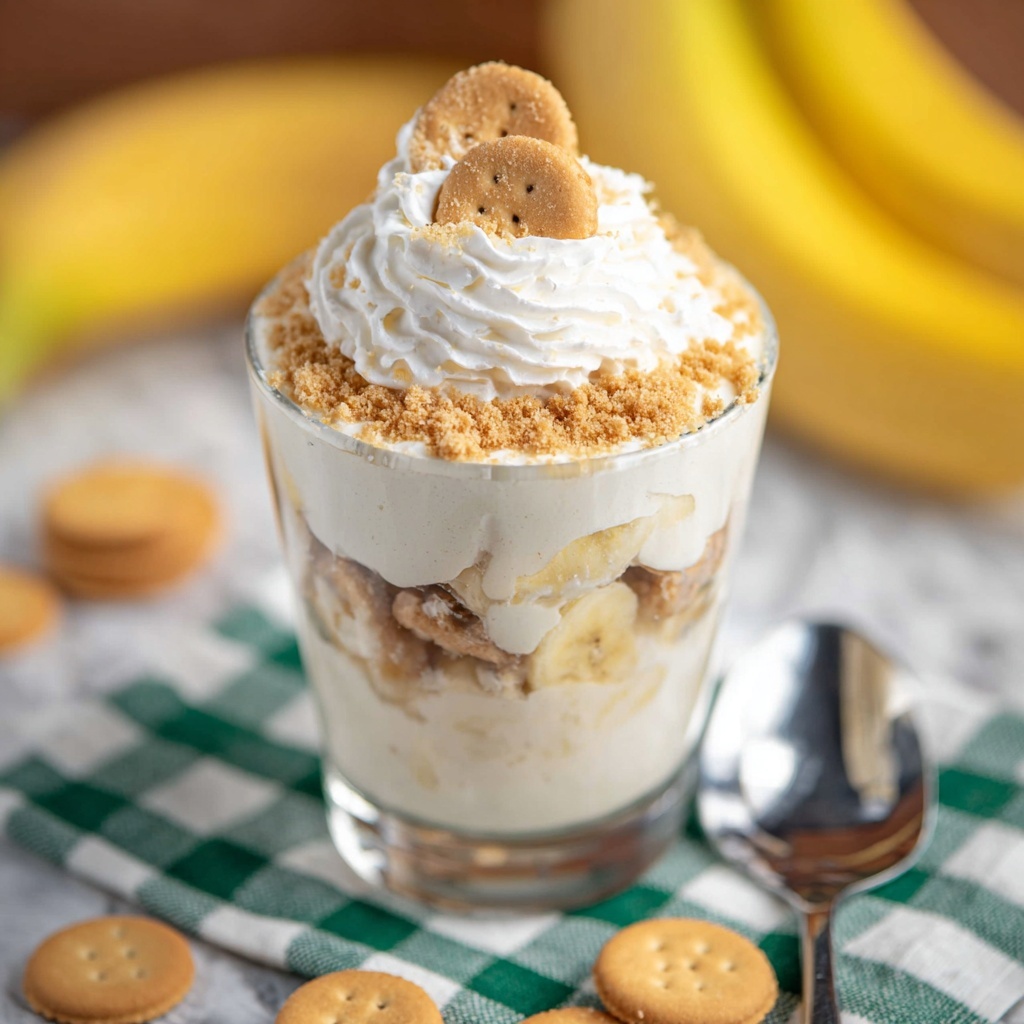
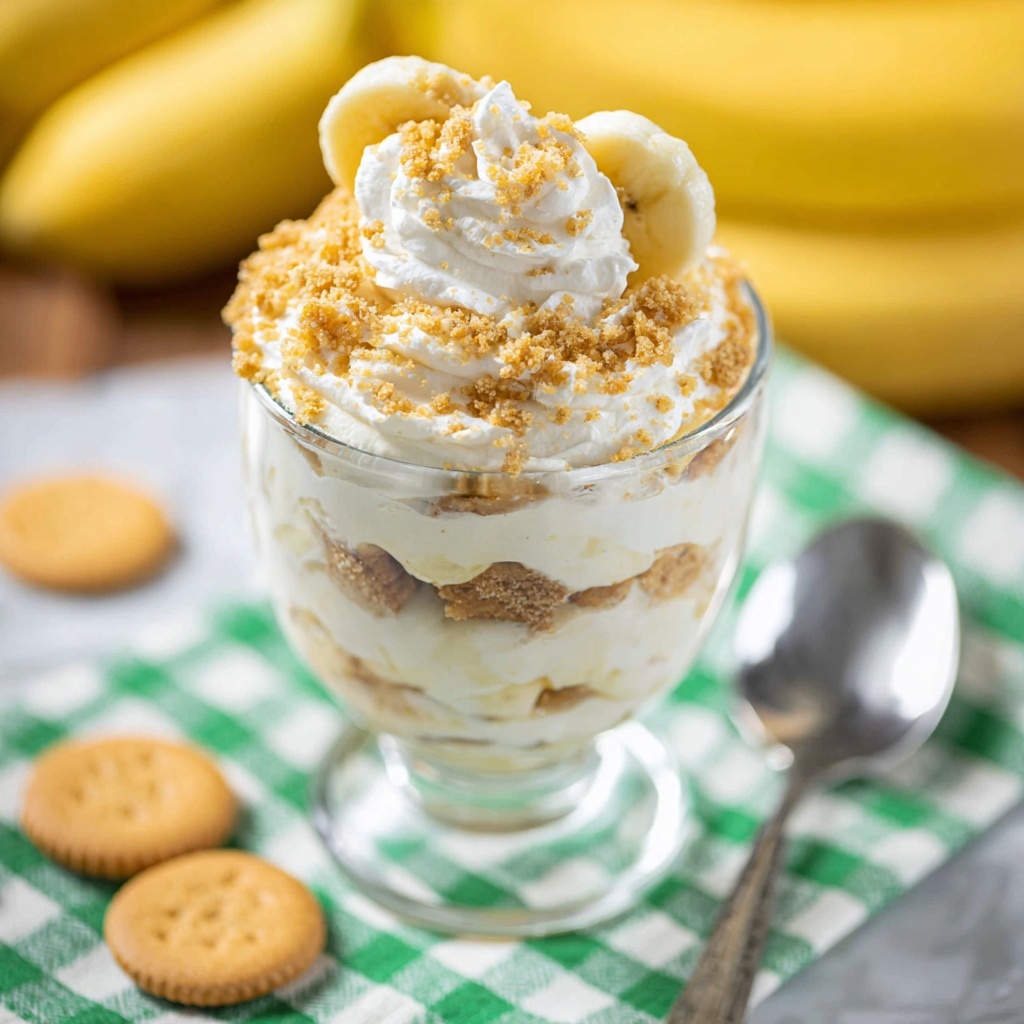
If you’ve ever wished for the perfect, nostalgic dessert that feels like a warm hug in a bowl, then this Classic Banana Pudding with Vanilla Wafers Recipe is exactly what you need. Creamy, luscious pudding, layers of fresh bananas, and the timeless crunch of vanilla wafers come together to create a sweet symphony that’s been a crowd-pleaser for generations. Whether it’s a family gathering, a summer potluck, or just a cozy night in, this dessert hits all the right notes with its simple ingredients and irresistible texture.
Ingredients You’ll Need
Every ingredient in this Classic Banana Pudding with Vanilla Wafers Recipe plays a key role in building layers of flavor and texture. The beauty lies in their simplicity, yet each one adds something special—whether it’s creamy sweetness, tangy balance, or that perfect cookie crunch.
- Vanilla wafers: These give that classic crispy texture and subtle vanilla flavor that’s essential for the pudding’s layers.
- Instant vanilla pudding mix: This helps create a silky, smooth base that’s rich and flavorful.
- Milk: The liquid element that brings the pudding mix to life, making everything creamy and luscious.
- Sour cream: Adds a slight tang that brightens every bite and balances the sweetness.
- Sweetened condensed milk: Brings deep, caramel-like sweetness and thick texture to the pudding.
- Vanilla extract: Boosts the warm vanilla notes throughout the dessert.
- Cool Whip (or whipped topping): Lightens the pudding mixture with airy fluffiness for the perfect mouthfeel.
- Bananas: Fresh, sliced bananas add natural sweetness, softness, and the iconic fruit flavor that defines this dessert.
How to Make Classic Banana Pudding with Vanilla Wafers Recipe
Step 1: Prepare Your Baking Dish
Begin by lightly spraying a 9×13-inch baking dish with cooking spray. This simple step helps prevent sticking and makes serving the pudding a breeze later on.
Step 2: Mix the Pudding Base
In a large bowl, whisk together the instant vanilla pudding mix and milk until smooth and just starting to thicken. Then add in the sour cream, sweetened condensed milk, vanilla extract, and Cool Whip. Gently fold or whisk everything together until fully combined and creamy. This mixture is the heart of your pudding’s decadence.
Step 3: Layer the Ingredients
Now comes the fun part—layering! Start by spreading half of the vanilla wafers evenly on the bottom of your prepared dish. Next, add half of the sliced bananas, then spoon over half of the pudding mixture. Repeat this process: another layer of wafers, bananas, and pudding mixture. This layering technique ensures every bite has a perfect balance of textures and flavors.
Step 4: Top with Crushed Wafers
Reserve a handful of vanilla wafers before layering, then crush them gently and sprinkle them over the very top. This final touch adds a delightful crunch and visually completes this tempting treat.
Step 5: Chill and Set
Cover your dish with plastic wrap and refrigerate for at least 4 hours. This chilling time allows the pudding to set properly and the wafers to soften slightly, melding all those incredible flavors beautifully.
How to Serve Classic Banana Pudding with Vanilla Wafers Recipe
Garnishes
Simple garnishes can take this classic dessert to the next level. Try adding a few extra fresh banana slices on top or a dollop of whipped cream for extra indulgence. A sprinkle of crushed vanilla wafers right before serving adds that lovely crunch that everyone will love.
Side Dishes
Banana pudding is a dessert that shines on its own but pairs wonderfully with light, fresh sides. Think of berry salads, citrus fruit cups, or even a simple scoop of vanilla ice cream to complement the creamy sweetness.
Creative Ways to Present
For an impressive twist, serve the Classic Banana Pudding with Vanilla Wafers Recipe in individual mason jars or clear glasses so everyone can admire the beautiful layers. You can also use mini trifle bowls or parfait glasses to create a stunning presentation perfect for parties and special occasions.
Make Ahead and Storage
Storing Leftovers
Place any leftover banana pudding in an airtight container and store it in the refrigerator. It’s best enjoyed within 2 to 3 days for optimal freshness and flavor. Beyond that, the bananas might start to brown, and the wafers can get overly soggy.
Freezing
While you can freeze banana pudding, the texture of the fresh bananas and vanilla wafers might change after thawing. If you plan to freeze, consider storing the pudding mixture separately and assemble just before serving for the best results.
Reheating
Banana pudding is meant to be enjoyed chilled, so reheating is not recommended. Instead, serve it straight from the fridge for that refreshing coolness that makes every spoonful so delightful.
FAQs
Can I use homemade vanilla pudding instead of instant?
Absolutely! Homemade pudding can add an extra level of richness and customization to the recipe, just make sure it’s fully cooled before layering with the other ingredients.
What can I use instead of Cool Whip?
If you prefer, you can replace Cool Whip with freshly whipped cream for a more natural taste and texture.
Can I substitute Greek yogurt for sour cream?
Yes, Greek yogurt is a great alternative that adds a similar tanginess, but keep in mind it might make the pudding slightly thicker.
How ripe should the bananas be?
Use ripe but firm bananas—too soft and they can become mushy once layered, but perfectly ripe bananas will be sweet and hold up nicely.
Is this recipe gluten-free?
Traditional vanilla wafers contain gluten, but you can find gluten-free vanilla wafer options in stores to keep this Classic Banana Pudding with Vanilla Wafers Recipe gluten-free.
Final Thoughts
This Classic Banana Pudding with Vanilla Wafers Recipe is one of those timeless treasures that brings joy to every occasion. The perfect balance of creamy, sweet, and crunchy is comfort food at its absolute best. I can’t wait for you to try this recipe and make it a part of your family’s dessert lineup — it’s guaranteed to be a new favorite!
Print
Classic Banana Pudding with Vanilla Wafers Recipe
- Prep Time: 15 minutes
- Cook Time: 0 minutes
- Total Time: 4 hours 15 minutes
- Yield: 12 servings
- Category: Dessert
- Method: No-Cook
- Cuisine: Southern American
Description
A classic Southern-style Banana Pudding made with layers of vanilla wafers, sliced bananas, and creamy pudding mixture. This no-bake dessert is rich, smooth, and perfect for serving chilled at family gatherings or potlucks.
Ingredients
Base Ingredients
- 1 (15-oz) box vanilla wafers (reserve a few to crush on the top)
- 6 bananas, sliced
Pudding Mixture
- 1 (5.1-oz) box instant vanilla pudding
- 2 cups milk
- ½ cup sour cream
- 1 (14-oz) can sweetened condensed milk
- 2 tsp vanilla extract
- 1 (12-oz) container Cool Whip, thawed
Instructions
- Prepare the dish: Lightly spray a 9×13-inch baking dish with cooking spray to prevent sticking and ease serving.
- Make pudding mixture: Whisk together the instant vanilla pudding mix and milk until thickened. Then add sour cream, sweetened condensed milk, vanilla extract, and Cool Whip. Gently whisk all ingredients until perfectly combined and smooth.
- Assemble layers: Start by layering half of the vanilla wafers on the bottom of the dish. Add half of the sliced bananas on top of the wafers, then spread half of the pudding mixture evenly over the bananas.
- Repeat layering: Repeat the layers by adding the remaining vanilla wafers, then the sliced bananas, and finally the rest of the pudding mixture on top.
- Add topping: Crush the reserved vanilla wafers into small pieces and sprinkle them evenly over the top layer for added texture and visual appeal.
- Chill: Cover the dish with plastic wrap or foil and refrigerate for at least 4 hours to allow the pudding to set and flavors to meld before serving.
Notes
- Use ripe but firm bananas to avoid mushiness in the pudding.
- For best results, refrigerate overnight to let flavors fully develop.
- Can be garnished with fresh whipped cream or extra crushed vanilla wafers before serving.
- Make sure Cool Whip is fully thawed for smooth incorporation.
- This dessert is best served cold and should be kept refrigerated.

