
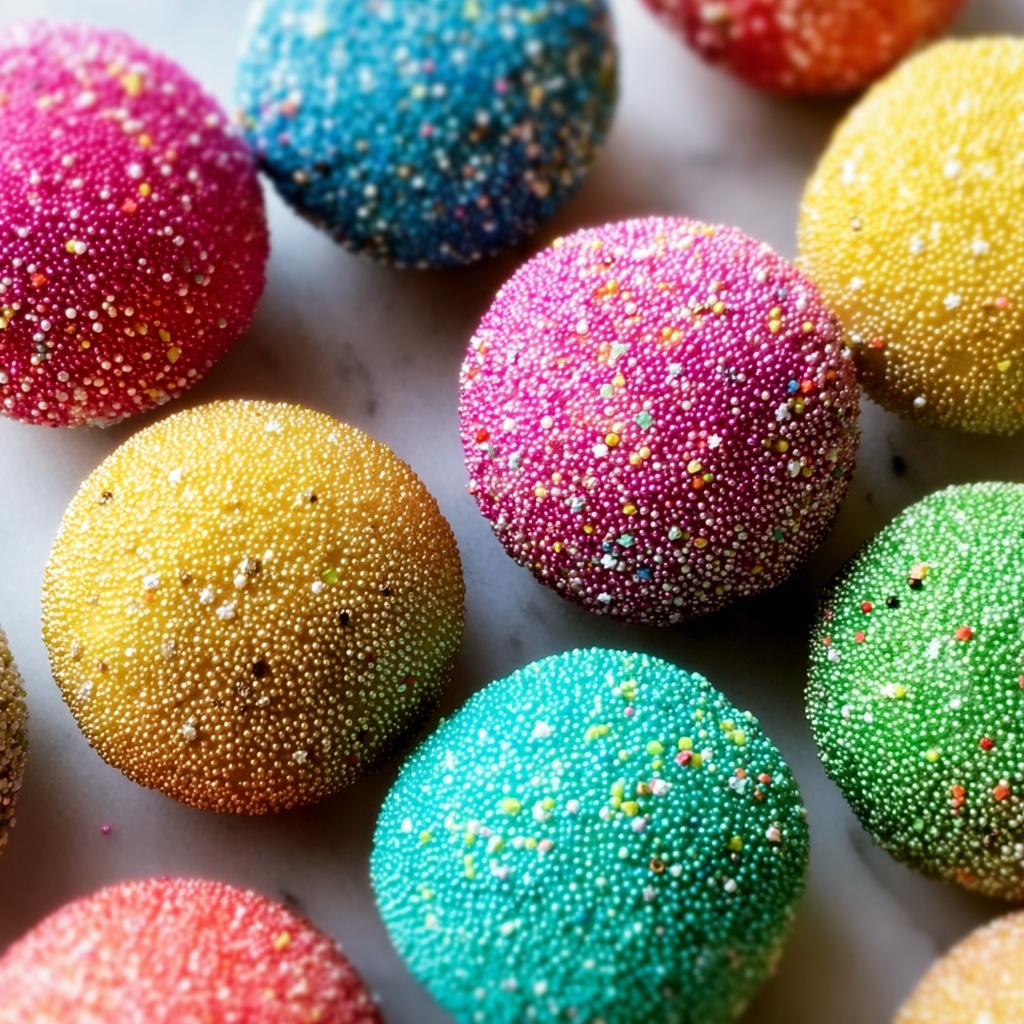
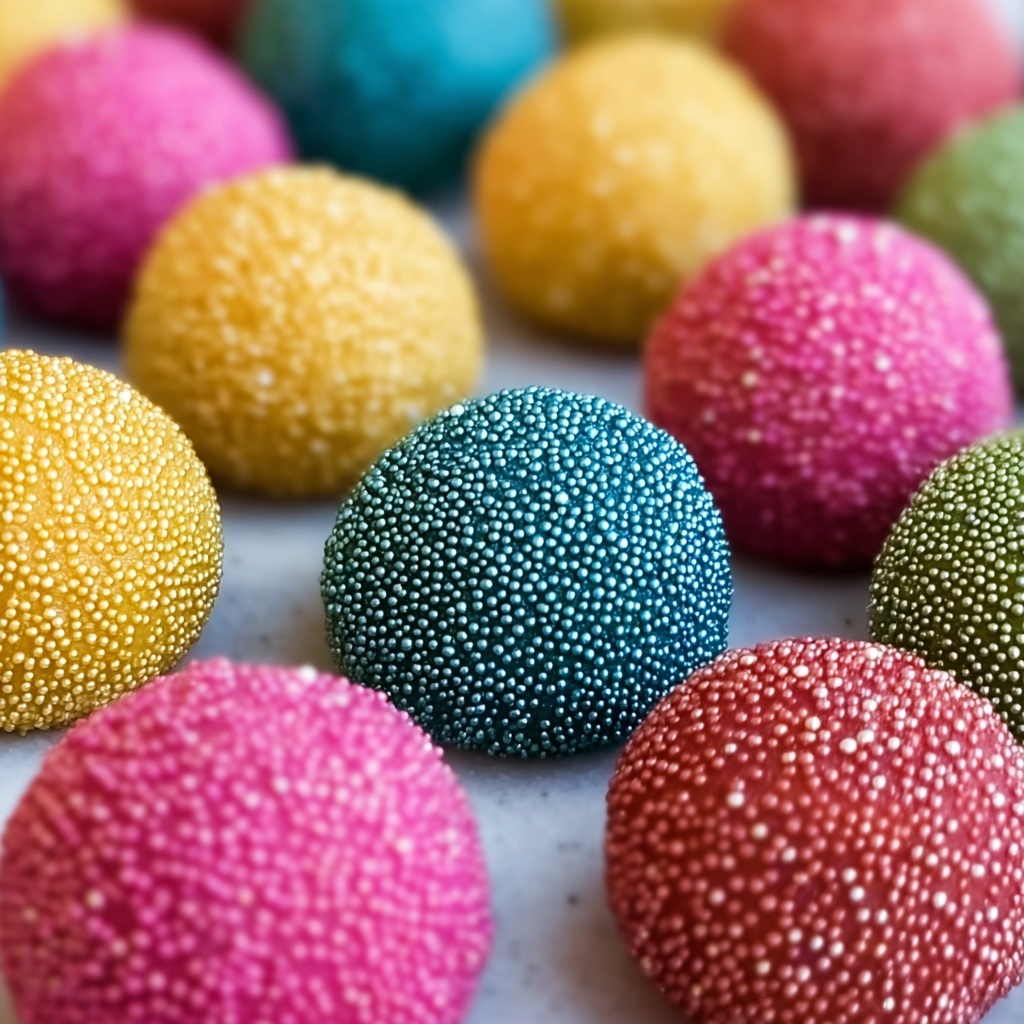
If you are looking to create a dessert that wows both in taste and appearance, this Glitter Cookie Balls Recipe is an absolute must-try. These delightful little treats combine the rich, creamy texture of cream cheese with the crumbly goodness of crushed cookies, all wrapped up in a luscious coat of chocolate that sparkles with edible glitter. Perfect for celebrations, gifts, or simply brightening up any day, these cookie balls are as fun to make as they are to eat, offering a delicious bite-sized indulgence that never fails to impress.
Ingredients You’ll Need
Gathering these simple yet essential ingredients is the first step to bringing your Glitter Cookie Balls Recipe to life. Each component plays a crucial role: cookies provide the crumbly base, cream cheese adds creamy richness, chocolate creates a smooth coating, and edible glitter delivers that enchanting sparkle.
- Crushed cookies: Choose Oreos, vanilla wafer cookies, or shortbread cookies for different flavors and textures in your cookie mixture.
- Cream cheese (8 oz, softened): This is what binds the cookie crumbs together, lending a rich and tangy creaminess.
- Vanilla extract (1 tsp, optional): Adds a subtle sweetness and depth of flavor to the cookie mixture.
- White chocolate chips (12 oz): Used for coating, you can swap with milk chocolate for a different taste profile.
- Vegetable or coconut oil (2 tbsp): Helps achieve a smooth, glossy chocolate coating that’s easy to work with.
- Edible glitter or shimmer powder: The magical finishing touch that turns these cookie balls into sparkling delights.
How to Make Glitter Cookie Balls Recipe
Step 1: Prepare the Cookie Mixture
Start by crushing your cookies finely; this is the foundation of your cookie balls. You can get this done with a food processor or place cookies in a sealed plastic bag and crush them with a rolling pin for a more hands-on method. The finer the crumbs, the smoother your cookie balls will be.
Step 2: Combine with Cream Cheese and Vanilla
Next, add the softened cream cheese and vanilla extract to the cookie crumbs. Mix them together thoroughly until you get a sticky, moldable mixture. If it feels a little dry, keep mixing; if it’s too wet, add a touch more crushed cookies.
Step 3: Roll into Balls
Using your hands, roll the cookie mixture into small, bite-sized balls, about an inch in diameter. Try to keep them roughly the same size to ensure even chilling and coating. Place each ball on a parchment-lined baking sheet to prepare for the next step.
Step 4: Chill the Cookie Balls
Pop the tray of cookie balls into the refrigerator for 20 to 30 minutes. This firms them up, making the upcoming chocolate coating process much simpler and less messy.
Step 5: Melt the Chocolate Coating
While the cookie balls chill, melt your white chocolate chips with vegetable or coconut oil. To do this, heat in a microwave-safe bowl in 30-second bursts, stirring each time until smooth. Alternatively, use a double boiler for gentle melting without risk of burning.
Step 6: Coat the Cookie Balls in Chocolate
Once the cookie balls are firm and your chocolate melted, it’s time for the fun part: dipping! Use a fork or spoon to fully coat each ball with the smooth chocolate, allowing any excess to drip off before setting them back on the parchment paper.
Step 7: Add the Glitter
Don’t wait for the chocolate to dry — sprinkle the edible glitter or shimmer powder generously over each chocolate-coated ball while it’s still wet. This is what gives your Glitter Cookie Balls their signature sparkling, festive look.
Step 8: Set the Coating
Return the cookie balls to the refrigerator for 15 to 20 minutes. This final chilling step ensures the shiny chocolate coating hardens perfectly, securing that glittery finish.
Step 9: Serve and Enjoy!
Your Glitter Cookie Balls are now ready to delight! Whether sharing with friends, giving as gifts, or keeping as a special treat, they are sure to bring smiles and sweet satisfaction.
How to Serve Glitter Cookie Balls Recipe
Garnishes
Elevate your presentation with a sprinkle of extra edible glitter or a few tiny edible pearls to complement the shimmer. You can also add a dusting of powdered sugar for a frosted effect that contrasts beautifully with the sparkling coating.
Side Dishes
These Glitter Cookie Balls pair wonderfully with a creamy cup of coffee or a glass of cold milk. For a party, consider offering fresh berries or a contrasting tangy fruit dip to balance the chocolate’s sweetness.
Creative Ways to Present
Serve these cookie balls in mini cupcake liners or on a decorative platter with festive napkins to make them pop visually. For a dazzling effect, arrange them on a tiered cake stand and scatter glitter or flower petals around for an extra-special touch.
Make Ahead and Storage
Storing Leftovers
Place leftover cookie balls in an airtight container and store them in the refrigerator. Properly stored, they stay fresh and delicious for up to a week, maintaining their creamy interior and crisp chocolate shell.
Freezing
If you want to keep these treats longer, freeze them in a single layer on a baking sheet first, then transfer to a freezer-safe container. They can be frozen for up to 2 months. Thaw them in the refrigerator before serving to preserve their texture.
Reheating
These cookie balls are best enjoyed cold or at room temperature. If you prefer a softer chocolate shell, leave them at room temperature for 15 minutes before serving. Avoid microwaving as it can soften the chocolate unevenly and affect the texture.
FAQs
Can I use different types of cookies for the cookie balls?
Absolutely! Oreos, vanilla wafers, shortbread, or even chocolate chip cookies work well. Just pick cookies you enjoy eating plain since their flavor forms the base of your cookie balls.
Is it necessary to use cream cheese in the recipe?
Cream cheese adds that essential creamy binding and slight tanginess that balances the sweetness. Without it, the balls won’t hold together as well or have the same luscious texture.
What do I do if my melted chocolate seizes or gets too thick?
Adding a small amount of vegetable or coconut oil helps smooth out the melted chocolate, making it easier to coat the cookie balls evenly.
Can I use food coloring with the chocolate coating?
Yes! White chocolate can be tinted with oil-based or powdered food colorings. This is a fun way to customize your Glitter Cookie Balls Recipe for special occasions or theme parties.
Is the edible glitter safe to eat?
Make sure to use glitter specifically labeled ‘edible’ or ‘food safe.’ These are made to be ingested and will add sparkle without any harmful effects.
Final Thoughts
Making these Glitter Cookie Balls Recipe is such a joyful experience, and the end result is a dazzling, delicious treat that feels like a special celebration in every bite. Whether you’re treating friends, family, or just yourself, these gems of dessert magic will quickly become a beloved favorite. So grab those simple ingredients, roll up your sleeves, and get ready to sparkle in the kitchen!
Print
Glitter Cookie Balls Recipe
- Prep Time: 20 minutes
- Cook Time: 0 minutes
- Total Time: 1 hour
- Yield: 12 servings
- Category: Dessert
- Method: No-Cook
- Cuisine: American
Description
Glitter Cookie Balls are a fun and festive no-bake treat featuring a creamy cookie and cream cheese center, coated in smooth white chocolate and decorated with sparkling edible glitter. Perfect for parties, holidays, or gifting, these bite-sized sweets combine crunchy cookie crumbs with rich, sweet coating for an irresistible dessert.
Ingredients
Cookie Mixture
- 2 cups crushed cookies (such as Oreos, vanilla wafer cookies, or shortbread cookies)
- 8 oz cream cheese, softened
- 1 tsp vanilla extract (optional)
Coating and Decoration
- 12 oz white chocolate chips (or milk chocolate, if preferred)
- 2 tbsp vegetable oil or coconut oil (to help with smooth coating)
- Edible glitter or shimmer powder (for decoration)
Instructions
- Prepare the Cookie Mixture: In a large bowl, crush the cookies into fine crumbs either using a food processor or by placing them in a sealed plastic bag and crushing with a rolling pin.
- Combine Ingredients: Add the softened cream cheese and vanilla extract to the crushed cookies and mix thoroughly until the mixture is sticky and moldable but not too wet.
- Roll into Balls: Form the cookie mixture into small, bite-sized balls about 1 inch in diameter and place them on a parchment-lined baking sheet.
- Chill the Cookie Balls: Refrigerate the cookie balls for 20-30 minutes until firm and set, which helps them hold their shape for dipping.
- Melt the Coating: While chilling, melt the white chocolate chips with vegetable or coconut oil in a microwave-safe bowl in 30-second intervals stirring between each, or melt over a double boiler until smooth.
- Coat the Cookie Balls: Dip each chilled cookie ball completely into the melted chocolate using a fork or spoon. Let excess chocolate drip off and place coated balls back on the parchment lined tray.
- Add the Glitter: Immediately sprinkle edible glitter or shimmer powder over the wet chocolate coating to give a festive sparkle.
- Set the Coating: Refrigerate the coated cookie balls for another 15-20 minutes to allow the chocolate to harden completely.
- Serve: Once the coating is fully set, serve the Glitter Cookie Balls as delightful party treats, gifts, or snacks.
Notes
- Ensure cream cheese is softened for easy mixing.
- Use a double boiler or microwave with care to prevent chocolate from burning.
- Customize the coating by using milk or dark chocolate instead of white chocolate.
- Edible glitter must be safe for consumption; avoid craft glitters.
- Store cookie balls in an airtight container in the refrigerator for up to 5 days.


