
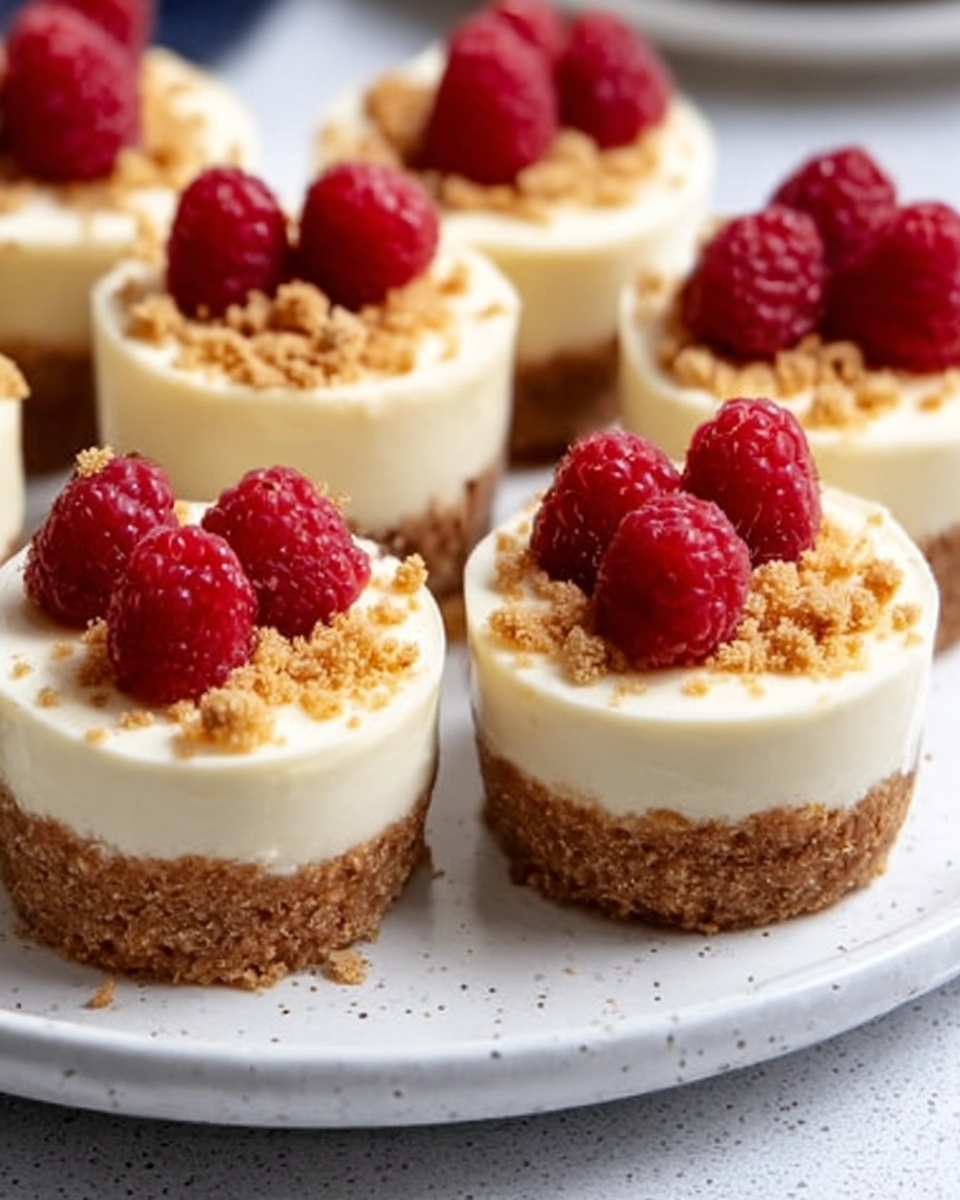
If you are on the lookout for an irresistible dessert that’s perfectly portioned and kind to your digestive system, then this Gluten-Free Mini Cheesecakes Recipe is exactly what you need. These charming little treats combine a buttery, crumbly crust with a luscious, creamy filling that melts in your mouth. Whether you are hosting a party or simply craving something sweet and special, these mini cheesecakes offer an elegant yet approachable way to enjoy a classic dessert without gluten worries. Trust me, every bite feels like a celebration!
Ingredients You’ll Need
Gathering the right ingredients is key to mastering this delightful dessert. Each component plays an essential role—from the crunchy, slightly sweet crust to the rich and creamy filling, every ingredient has a purpose that enhances texture, flavor, or appearance.
- Gluten-free graham cracker crumbs: Provides the perfect crumbly, buttery base without gluten for those sensitive to it.
- Unsalted butter, melted: Binds the crumbs with a rich flavor and helps create a crisp crust.
- Granulated sugar: Adds sweetness to both crust and filling, balancing the tanginess of cream cheese.
- Cream cheese, softened: The heart of the cheesecake ensuring a silky and dense texture.
- Pure vanilla extract: Infuses warmth and sweetness enhancing the overall flavor profile.
- Large eggs: Act as a natural binder while adding richness to the filling.
- Sour cream: Gives the cheesecake a slight tang and creamy finish.
- Pinch of salt: Elevates and balances the sweetness for a nuanced taste.
- Fresh berries: Perfect for topping, adding natural color and a burst of freshness.
- Whipped cream: Adds an airy sweetness that complements the dense cheesecake.
- Chocolate drizzle: Optional but irresistible for a touch of indulgence and beautiful presentation.
How to Make Gluten-Free Mini Cheesecakes Recipe
Step 1: Prepare Your Oven and Muffin Tin
Start by preheating your oven to 325°F (160°C). Line a 12-cup muffin tin with paper liners; this makes removing the mini cheesecakes effortless and keeps their shape pristine.
Step 2: Make the Crust
Mix the gluten-free graham cracker crumbs, melted butter, and 2 tablespoons of sugar in a bowl until every crumb is coated and slightly moistened. This ensures a crust that holds together beautifully while baking.
Step 3: Press the Crust into Muffin Cups
Divide the crust mixture evenly among the muffin cups, pressing it firmly into the bottom to form a sturdy base. Taking your time here helps your crust stay intact when serving.
Step 4: Prepare the Cheesecake Filling
In a large bowl, beat the softened cream cheese with 1/2 cup sugar until smooth and creamy. Then, add the vanilla extract, eggs one at a time, sour cream, and a pinch of salt. Mix these ingredients just until combined; too much mixing can make the filling dense.
Step 5: Assemble and Bake
Spoon the cheesecake batter into each muffin cup, filling about 3/4 full to leave room for even baking and a perfect dome shape. Bake your mini cheesecakes for 18-20 minutes—you’ll know they’re done when the centers are set but still slightly jiggly.
Step 6: Cool and Chill
Allow the cheesecakes to cool to room temperature right in the pan. Then transfer them to the refrigerator for at least 2 hours to chill and firm up, which helps develop their signature creamy texture.
How to Serve Gluten-Free Mini Cheesecakes Recipe
Garnishes
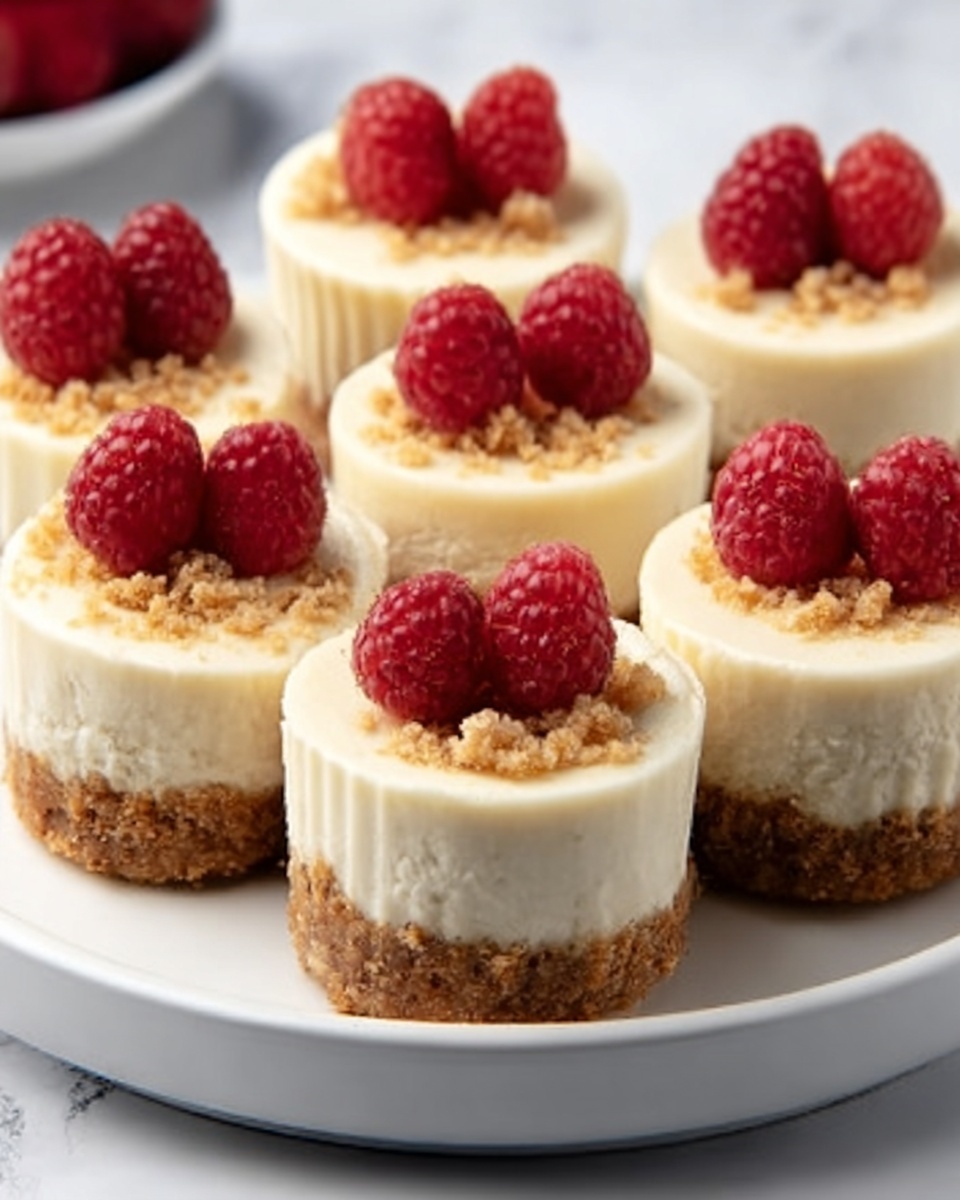
The toppings you choose can elevate your Gluten-Free Mini Cheesecakes Recipe from simple to spectacular. Fresh berries add a bright, natural burst that contrasts beautifully with the creamy filling. Whipped cream introduces a light, airy sweetness, while a drizzle of rich chocolate adds decadence and a luxurious finish.
Side Dishes
Pair your mini cheesecakes with a cup of freshly brewed coffee or herbal tea to balance the sweetness. For a festive spread, fresh fruit salads or a tangy citrus sorbet can provide a refreshing palate cleanser between bites.
Creative Ways to Present
For a playful twist, serve these mini cheesecakes in decorative cupcake liners or on a tiered dessert stand for gatherings. Garnishing each with edible flowers or a sprinkle of finely chopped nuts can add texture and visual appeal that is sure to impress your guests.
Make Ahead and Storage
Storing Leftovers
Your mini cheesecakes keep beautifully in an airtight container in the refrigerator for up to 4 days. Keeping them chilled preserves their creamy texture and fresh flavor, making them a convenient dessert option for busy days.
Freezing
If you want to enjoy these treats later, wrap each mini cheesecake individually in plastic wrap and place them in a sealed freezer bag. They will keep in the freezer for up to 2 months without losing their delicious flavor or texture.
Reheating
To enjoy frozen mini cheesecakes, thaw them overnight in the refrigerator. There’s no need to heat them; serving chilled actually enhances the creaminess and overall experience of this dessert.
FAQs
Can I use regular graham crackers instead of gluten-free?
While regular graham crackers work well in traditional recipes, using gluten-free graham cracker crumbs ensures everyone, including those with gluten sensitivities, can enjoy the dessert without worry.
What if I don’t have sour cream?
Sour cream adds a slight tang and moisture to the batter. If you don’t have it on hand, you can substitute with Greek yogurt, which provides a similar texture and flavor profile.
How do I prevent the cheesecake filling from cracking?
Avoid overmixing the batter and bake at the recommended low temperature. Cooling the cheesecakes gradually at room temperature before refrigerating also helps minimize cracks on the surface.
Can I make these mini cheesecakes vegan?
Making this exact recipe vegan would require significant substitutions for cream cheese, eggs, and butter. However, with specialized vegan cream cheese and egg replacers, you can experiment to create a similar delightful treat.
Are there any tips for picking the best cream cheese?
Choose cream cheese that is full-fat and fresh, as it provides the best texture and flavor in your cheesecake. Softer, room-temperature cream cheese blends more smoothly into the batter, ensuring a silky filling.
Final Thoughts
With its perfect balance of flavors and textures, this Gluten-Free Mini Cheesecakes Recipe is a game-changer for anyone craving dessert without compromise. Easy to make and universally loved, it feels like a special occasion treat every time. I encourage you to give it a try—once you do, these little bites of bliss might just become your new favorite dessert to share again and again!
Print
Gluten-Free Mini Cheesecakes Recipe
- Prep Time: 20 minutes
- Cook Time: 20 minutes
- Total Time: 2 hours 40 minutes
- Yield: 12 mini cheesecakes
- Category: Dessert
- Method: Baking
- Cuisine: American
- Diet: Gluten Free
Description
These Gluten-Free Mini Cheesecakes are a delightful and creamy dessert perfect for any occasion. Featuring a crunchy gluten-free graham cracker crust and a smooth, rich cream cheese filling, these individual cheesecakes are easy to make and deliciously satisfying. Topped with fresh berries, whipped cream, or a chocolate drizzle, they offer a perfect balance of flavor and texture while catering to gluten-sensitive diets.
Ingredients
Crust
- 1 1/2 cups gluten-free graham cracker crumbs
- 4 tablespoons unsalted butter, melted
- 2 tablespoons granulated sugar
Filling
- 16 oz cream cheese, softened
- 1/2 cup granulated sugar
- 1 teaspoon pure vanilla extract
- 2 large eggs
- 2 tablespoons sour cream
- Pinch of salt
Toppings (Optional)
- Fresh berries
- Whipped cream
- Chocolate drizzle
Instructions
- Preheat Oven and Prepare Pan: Preheat your oven to 325°F (160°C) and line a 12-cup muffin tin with paper liners to prevent sticking and easy removal of the mini cheesecakes.
- Make the Crust Mixture: In a mixing bowl, combine gluten-free graham cracker crumbs, melted unsalted butter, and 2 tablespoons of granulated sugar. Mix thoroughly until the crumbs are evenly coated with butter, ensuring a firm crust.
- Form the Crust Base: Divide the crust mixture evenly among the muffin cups. Press the crumbs firmly into the bottom of each cup to form a compact base. Set aside while preparing the filling.
- Beat Cream Cheese and Sugar: In a large bowl, beat the softened cream cheese and 1/2 cup granulated sugar together until smooth and creamy, making sure there are no lumps.
- Add Remaining Filling Ingredients: Mix in the vanilla extract, then add the eggs one at a time, beating gently after each addition. Stir in sour cream and a pinch of salt, mixing just until combined to avoid overmixing, which can cause cracks.
- Fill Muffin Cups: Spoon the cheesecake batter over the prepared crusts in the muffin tin, filling each cup about three-quarters full to allow room for slight expansion during baking.
- Bake the Mini Cheesecakes: Bake in the preheated oven for 18-20 minutes until the centers are set but still have a slight jiggle. This ensures a creamy texture.
- Cool and Chill: Allow the cheesecakes to cool to room temperature in the pan. Once cooled, refrigerate for at least 2 hours or longer to fully set and develop flavors.
- Add Toppings and Serve: Before serving, top each mini cheesecake with fresh berries, whipped cream, or a drizzle of chocolate, according to your preference for an added touch of sweetness and elegance.
Notes
- Ensure cream cheese is softened to room temperature for easier mixing and a smooth batter.
- Do not overmix the cheesecake batter to prevent cracks and avoid dense texture.
- Chilling time is important for setting the cheesecake properly; ideally refrigerate for 2-4 hours or overnight.
- Use gluten-free graham crackers to maintain the gluten-free status of the recipe.
- Customize toppings based on season or preference for variety and presentation.


