
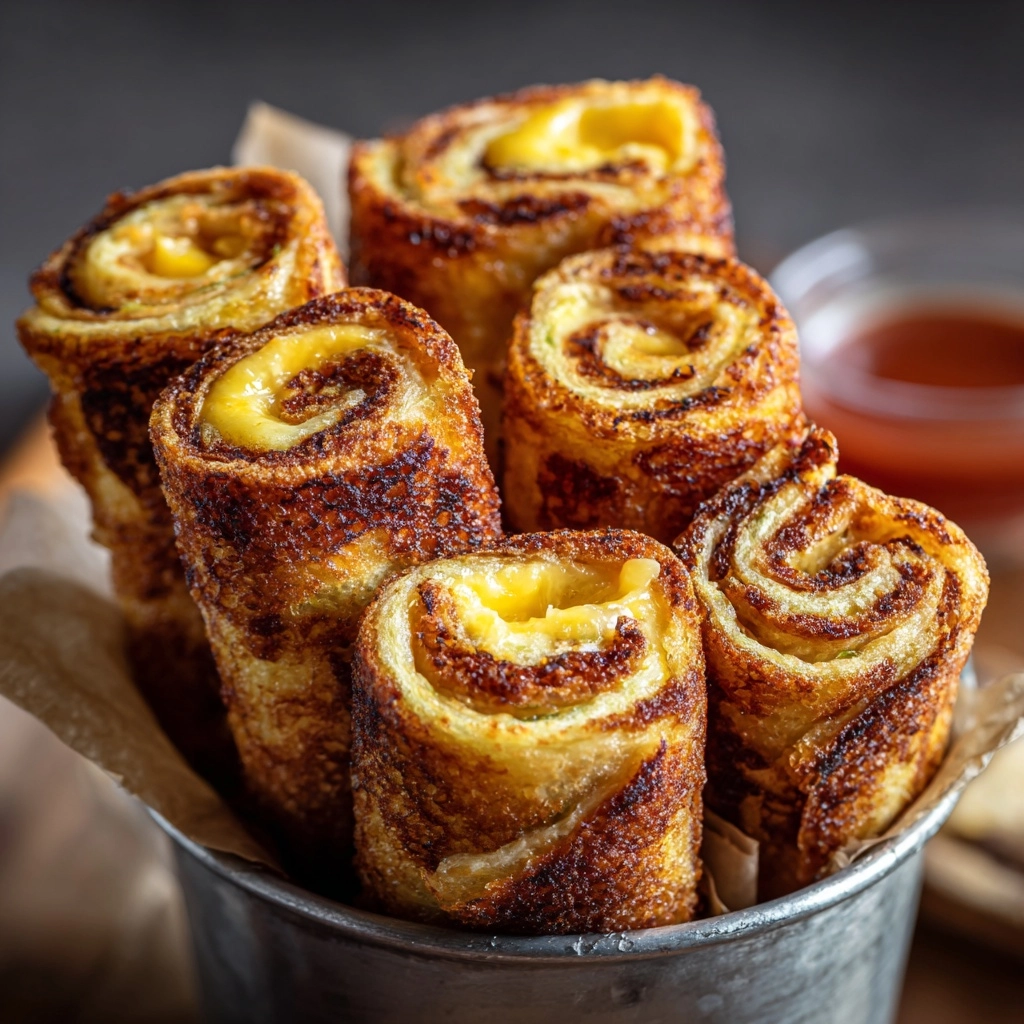
If you’re looking for the ultimate nostalgic comfort food with a playful twist, Grilled Cheese Roll Ups are about to become your new obsession. Imagine the gooey, golden, and crisp magic of classic grilled cheese, but rolled up into perfect, dippable bites! These roll ups offer the same cheesy satisfaction, but with a fun, snackable spin that makes them irresistible for kids and adults alike. Whether you’re whipping up a quick lunch, a crowd-pleasing snack, or a late-night treat, these Grilled Cheese Roll Ups check every box for flavor, ease, and a touch of childhood joy.
Ingredients You’ll Need
You only need a handful of simple ingredients to create Grilled Cheese Roll Ups, but each one is essential for building those signature crispy edges and melty, cheesy centers. Let’s break down what makes each component so special:
- Sandwich bread (8 slices, crusts removed): Soft, classic white bread is easiest to roll and crisps up beautifully, but feel free to use your favorite variety.
- Cheddar cheese or American cheese (8 slices): These melt perfectly, giving you that classic grilled cheese flavor and the perfect cheese pull.
- Unsalted butter (2 tablespoons, softened): Butter is key for creating that golden, crispy exterior and adding rich flavor.
- Optional dipping sauces (like tomato soup or marinara): A zesty dip takes these roll ups over the top and adds a tangy, comforting finish to each bite.
How to Make Grilled Cheese Roll Ups
Step 1: Flatten the Bread
Start by taking each slice of bread and removing the crusts. Lay the slices out on a clean surface and use a rolling pin to gently flatten them until they’re nice and thin. This step is key—thinner bread rolls up easily and gets extra crispy in the pan, making your Grilled Cheese Roll Ups perfectly golden on all sides.
Step 2: Add the Cheese and Roll
Lay a slice of cheese on each piece of flattened bread. If you’re feeling adventurous, sprinkle a little garlic powder or Italian seasoning on the cheese for extra flavor. Carefully roll each slice up tightly, pressing gently as you go to keep everything snug—this keeps the cheese tucked in and ready to melt.
Step 3: Butter and Heat the Skillet
Heat a nonstick skillet over medium heat while you brush the outside of each roll up lightly with softened butter. The butter not only adds flavor but helps the roll ups develop that irresistible crispy, golden crust as they cook.
Step 4: Cook Until Golden Brown
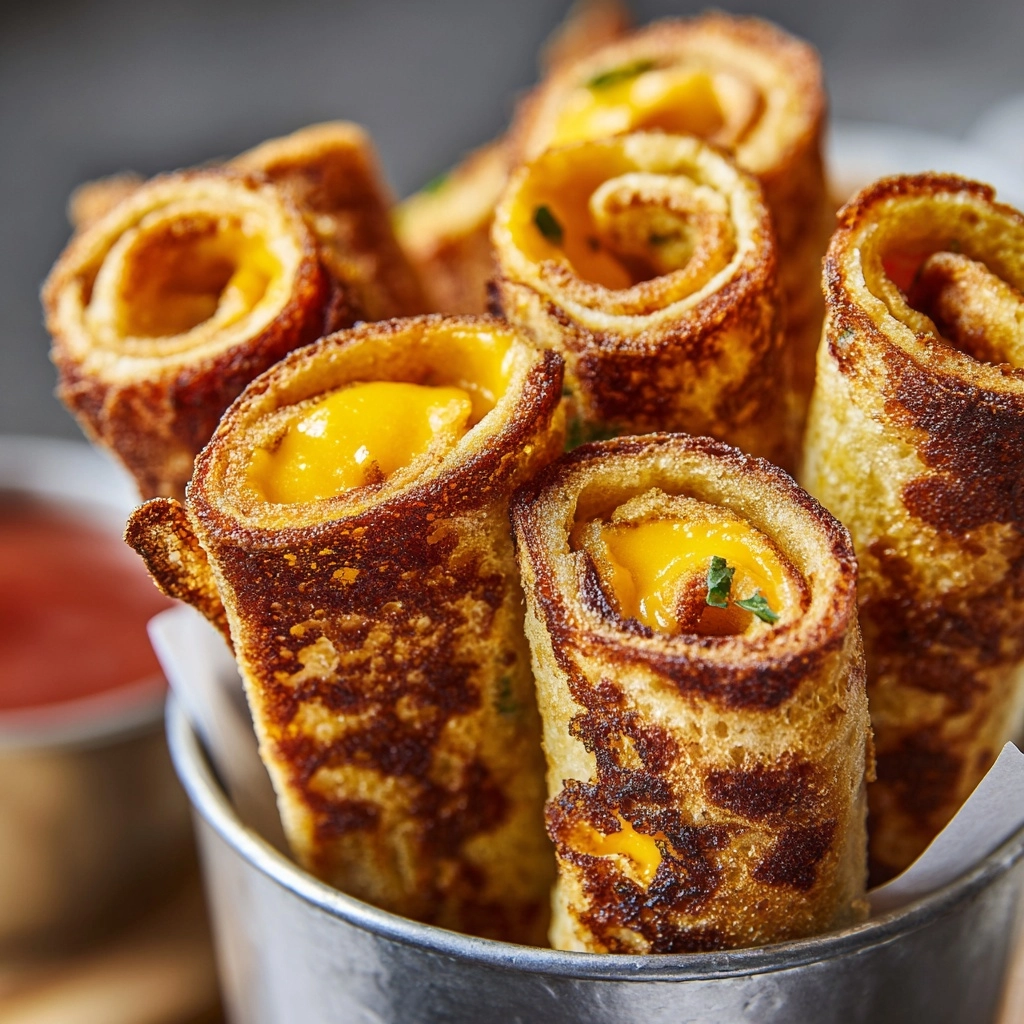
Place your Grilled Cheese Roll Ups seam-side down in the hot skillet. Cook for 2 to 3 minutes per side, turning with tongs as needed, until all sides are beautifully golden and the cheese is perfectly melted inside. This step is where the magic happens—the outsides become crisp while the insides turn melty and delicious.
Step 5: Serve Warm
Once your roll ups are golden and crisp, transfer them to a plate and serve warm. Pair them with your favorite dipping sauce, like tomato soup or marinara, for the ultimate cozy snack or lunch.
How to Serve Grilled Cheese Roll Ups
Garnishes
For a pop of color and flavor, sprinkle your Grilled Cheese Roll Ups with a little chopped parsley or fresh basil just before serving. A dusting of parmesan or a crack of black pepper also adds a touch of sophistication without any extra fuss.
Side Dishes
These roll ups are dreamy alongside a bowl of rich tomato soup, but they’re also great with a crisp green salad or crunchy veggie sticks for a well-rounded meal. For a heartier option, serve them with a side of fries or sweet potato wedges for the ultimate comfort food platter.
Creative Ways to Present
Arrange your Grilled Cheese Roll Ups on a platter with small ramekins of different dipping sauces for a fun, interactive appetizer spread. You can also slice them into bite-sized pieces and secure each with a toothpick—perfect for parties or kid-friendly snack plates!
Make Ahead and Storage
Storing Leftovers
If you find yourself with extra Grilled Cheese Roll Ups, let them cool completely before transferring to an airtight container. Store them in the refrigerator for up to 2 days. They reheat beautifully and retain their satisfying crispness with the right approach.
Freezing
To freeze, arrange the cooled roll ups on a baking sheet and freeze until firm, then transfer to a zip-top bag or freezer-safe container. They can be kept frozen for up to a month. Just be sure to separate layers with parchment paper to prevent sticking.
Reheating
For best results, reheat Grilled Cheese Roll Ups in a skillet over medium heat until warmed through and crisp again. You can also reheat them in a toaster oven or air fryer for a couple of minutes. The microwave works in a pinch, but the bread won’t be as crisp.
FAQs
Can I use different types of cheese for Grilled Cheese Roll Ups?
Absolutely! While cheddar and American cheese are classic choices for their meltability and flavor, you can try mozzarella, pepper jack, Swiss, or even a blend for a fun twist. Just be sure the cheese slices are thin enough to roll easily.
How do I prevent the roll ups from unrolling in the pan?
Rolling the bread tightly and placing the seam side down in the skillet helps them hold their shape. If you’re still worried about them unrolling, you can secure each roll up with a toothpick while cooking—just remember to remove it before serving!
Are Grilled Cheese Roll Ups good for meal prep?
They’re a great make-ahead snack! Prepare and cook the roll ups, then store and reheat as needed. They’re perfect for packing in lunchboxes or grabbing for a quick snack throughout the week.
Can I make these Grilled Cheese Roll Ups gluten-free?
Yes, simply use your favorite gluten-free sandwich bread. The process is exactly the same, and you’ll still get that crunchy, cheesy bite everyone loves.
What are some dipping sauce ideas besides tomato soup?
Besides classic tomato soup, try marinara, ranch, honey mustard, or even a creamy sriracha mayo for a spicy kick. The possibilities are endless and let you customize your Grilled Cheese Roll Ups experience every time!
Final Thoughts
There’s just something magical about sharing Grilled Cheese Roll Ups—whether you’re serving them to kids, friends, or just treating yourself to a cozy snack. They’re quick, endlessly customizable, and seriously fun to eat. Trust me, these little roll ups are about to earn a permanent spot in your snack and lunch rotation. Give them a try and watch them disappear!
Print
Grilled Cheese Roll Ups Recipe
- Prep Time: 10 minutes
- Cook Time: 10 minutes
- Total Time: 20 minutes
- Yield: 8 roll ups
- Category: Snack
- Method: Stovetop
- Cuisine: American
- Diet: Vegetarian
Description
Grilled Cheese Roll Ups are a quick and delicious snack featuring melted cheddar cheese wrapped in thin, buttery bread. Perfect as a kid-friendly treat or easy lunch, these crispy golden rolls pair wonderfully with your favorite dipping sauces like tomato soup or marinara.
Ingredients
Ingredients
- 8 slices sandwich bread (crusts removed)
- 8 slices cheddar cheese (or American cheese)
- 2 tablespoons unsalted butter (softened)
- Optional: dipping sauces such as tomato soup or marinara
Instructions
- Prepare the bread: Flatten each slice of bread with a rolling pin until thin to make rolling easier and create a crispy texture when cooked.
- Add cheese and roll: Place one slice of cheddar cheese on each flattened bread slice, then roll up tightly to enclose the cheese completely.
- Heat the skillet: Preheat a nonstick skillet over medium heat and brush it lightly with softened butter to prevent sticking and add flavor.
- Cook the roll ups: Place the rolls seam-side down in the skillet and cook for 2 to 3 minutes per side, turning as needed, until all sides turn golden brown and the cheese inside is melted.
- Serve warm: Remove the roll ups from the skillet and serve immediately with your favorite dipping sauces like tomato soup or marinara for a delicious cheesy snack.
Notes
- Add a sprinkle of garlic powder or Italian seasoning inside the bread before rolling for extra flavor.
- Try different cheeses like mozzarella or pepper jack for a tasty twist on the classic version.
- Make sure to remove the crusts before rolling for a smoother roll.
- Serve these roll ups warm for the best melty and crispy texture experience.
Nutrition
- Serving Size: 1 roll up
- Calories: 140
- Sugar: 1g
- Sodium: 280mg
- Fat: 9g
- Saturated Fat: 5g
- Unsaturated Fat: 3g
- Trans Fat: 0g
- Carbohydrates: 11g
- Fiber: 0g
- Protein: 5g
- Cholesterol: 20mg

