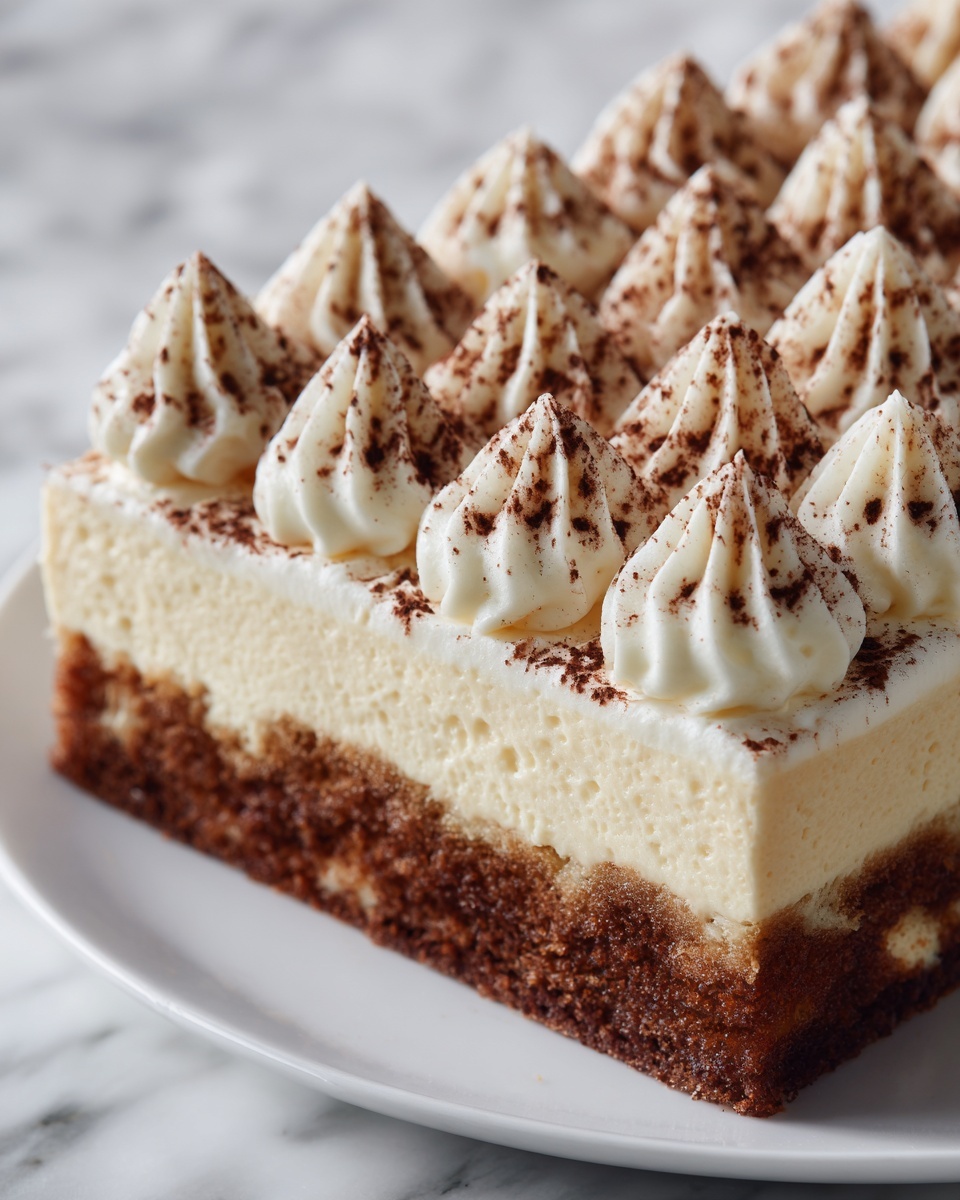
There is something truly magical about the way textures and flavors come together in this Hot Chocolate Meringue Cake Recipe. Imagine crisp, cocoa-kissed meringue layers that gently crumble to the bite, perfectly complemented by cloud-like whipped cream that melts in your mouth. The subtle hint of cayenne pepper adds an unexpected warmth that elevates the classic chocolate experience. This cake isn’t just a dessert, it’s a little celebration on a plate, perfect for sharing with friends or treating yourself to a slice of pure joy.
Ingredients You’ll Need
The beauty of this Hot Chocolate Meringue Cake Recipe lies in its simplicity. Each ingredient plays a vital role in creating the perfect balance of flavor, texture, and appearance. From the airy egg whites that form the delicate meringue to the rich cocoa powder and the gentle heat of cayenne pepper, every component is essential.
- 6 egg whites: The foundation of your meringue, whipped to airy perfection for that crisp, delicate texture.
- 1 tablespoon cream of tartar: Helps stabilize the egg whites and ensures your meringue holds its shape.
- 1 1/4 cups sugar: Sweetens and strengthens the meringue, contributing to a glossy finish and crunch.
- 3 tablespoons sifted cocoa powder: Infuses deep chocolate flavor and beautiful color into the meringue layers.
- 1/8 teaspoon cayenne pepper: Adds a subtle, surprising warmth that elevates the chocolate without overpowering it.
- 4 cups whipped cream (freshly whipped, unsweetened): Offers a luscious, light contrast to the crisp meringue, rounding out the cake’s flavor profile.
How to Make Hot Chocolate Meringue Cake Recipe
Step 1: Prepare the Oven and Pans
Start by preheating your oven to a low temperature that will allow the meringues to dry out slowly without browning. Line two baking pans with parchment paper, then carefully draw two 9-inch circles on the center of each sheet. These circles will guide you in shaping the meringue layers evenly, so your cake has a beautiful, uniform look.
Step 2: Make the Meringue
In a clean, grease-free bowl, whisk the egg whites along with the cream of tartar on high speed. Once soft peaks start to form, gradually add sugar in a slow stream, continuing to whip. When the mixture becomes glossy and stiff peaks develop, gently sift in the cocoa powder and cayenne pepper. Carefully fold these into the meringue, or continue to beat briefly until well combined without deflating the mixture.
Step 3: Shape and Bake
Spoon the meringue inside the penciled circles on your parchment-lined pans. Smooth each into an even layer, making sure not to go beyond the circle edges. Bake the meringue layers low and slow for about 3 hours. Once baking is complete, turn off the oven and leave the meringues inside for an additional hour with the door closed. This slow drying process ensures a perfect crisp texture without cracks.
Step 4: Cool the Meringue Layers
After the oven time, remove the meringue layers carefully and let them cool completely on a wire rack. It’s crucial to store them in a dry, cool place at this point to keep their crispness intact until you’re ready to assemble your cake.
Step 5: Assemble the Cake
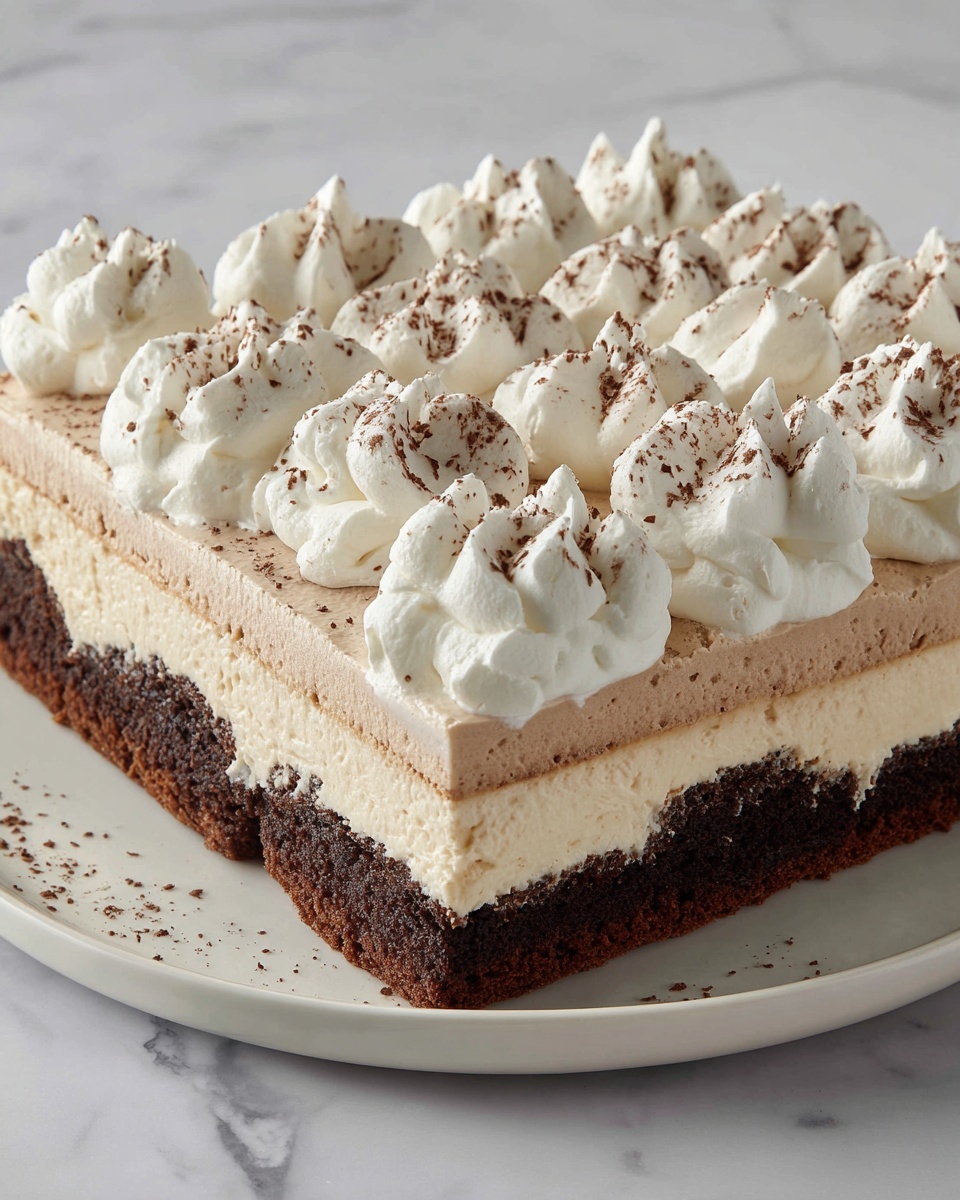
To assemble your Hot Chocolate Meringue Cake Recipe, spread half of your freshly whipped cream over the first meringue layer. Gently place the second layer on top and finish with the remaining whipped cream spread evenly. The contrast between the crunchy meringue and silky cream makes each bite feel indulgent yet light.
Step 6: Serve
This cake is best enjoyed fresh but also holds its charm a few hours later. Slice carefully to preserve the delicate layers and prepare to delight your guests or family with a dessert that’s as impressive as it is delicious.
How to Serve Hot Chocolate Meringue Cake Recipe

Garnishes
Decorate the top with a dusting of cocoa powder or a few chocolate shavings for an elegant finish. Fresh berries like raspberries or strawberries bring a vibrant pop of color and a tart balance to the sweet cream and rich chocolate flavors.
Side Dishes
This cake pairs beautifully with a cup of freshly brewed coffee or a glass of cold milk. For a decadent experience, add a scoop of vanilla bean ice cream alongside, which melts charmingly over the crisp meringue layers.
Creative Ways to Present
For a stunning presentation, try stacking mini versions of this cake in individual glass parfaits with layers of whipped cream and fresh fruit. Alternatively, arrange slices on a platter with edible flowers or a drizzle of raspberry coulis for a special occasion touch.
Make Ahead and Storage
Storing Leftovers
Keep any leftover cake covered in the refrigerator in an airtight container. Because of the whipped cream, it’s best consumed within two days to maintain freshness, but the meringue layers might soften slightly over time.
Freezing
While the assembled cake doesn’t freeze well due to the whipped cream, you can freeze the baked meringue layers separately. Place them between sheets of parchment paper inside a freezer-safe bag, and thaw gently at room temperature before use to retain their crispness.
Reheating
Meringue cakes are best enjoyed cold or at room temperature. If you want to refresh the meringue’s crispness slightly, place the individual layers in a low oven for a few minutes before assembling, but do this sparingly to avoid burning or browning.
FAQs
Can I make this cake without cream of tartar?
Cream of tartar helps stabilize the egg whites for a firmer meringue. If you don’t have it, you can substitute with a few drops of lemon juice or white vinegar, but the texture might be a bit less stable.
Why is there cayenne pepper in the recipe?
Adding cayenne pepper introduces a mild heat that enhances the chocolate flavor and adds an unexpected depth. It’s subtle and won’t make the cake spicy, just intriguingly warm.
How do I know when the meringue is done baking?
The meringue layers should be dry and crisp to the touch, with no tacky spots. They should easily lift off the parchment and sound hollow when tapped gently.
Can I use store-bought whipped cream for the filling?
Freshly whipped cream is best as it has a lighter, fluffier texture without added stabilizers or sugars. However, in a pinch, high-quality whipped cream from a can or tub can work if sweetened and handled gently.
Is this cake suitable for special occasions?
Absolutely! The Hot Chocolate Meringue Cake Recipe is elegant, unique, and sure to impress at birthdays, holidays, or any celebration needing a memorable dessert.
Final Thoughts
If you’re looking for a dessert that’s both show-stopping and delightfully delicious, you can’t go wrong with the Hot Chocolate Meringue Cake Recipe. It’s a celebration of crisp, airy meringue combined with rich chocolate and luscious whipped cream that feels like a treat every time you savor it. Give it a try, and watch this cake quickly become a beloved favorite in your kitchen.
Print
Hot Chocolate Meringue Cake Recipe
- Prep Time: 20 minutes
- Cook Time: 3 hours
- Total Time: 3 hours 50 minutes
- Yield: 8 servings
- Category: Dessert
- Method: Baking
- Cuisine: International
- Diet: Vegetarian
Description
This Hot Chocolate Meringue Cake is a delicate and airy dessert featuring crisp cocoa-flavored meringue layers with a hint of cayenne pepper, filled and topped with fresh, unsweetened whipped cream. Light yet indulgent, it offers a unique twist on classic meringue with a subtle spicy kick and rich chocolaty flavor, perfect for special occasions or an elegant treat.
Ingredients
Meringue
- 6 egg whites
- 1 tablespoon cream of tartar
- 1 1/4 cups sugar
- 3 tablespoons sifted cocoa powder
- 1/8 teaspoon cayenne pepper
Filling
- 4 cups freshly whipped cream (unsweetened)
Instructions
- Prepare the Oven and Pans: Preheat your oven to a low temperature suitable for drying meringues (around 200°F or 90°C). Line two baking pans with parchment paper and carefully draw two 9-inch diameter circles on the paper; these will guide the shape of your meringue layers.
- Make the Meringue: In a clean, dry bowl, beat 6 egg whites with 1 tablespoon of cream of tartar until soft peaks form. Gradually add 1 1/4 cups of sugar in a slow stream while beating on high speed. When the mixture becomes glossy and holds soft peaks, sift in 3 tablespoons of cocoa powder and 1/8 teaspoon of cayenne pepper. Continue to beat until stiff peaks form, ensuring the meringue holds firm and is smooth.
- Shape and Bake: Spoon or pipe the meringue within the drawn 9-inch circles on the parchment-lined baking sheets, smoothing the tops. Place the pans in the oven and bake for 3 hours, allowing the meringues to dry out slowly without browning too much.
- Cool the Meringue Layers: After baking for 3 hours, turn off the oven but keep the door closed. Let the meringues sit in the cooling oven for an additional hour to ensure they dry completely. Once cooled, store them in a very dry, cool place until ready to assemble the cake.
- Assemble the Cake: Place one meringue layer on a serving plate. Spread half of the freshly whipped cream evenly over it. Carefully top with the second meringue layer, then spread the remaining whipped cream on top, smoothing it out for a beautiful finish.
- Serve: The cake is best served fresh, immediately after assembly, to enjoy the contrast between the crisp meringue and the creamy whipped cream.
Notes
- Use room temperature egg whites for best volume and stability.
- Ensure no yolk contaminates the egg whites to achieve proper meringue peaks.
- The cayenne pepper adds a subtle heat that enhances the chocolate flavor but can be adjusted or omitted depending on preference.
- Keep the meringues in a dry place to prevent them from becoming sticky or soft before assembly.
- For an extra touch, garnish the top of the cake with shaved dark chocolate or a dusting of cocoa powder before serving.


