
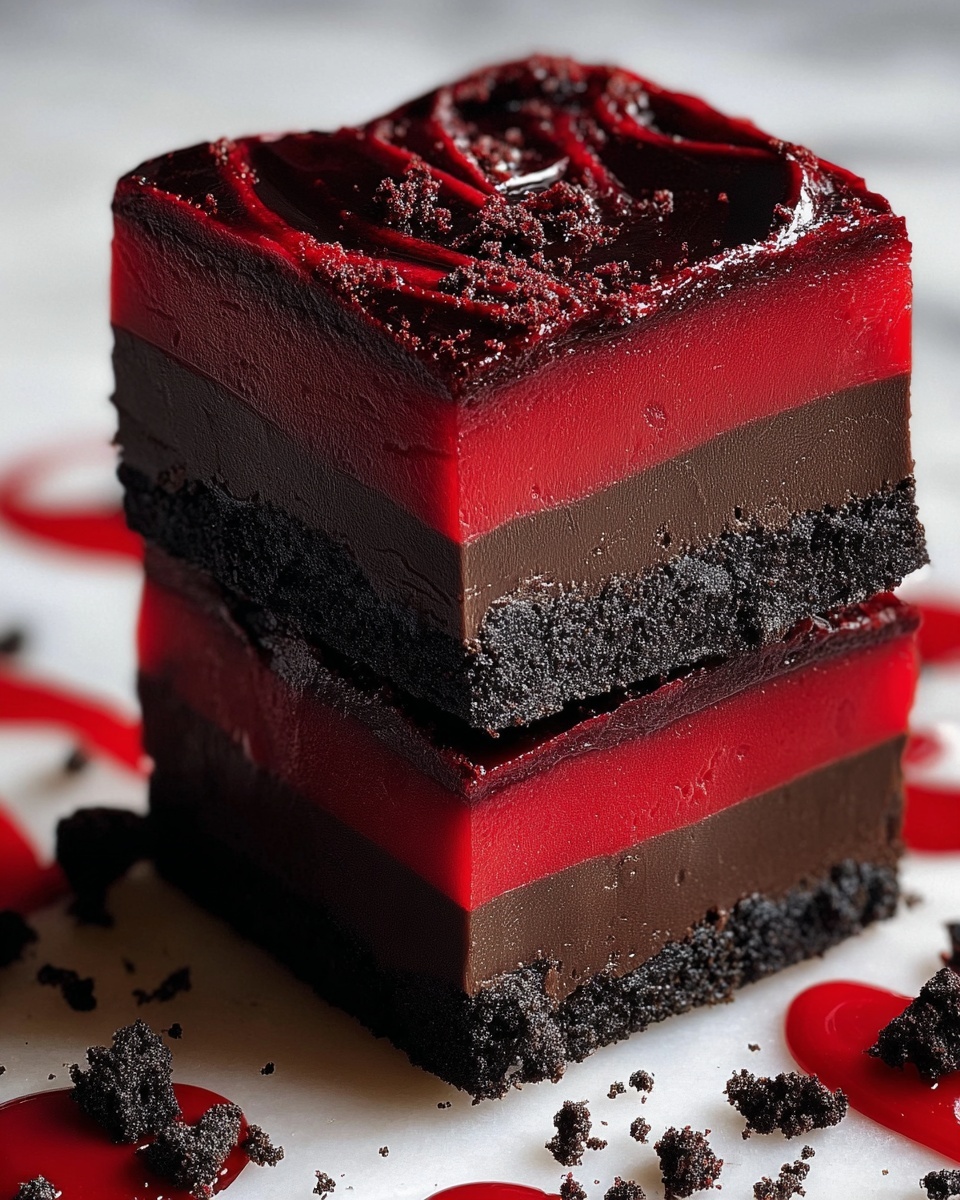
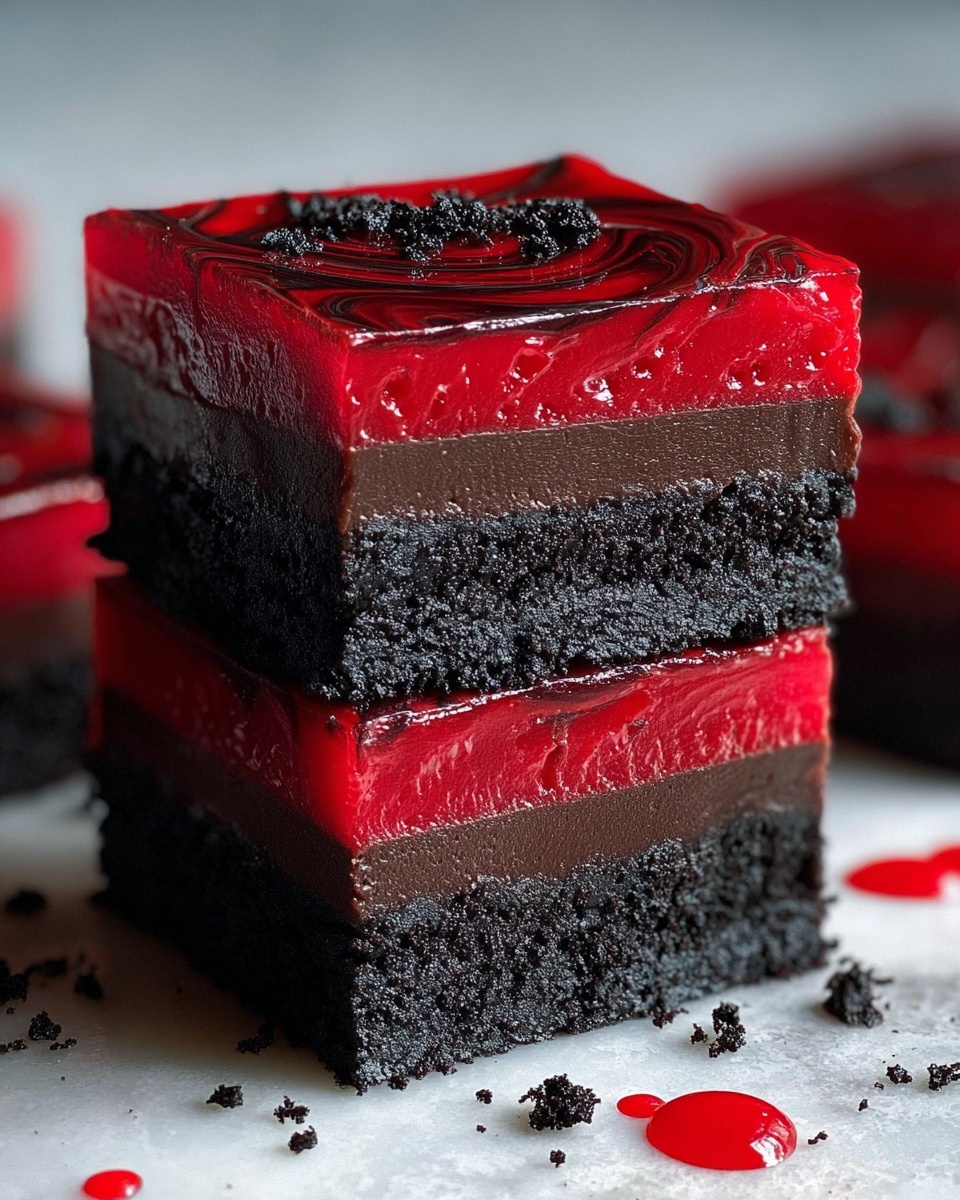
If you love desserts that thrill your taste buds and enchant your celebrations, then this Vampire Fudge: Spooky Red Velvet Peanut Butter Chocolate Treat Recipe is about to become your new obsession. Imagine rich layers of velvety chocolate mingled with creamy peanut butter, all swirled with a dramatic pop of blood-red color that’s perfect for spooky occasions or just when you want to impress. This fudge not only looks breathtaking but melts in your mouth, delivering a perfect balance of sweetness and a hint of nostalgia that makes every bite utterly irresistible.
Ingredients You’ll Need
This recipe is a beautiful example of how simple, pantry-friendly ingredients come together to create something extraordinary. Each one brings its own magic, from the smoothness of butter to the creamy peanut butter, and the depth of chocolate chips to that iconic red velvet hue.
- Unsalted butter (1 cup or 2 sticks): Provides a rich, creamy base for melting and blending all the flavors.
- Sweetened condensed milk (14-ounce can): Adds the perfect, glossy sweetness that binds everything into fudge perfection.
- Semi-sweet chocolate chips (12-ounce bag): Balances the sweetness with a subtle chocolate richness.
- Milk chocolate chips (12-ounce bag): Enhances the fudge’s smooth, creamy texture and adds milky notes.
- Creamy peanut butter (1 cup): Brings a luscious, nutty layer that complements the chocolate wonderfully.
- Vanilla extract (1 teaspoon): Boosts the overall depth of flavor for a subtle warmth.
- Powdered sugar (1/2 cup): Sweetens and thickens the peanut butter swirl to just the right consistency.
- Unsweetened cocoa powder (1/4 cup): Intensifies the chocolate flavor with a rich, slightly bitter edge.
- Red food coloring gel (a tiny amount): Adds that spooky, dramatic red velvet color without altering the taste.
- Optional garnishes: Pretzel sticks, crushed Oreos, or chopped nuts for an exciting texture contrast and visual appeal.
How to Make Vampire Fudge: Spooky Red Velvet Peanut Butter Chocolate Treat Recipe
Step 1: Prepare Your Pan Like a Pro
Start by lining an 8×8 inch baking pan with parchment paper, ensuring the paper hangs over the edges. This simple prep allows you to lift out the fudge easily once it’s set and saves you any frustrating scrapes—effortless and neat!
Step 2: Melt Butter and Sweetened Condensed Milk
Gently melt the butter in a large saucepan over medium-low heat. Once fully melted, whisk in the sweetened condensed milk until smooth and combined. This mixture will create the luscious, creamy base your fudge needs to be smooth and velvety.
Step 3: Add Chocolate Chips for That Decadence
Next, add both the semi-sweet and milk chocolate chips to the buttery mixture. Stir continuously until the chocolates melt completely and the mixture turns glossy. This step builds that rich, chocolatey foundation that makes vampire fudge so irresistible.
Step 4: Stir in Vanilla Extract
Take your vanilla extract and stir it in now. This small addition lifts the flavor, making each bite just a touch more sophisticated and aromatic.
Step 5: Make the Spooky Red Velvet Peanut Butter Swirl
In a separate bowl, combine the creamy peanut butter and powdered sugar until you get a smooth, thick paste. Add a tiny amount of red food coloring gel, mixing until the color is evenly distributed. This gor-geous red swirl makes the fudge decidedly vampire-inspired and wildly eye-catching.
Step 6: Layer Your Fudge Magic
Pour half of your melted chocolate mixture into the prepared pan and spread it evenly. Then spoon dollops of the red peanut butter mixture on top and use a knife or skewer to swirl the two together gently. Pour the remaining chocolate over this swirl, smoothing it out for an even layer.
Step 7: Add Optional Toppings and Chill
Now’s the time to sprinkle on those pretzel sticks, crushed Oreos, or chopped nuts if you’re using them. They add a fun crunch and visual contrast. Cover the pan with plastic wrap and place it in the fridge for at least 4 hours—overnight is best to let the fudge fully firm up.
Step 8: Slice and Serve Your Showstopper
Use the parchment paper overhang to lift the fudge out of the pan, then cut it into small, bite-sized squares using a sharp knife—wiping between cuts keeps those layers looking clean and sharp. Voila, your spooky treat is ready to charm everyone!
How to Serve Vampire Fudge: Spooky Red Velvet Peanut Butter Chocolate Treat Recipe
Garnishes
To truly wow your guests, consider adding edible glitter, tiny candy bats, or a dusting of powdered sugar right before serving. These garnishes keep the spooky vibe alive and add a dash of extra excitement.
Side Dishes
Pair your Vampire Fudge with a rich cup of hot chocolate or creamy coffee to complement the chocolate-peanut butter decadence. Fresh berries or a simple vanilla ice cream scoop can add a refreshing contrast that never disappoints.
Creative Ways to Present
Arrange your fudge squares in a tiered dessert stand for a Halloween party or use black or red-themed plates to enhance the dramatic red velvet look. Wrapping each piece in cellophane tied with black ribbon makes for perfect take-home favors too!
Make Ahead and Storage
Storing Leftovers
Keep leftover fudge stored tightly wrapped in the refrigerator. Using an airtight container helps maintain its moist texture and rich flavor for up to two weeks, so your spooky treat stays fresh and tasty.
Freezing
If you want to keep your Vampire Fudge for longer, freezing is an excellent option. Wrap the fudge securely in plastic wrap and aluminum foil, then place it in a freezer-safe bag or container. It should keep well for up to three months.
Reheating
When you’re ready to enjoy frozen fudge, thaw it overnight in the refrigerator. Serve chilled or bring it to room temperature for the best texture—no reheating needed since the magic is in the cool, creamy bite.
FAQs
Can I use crunchy peanut butter instead of creamy?
Absolutely! Crunchy peanut butter will add delightful texture to your fudge, making each bite a little more interesting with those nutty bits. Just be sure to mix well for an even swirl.
Is there a substitute for sweetened condensed milk?
You can use evaporated milk combined with sugar as a substitute, but the texture might be a bit less thick and creamy. Sweetened condensed milk is ideal for that perfect fudge consistency.
Can I make this fudge without red food coloring?
Yes! The fudge will still taste delicious without the red coloring, but you’ll lose that striking red velvet look. For a spooky Halloween vibe, the red is definitely worth it!
How do I get clean, even cuts when slicing fudge?
Use a sharp knife and wipe it clean between cuts to achieve smooth edges. Chilling the fudge thoroughly before slicing also helps keep the squares intact without crumbling.
What’s the best way to swirl the peanut butter and chocolate mixtures?
Spoon dollops of the peanut butter mixture randomly over the chocolate, then use a knife or toothpick to swirl gently in a figure-eight or circular motion. Don’t overmix to keep those beautiful distinct swirls.
Final Thoughts
Creating this Vampire Fudge: Spooky Red Velvet Peanut Butter Chocolate Treat Recipe has been such a rewarding adventure for me, and I can’t wait for you to experience the delight it brings to any gathering. Its gorgeous appearance and decadent flavors are not just a feast for your eyes but a warm hug for your soul. Trust me, once you try this fudge, it will be your go-to for every spooky season and any time you want to impress with a homemade treat!
Print
Vampire Fudge: Spooky Red Velvet Peanut Butter Chocolate Treat Recipe
- Prep Time: 20 minutes
- Cook Time: 15 minutes
- Total Time: 4 hours 35 minutes
- Yield: 16 servings
- Category: Dessert
- Method: Stovetop
- Cuisine: American
Description
Vampire Fudge is a rich, decadent chocolate and peanut butter treat perfect for spooky occasions. This layered fudge combines semi-sweet and milk chocolate with creamy peanut butter swirled with a hint of red food coloring for a dramatic, eerie effect. Easy to make and perfect for parties, this no-bake dessert is stored in the fridge until firm and cut into bite-sized squares.
Ingredients
Main Ingredients
- 1 cup (2 sticks) unsalted butter
- 1 (14 ounce) can sweetened condensed milk
- 1 (12 ounce) bag semi-sweet chocolate chips
- 1 (12 ounce) bag milk chocolate chips
- 1 cup creamy peanut butter
- 1 teaspoon vanilla extract
- 1/2 cup powdered sugar
- 1/4 cup unsweetened cocoa powder
- Red food coloring gel (a tiny amount, for dramatic effect)
Optional Garnishes
- Pretzel sticks
- Crushed Oreos
- Chopped nuts
Instructions
- Prepare the Pan: Line an 8×8 inch baking pan with parchment paper, ensuring the paper extends over the edges for easy removal later.
- Melt Butter: In a large saucepan over medium-low heat, melt the butter completely, stirring occasionally to prevent burning.
- Add Condensed Milk: Gradually whisk in the sweetened condensed milk until the mixture is smooth and well combined.
- Incorporate Chocolate Chips: Add both the semi-sweet and milk chocolate chips to the saucepan, stirring constantly until all chips have melted and the mixture is glossy.
- Add Vanilla Extract: Stir in the vanilla extract to enhance the flavor of the fudge base.
- Prepare Peanut Butter Mixture: In a separate bowl, combine the creamy peanut butter and powdered sugar, mixing until smooth and creamy.
- Add Red Food Coloring: Add a tiny amount of red food coloring gel to the peanut butter mixture and stir until the color is even and vibrant.
- Layer Base Chocolate: Pour half of the melted chocolate mixture into the prepared pan, spreading it evenly to create the first layer.
- Add Peanut Butter Swirls: Spoon dollops of the red peanut butter mixture over the chocolate layer, then gently swirl with a spatula or knife to create a marbled effect.
- Top with Remaining Chocolate: Pour the remaining chocolate mixture over the peanut butter swirls and spread evenly to cover.
- Add Garnishes: Sprinkle optional toppings such as pretzel sticks, crushed Oreos, or chopped nuts over the top for extra texture and flavor.
- Chill the Fudge: Cover the pan tightly with plastic wrap and refrigerate for at least 4 hours, preferably overnight, to allow the fudge to set properly.
- Remove from Pan: Use the parchment paper overhang to lift the fudge out of the pan once it has fully set.
- Cut into Squares: Using a sharp knife, cut the fudge into small squares, wiping the knife clean between cuts to maintain clean edges.
- Serve: Arrange the fudge squares on a serving platter and serve chilled for the best texture and flavor.
Notes
- Make sure to melt the butter and chocolate slowly over medium-low heat to avoid burning the mixture.
- You can adjust the red food coloring to achieve a more subtle or dramatic swirl effect.
- For a nut-free version, omit the peanut butter and use a nut-free spread.
- Store leftovers in an airtight container in the refrigerator for up to one week.
- Using parchment paper helps to lift out the fudge easily without sticking.


